Waivers can be generated on a large scale without having to access individual vendor records. You can create multiple waiver records by job using Generate Waivers. This feature allows you to select numerous vendors by job, create various waiver records, send and print from a single grid. The mass lien generator will only generate one type of lien.
1.From the ribbon toolbar, click Greenlight.
2.Click Greenlight,  .
.
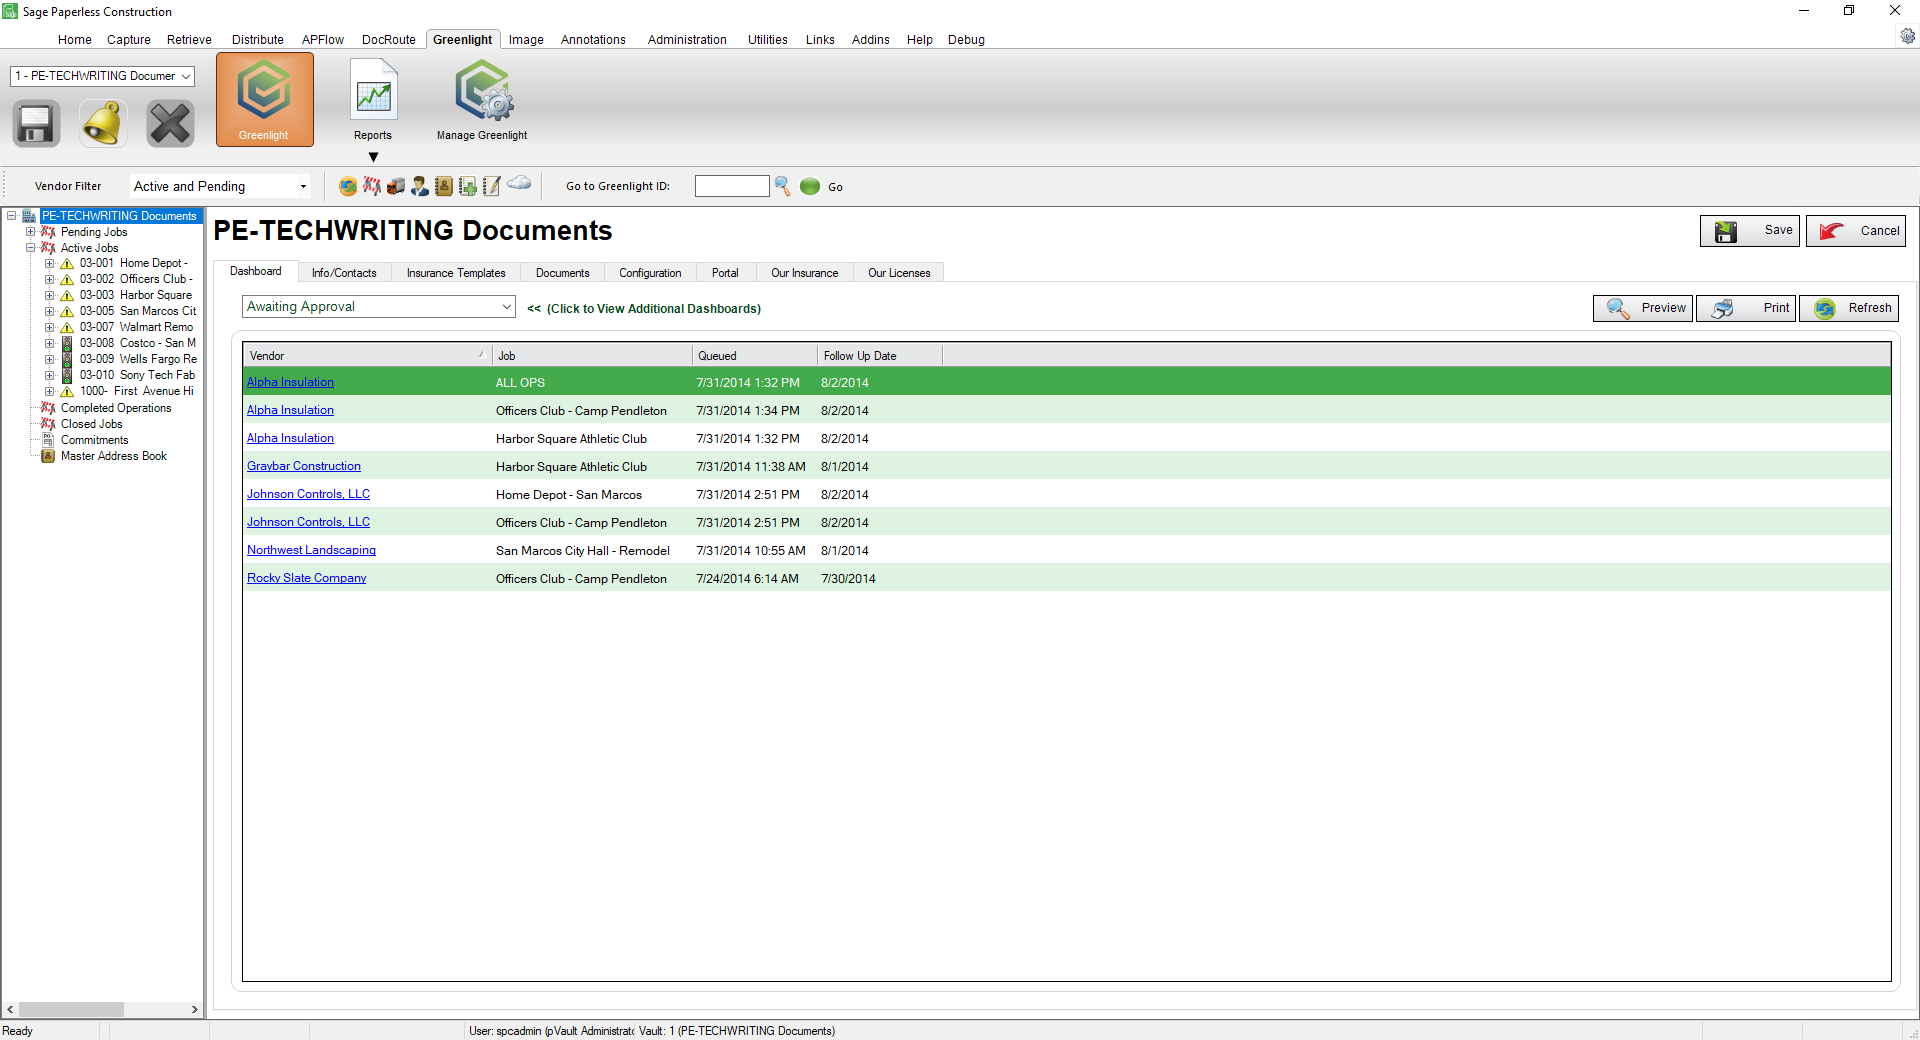
The main screen displays with the Dashboard tab active:
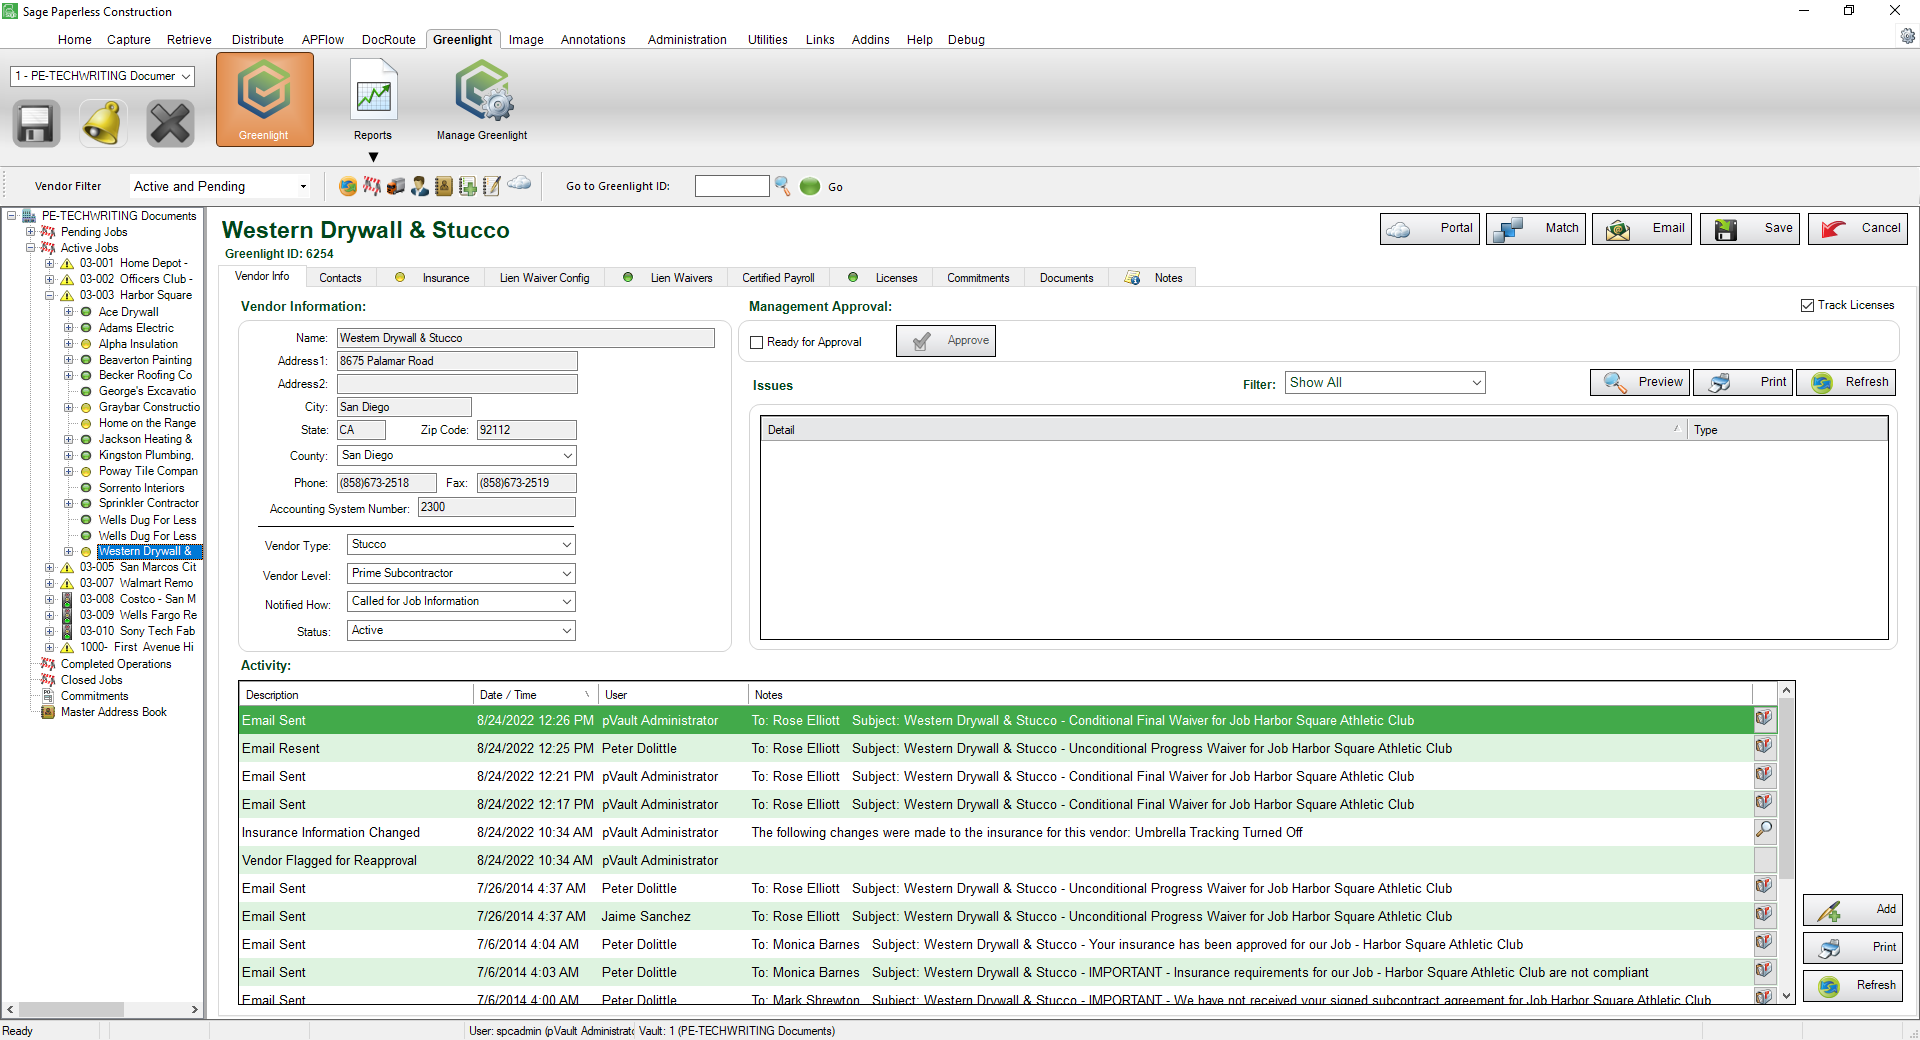
3.From the left navigation bar, click the vendor.
The following screen displays with the Vendor Info tab active:
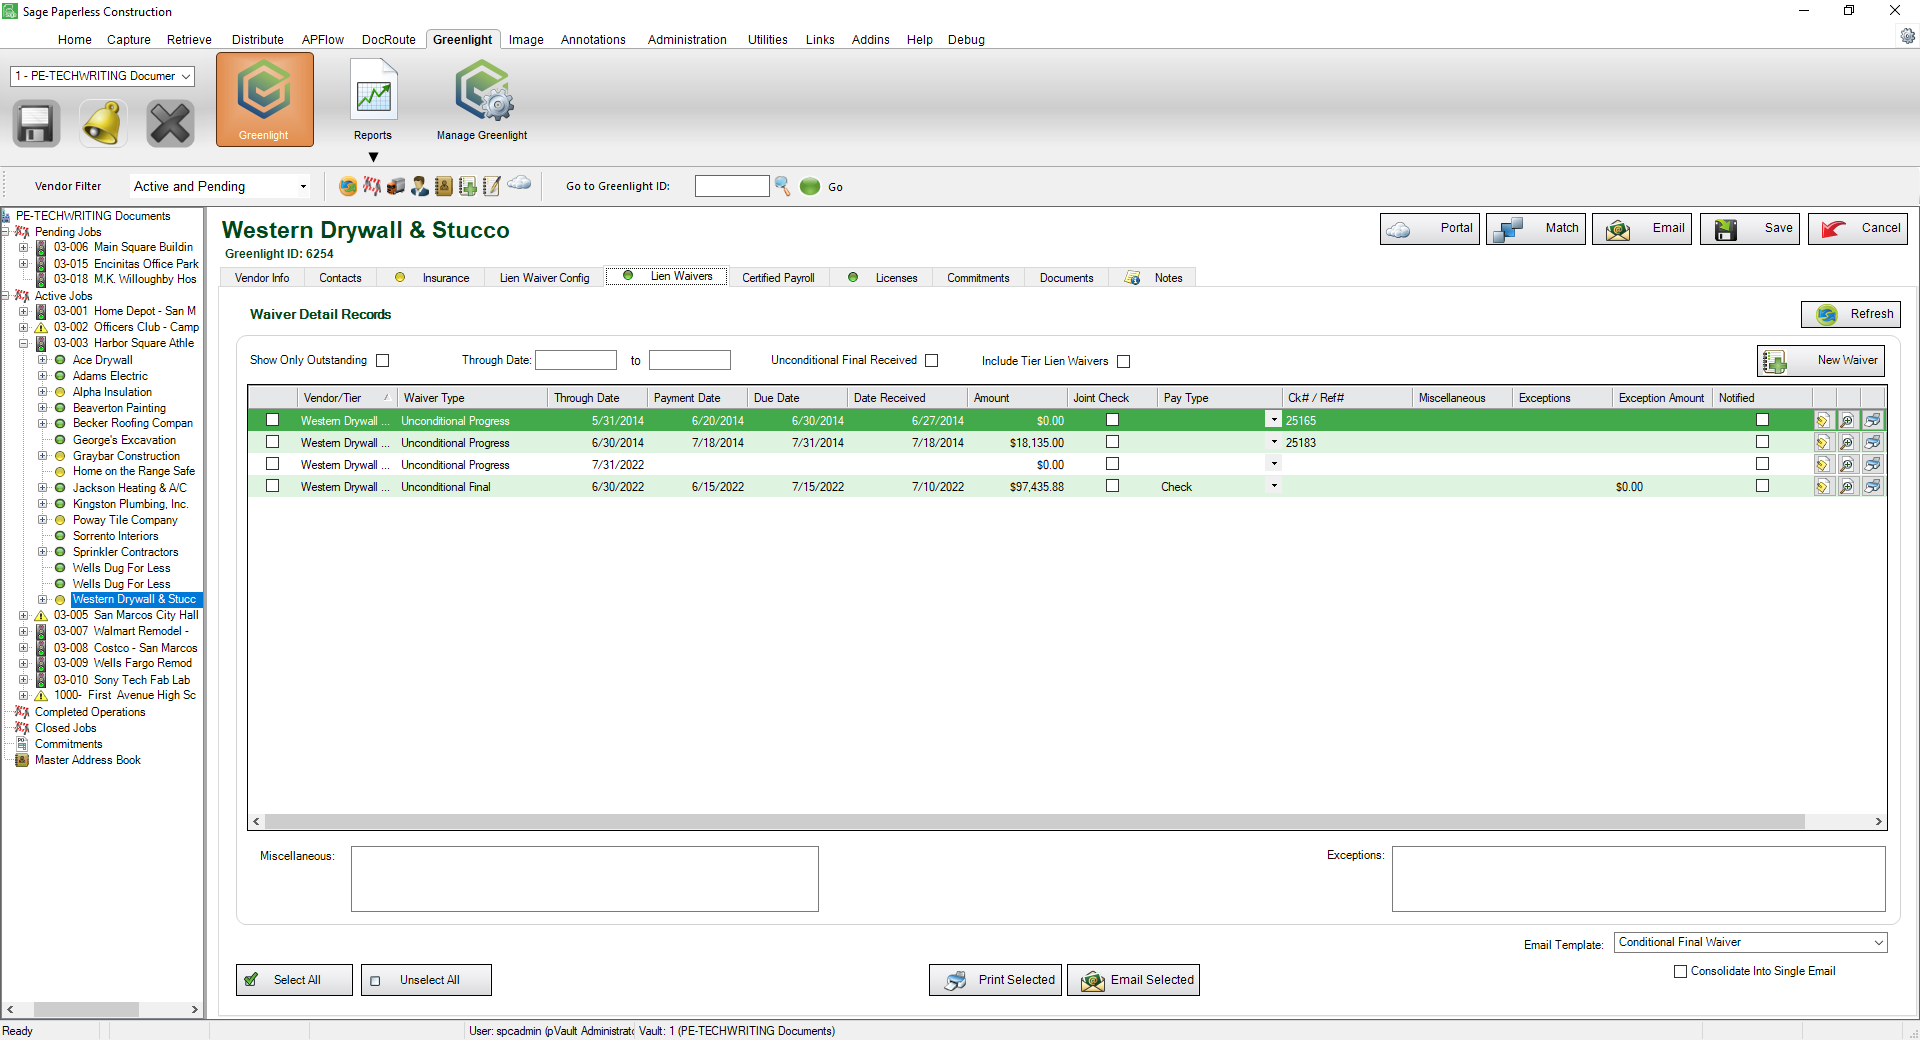
4.Click the Lien Waivers tab.
The following screen displays:
5.In the toolbar, click Add Waivers,  .
.
The following Generate Waivers window displays:
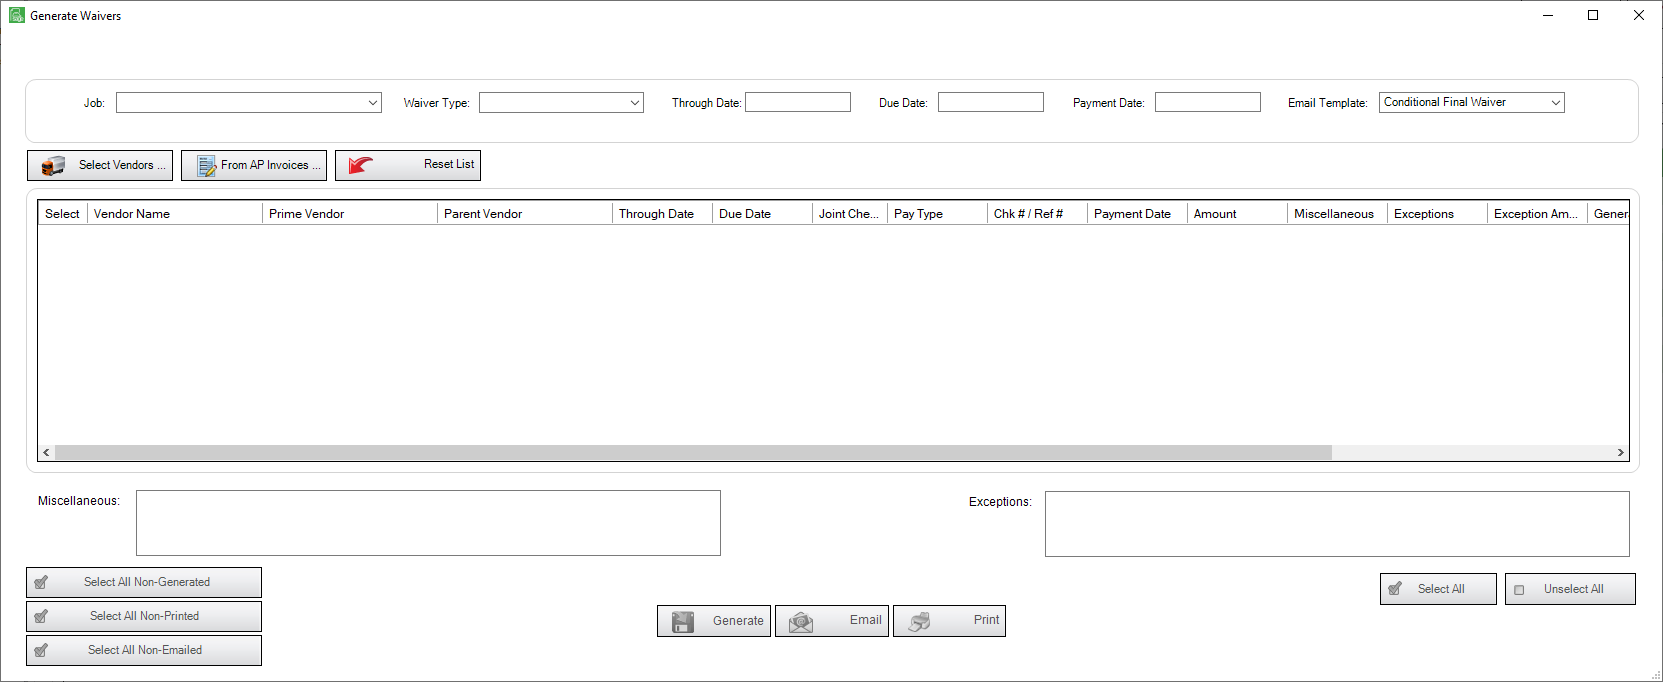
6.Use the Job field dropdown to select a job.
7.Use the Waiver Type field dropdown to select a waiver type.
8.The Through Date field should automatically populate according to how the Through Date was set on the Job level, Lien Waiver Config tab. If the field remains blank, enter a date through which the waiver is valid.
9.In the Due Date field, enter the date you want to receive the signed waiver back from the vendor.
If the current date exceeds the due date, Greenlight CM™ will flag the vendor as non-compliant and a warning will be added to the Out of Compliance dashboard and to the Outstanding Lien Waiver Reports.
10.Click Select Vendors,  , to access the Vendor Selection Screen.
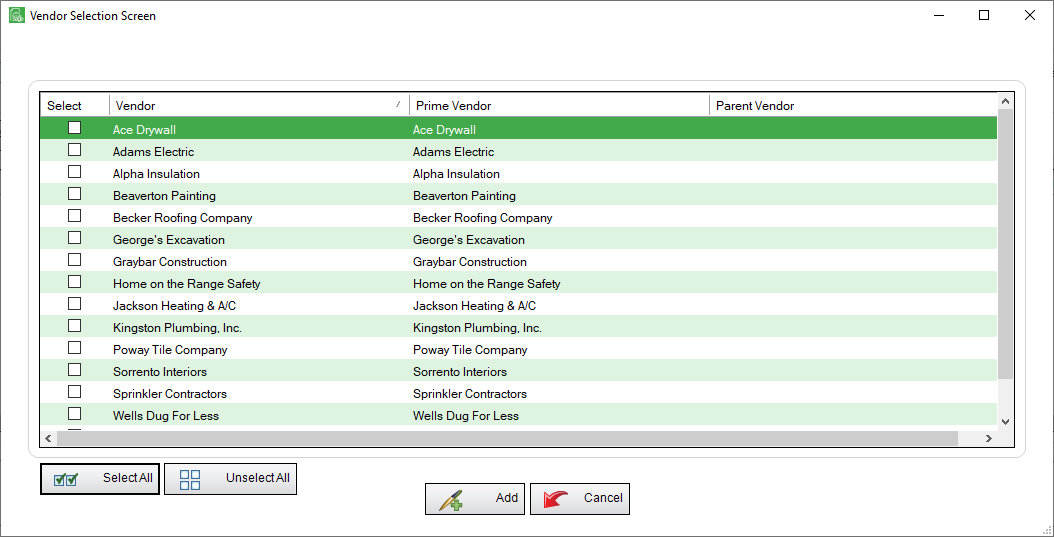
11.Scroll through the list to locate the appropriate vendor.
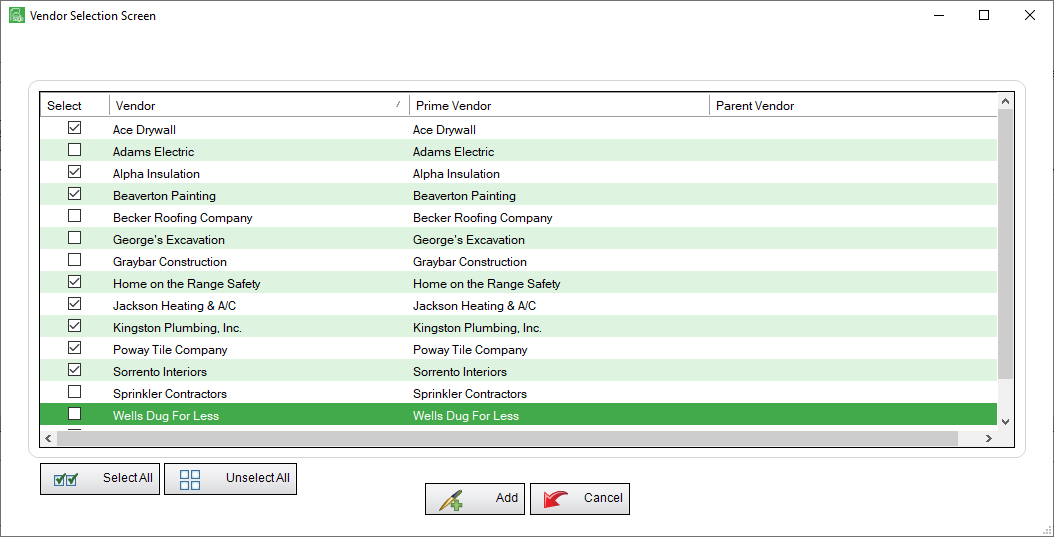
Note: You can click Select All,  , to include all vendors.
12.Click the checkbox in the Select column.
Note: If you select a prime vendor, for example Western Drywall & Stucco, all vendors associated the prime vendor will systematically be checked. In this example, J&B Materials and USG Building Materials.
13.Click Add,  , when finished.
The completed Generate Waivers screen similar to the following displays:
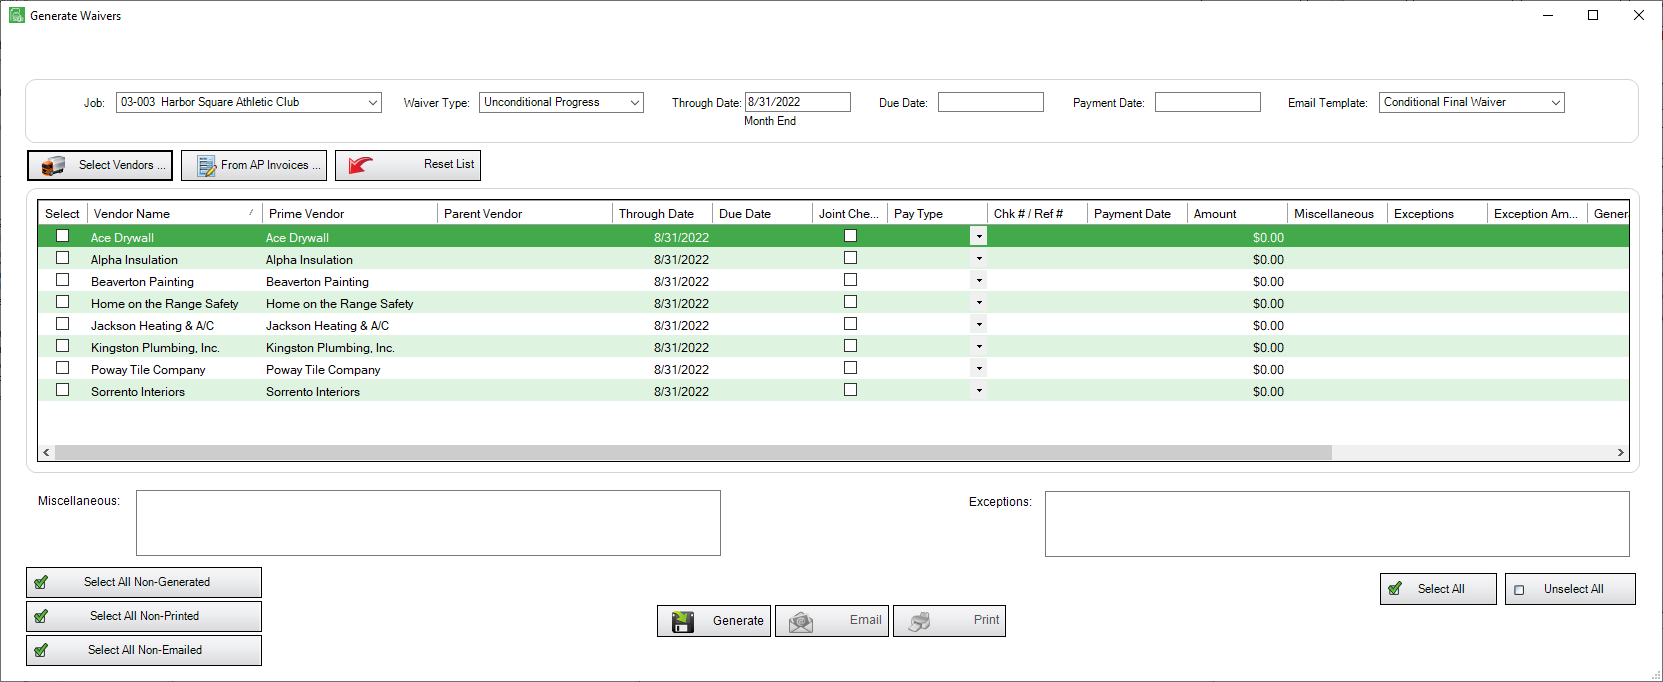
14.In the Amount field, enter the lien amount.
15.If appropriate, enter a date in the Payment Date field.
16.The remaining fields are editable (every column field to the right of the Parent Vendor column).
17.After editing fields, as necessary, click Select All Non-Generated,  .
.
18.Click Generate,  .
.
The following dialog box should display:
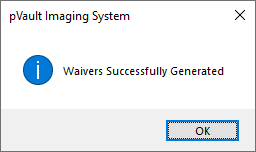
19.Click OK.
Once the waivers are generated, users can do a mass email from the Generate Waivers screen.