If your employees want to view their payroll-related items, such as their payroll check stubs online, you could map each employee to their Employee ID. This same process holds true for vendors (Vendor ID0 who have subcontractors needing to view their relevant documents as well as job customers (Customer ID) needing to see their relevant documents. Having the mapping in place limits what employees, vendors/subcontractors and customers can see.
User Mappings works hand-in-hand with Vault Security Groups.
Vault Security Groups Setup
1.From the ribbon toolbar, click Administration.
2.Click Vaults,  .
.
3.In the Vaults window, click to highlight the appropriate vault.
4.Click Edit Vault.
5.From the Vault Properties screen, click the Web Security Groups tab.
6.If the group you need does not exist, click Add Group and follow the Create Web Security Group wizard to create it.
If the group you needs already exists, click to highlight it.
7.Click Edit Group.
8.In the Web Security Group Properties window, click the Document Types tab.
9.In the Available grid, scroll to locate the PR Direct Deposit Advice entry.
10. Click to highlight the entry and click the arrow to move it to the Assigned grid.
11. While the entry is still highlighted, click Filters,  .
.
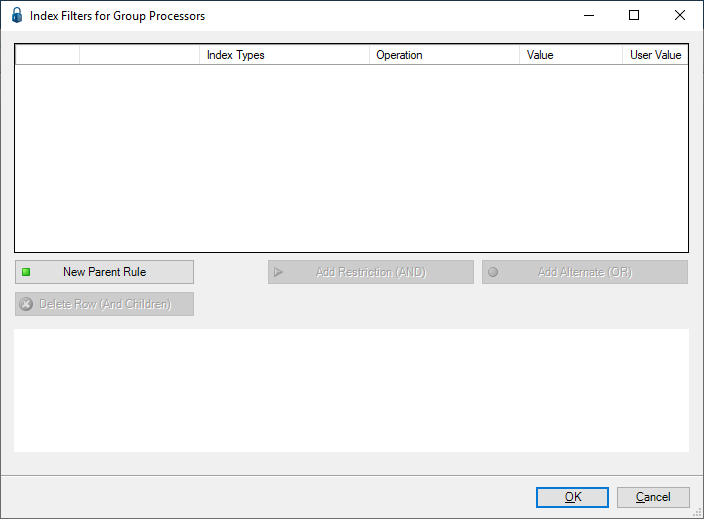
The Index Filters for Group (name) window similar to the following displays:

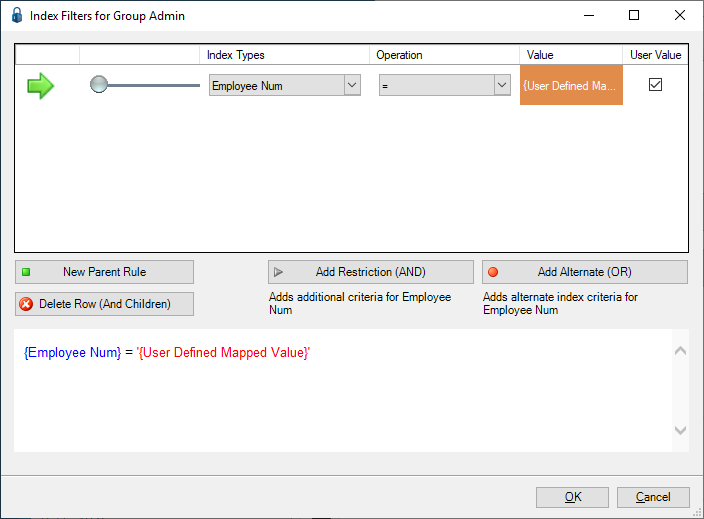
12. In the Index Types column entry dropdown, select Employee Num.
13. In the Operation column entry dropdown, select =.
14. Click the User Value check box. This will populate the Value column entry with (User Defined Mapped Value).
The Index Filters for Group (name) window will resemble the following:

15. Click OK to save changes and close the Index Filters for Group window.
16. Click OK to save changes and close the Web Security Group Properties window.
17. Click OK to save changes and close the Vault Properties window.
Web Users Setup
1.From the ribbon toolbar, click Web Users from the Users icon dropdown,  .
.
2.In the Web User Accounts window, click to select the user for which you are setting up user mapping.
3.Click Edit User.
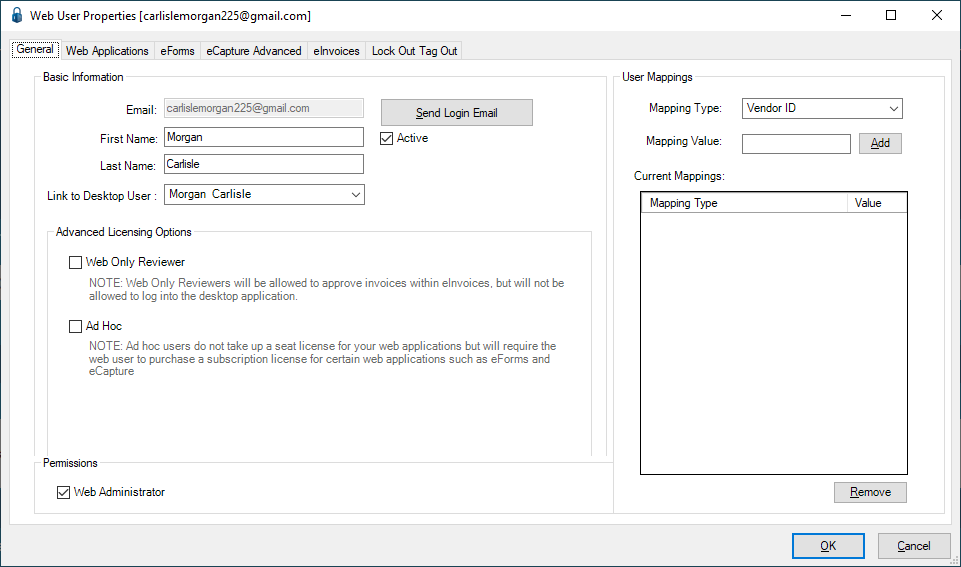
The Web User Properties window displays with the General tab active similar to the following:

4.In the User Mappings pane, in the Mapping Type field dropdown, select Employee ID.
5.With your cursor in the Mapping Value field, click F4.
An Employee List dialog box displays.
Important: This is a list of employees pulled directly from your payroll system, not pVault®.
6.Scroll through the list to locate the appropriate employee.
7.Click to highlight the employee's name.
8.Click OK.
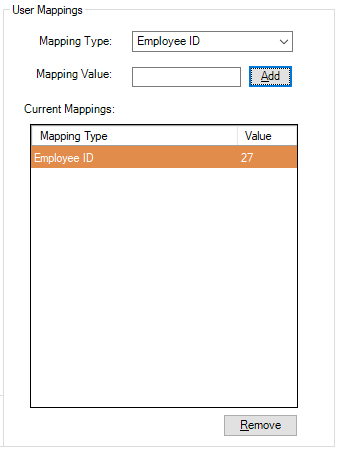
Notice that the associated employee number populates the Mapping Value field.
9.Click Add.
The User Mappings pane should resemble the following:

10. Click OK to save and close the Web User Properties window.
11. Click Close to close the Web User Accounts window.