How to get to the Add Field
1.From the ribbon toolbar, click APFlow™. 2.Click Manage APFlow™, 3.Click Manage Entry Fields. |

Add Field,  .
.
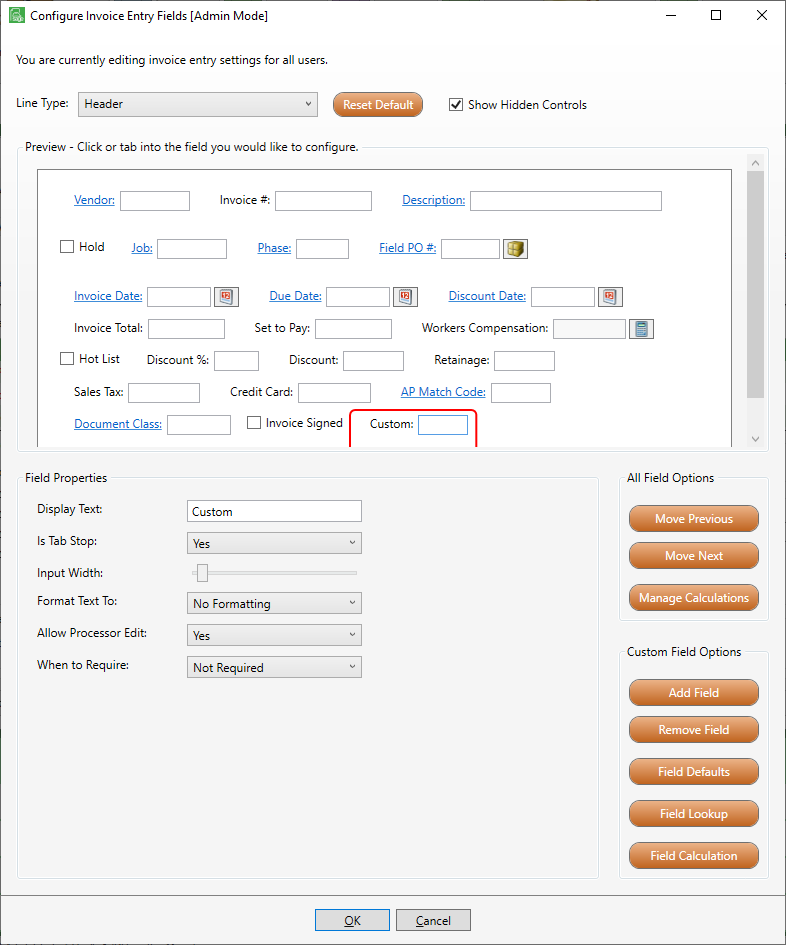
1.Before clicking Add Field, make sure that you select the correct Line Type from the dropdown (Header, Job, Expense, Detail, etc.).
Note: Custom fields may be added as columns displaying in the middle pane of the Invoice Entry screen. You must select Detail in the Line Type dropdown.
2.Click Add Field, ..
The Add Custom Field dialog box displays:
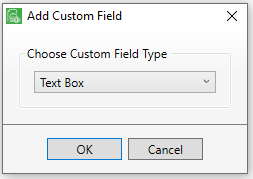
3.From the dropdown list, select either Text Box or Check Box.
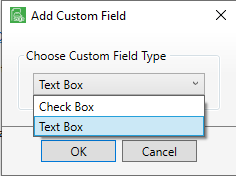
4.Click OK.
The new custom field similar to the following displays:
5.Complete the Field Properties grid fields, beginning with the Display Text field. This is where you will give your new custom field a name.
Important: For a description (Description Field) to display for a custom field, a field lookup must be configured using the Field Lookup option listed in the Custom Field Options. Click here for details.
With the creation of the custom field, the Field Defaults button,  , displays.
6.Click Field Defaults, as appropriate. For more information on Field Defaults, click here.
7.Click Configure Lookup,  . For details on completing the Configure Lookup window, click here.
8.Click OK to ultimately save the custom field and close the Configure Invoice Entry Fields [Admin Mode] window.
Important: If you do not click OK before clicking Field Calculation, the following warning prompt displays:
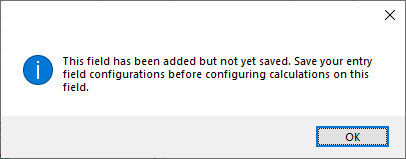
If you do not click Field Calculation, this prompt will not display.
Once the custom fields are added, access the Invoice Entry screen.
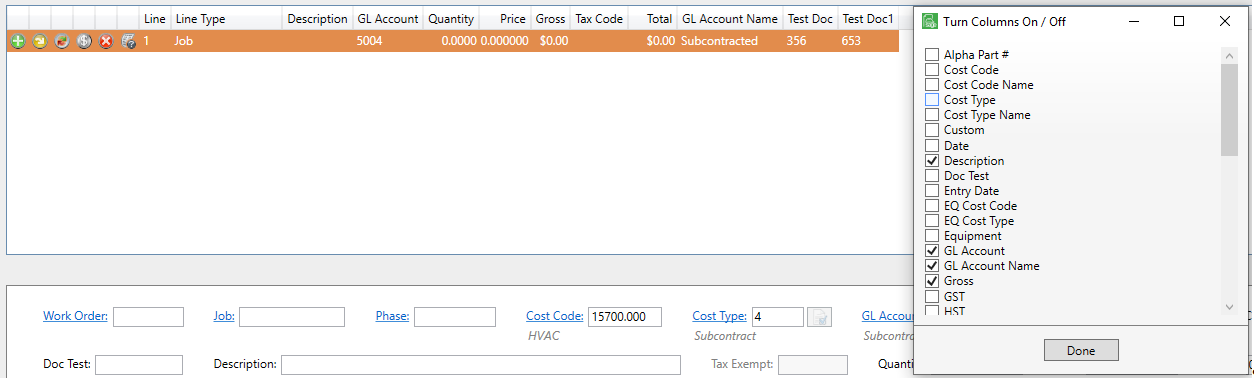
In the middle pane, right click to access the Turn Columns On / Off dialog box similar to the following: