Important: There are two levels of Invoice Entry setting modifications based upon Administrator or Processor access.
The Processor settings build on the Administrator settings; however, not all Administrator settings are visible to Processors.
While Administrator settings are company-wide, Processor settings are limited to the individual who sets them up. Processor settings will override Administrator settings and are generally limited to the appearance of the form.
When configuring the Invoice Entry Fields, whether in Admin or User mode, Invoice Entry form changes are being made for the current vault only.
Note: To read about the User level Invoice Entry settings, click here.
Administrator Access
1.From the ribbon toolbar, click APFlow™.
2.Click Manage APFlow™,  .
.
The Manage AP Flow screen similar to the following displays with the General tab active:
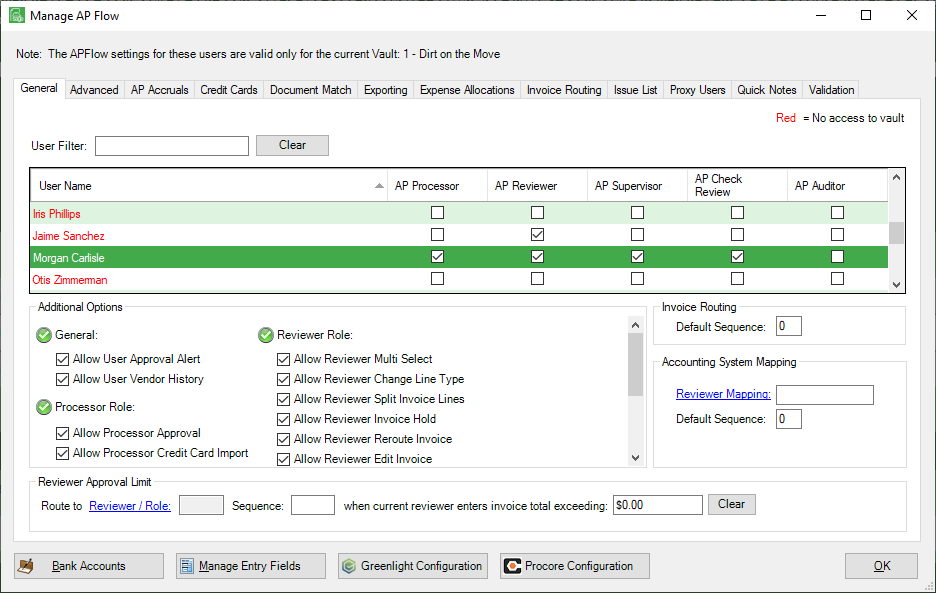
3.Click Manage Entry Fields.
The Configure Invoice Entry Fields [Admin Mode] window displays:
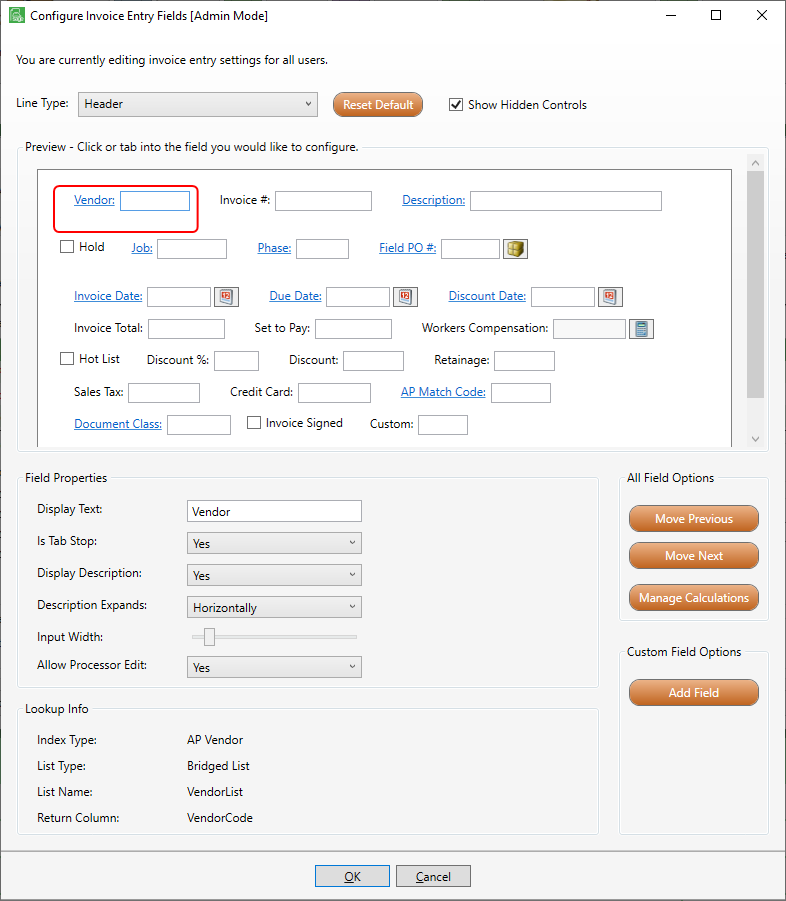
4.In the Field Type field, use the dropdown to select the section of the invoice to configure.
Notes: The Field Type dropdown will consist of Header, Line Types (based on the accounting system) and Detail sections.
The Line Types and Detail sections are only applicable to accounting systems that are not header only.
Each labeled field is configurable.
Reset Default |
The Reset Default field returns all fields to their original default properties only for the Field Type that is displaying. Warning: If a custom field for the current Field Type was used in invoice routing rules, and Reset Default was clicked, the Administrator must remove the custom field from the routing rules first and then return to the Configure Invoice Entry Fields screen to remove that custom field. As a precaution, if Reset Default is clicked and a custom field was used in invoice routing rules, a dialog box will display advising that the custom field was used in invoice routing rules and that the custom field must be removed from invoice routing rules before being removed. |
5.Click on a field.
Note: A red border will display around the field to identify it as the selected field.
6.While on a field in the top pane, refer to the Field Properties grid to see how the field can be modified.
Note: If a function is not available for a highlighted field, the particular function will not display.
Field |
Function |
Display Text |
This is the field label displaying to the left of each field. This is where the field name can be changed. |
Is Tab Stop |
This is where to determine if the cursor should stop at this field when tabbing through the Invoice Entry screen fields. |
Display Description |
This is where to decide if the field description should display. If it is visible, the italicized text displays below the field. |
Description Field |
For this field to display for a custom field, a field lookup must be configured using the Field Lookup option listed in the Custom Field Options list. |
Description Expands |
Administrators can make mandatory changes to the appearance of field descriptions. This is the text that displays below an Invoice Entry field. |
Hide |
This is where to decide if the field should not be visible on the Invoice Entry screen. |
Input Width |
This field determines the length or size of the field. |
Format Text To |
No Formatting is the default. |
Allow Processor Edit |
This is where to decide if Processors should have either write or read-only access. |
Allow Reviewer Edit |
This is where to decide if Reviewers should have either write or read-only access. Important: A field may be set to allow modification; however, there may be instances when logic within the form will not allow for modification. |
Invoice Index Type |
This field is a drop-down menu to map the selected field with an index type contained on the AP Invoice or AP Invoice Confidential document types. It reflects the index type of the highlighted field. |
When to Require |
Beginning with the Description field, the Administrator can determine which fields are not required, which fields are required and if required, when. Note: Vendor and Invoice # fields are not configurable. These fields are programmatically pre-defined as required. |
Allow Calculation Override |
This is where to decide if custom fields with calculations are allowed to be overridden. |
All Field Options
Field |
Function |
Move Previous |
Every field can be moved to change its position to facilitate order entry. |
Move Next |
Every field can be moved to change its position to facilitate order entry. |
Manage Calculations |
Go here to manage existing field calculations. You can also create new field calculations here. |
Custom Field Options
Field |
Function |
Add Field |
Click Add Field to generate a new field to the Invoice Entry screen. |
Remove Field |
The Remove Field option only displays when a custom field is added and currently selected. |
Field Defaults |
Custom field defaulting allows values to be pre-populated within custom fields using the data in Bridge Lists or Query Lists. |
Field Lookup |
The Lookup Info grid allows you to see at a glance the Index Type, List Type, List Name and Return Column of a selected Invoice Entry field without having to look elsewhere within Sage Paperless Construction. This includes custom fields. |
Field Calculations |
Click here for details. |