Field backfills allows values to be pre-populated within standard and custom fields using the data in Bridge Lists, Query Lists or "Paperless" Lists.
Bridge Lists are predefined lists of data that are tied to accounting data.
Query Lists are lists configured within Sage Paperless Construction that can be tied to any data source such as a custom database or tables within the accounting system that are not predefined within Sage Paperless Construction.
"Paperless" Lists are user-created lists.
Notes: |
If setting up backfilling on a header field, only header fields will be available to map to. This is because the backfilling must be able to run--even when no lines are present. |
If setting up backfilling on a line field, both header and line fields will be available to map to. This is because the header information will always be present when line information is present. |
|
For Reviewers, line backfilling will still occur using the header values even though those values are not visible to Reviewers. |
|
Any number of backfilling rules can be configured; however, be aware that too many rules, or rules tied to data that takes a long time to pull can slow Invoice Entry function down. |
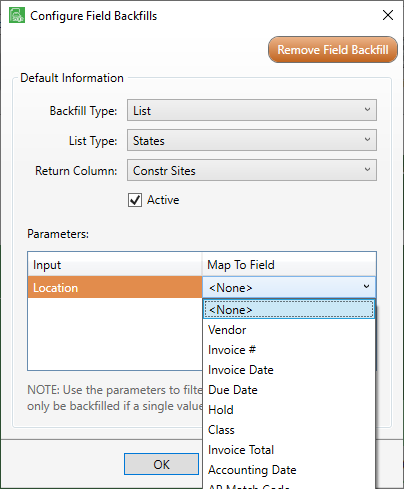
The dialog box similar to the following displays:
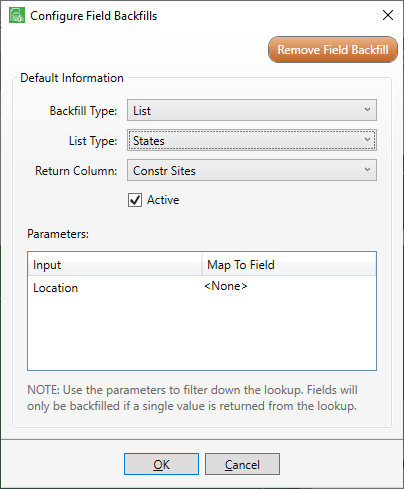
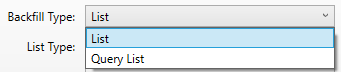
1.In the Backfill Type field, there is the option to retrieve data using a Bridge List or a Query List.
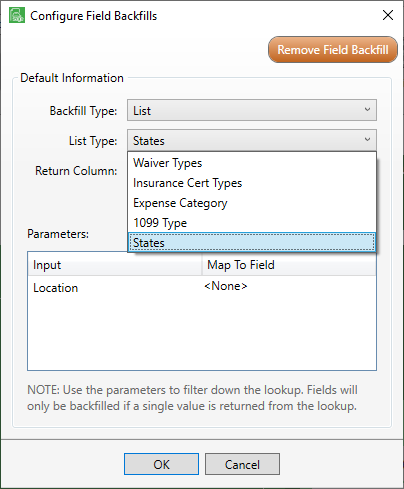
2.If Bridge List was selected as the Default Type, the List Type field dropdown selections are based on the bridged accounting system.
If Query List is selected as the Default Type, a SQL query needs to be set up before it would be available in the List Type dropdown. If no queries were set up, the List Type field dropdown will be blank.
Use the dropdown to identify the table from which the data will be retrieved.
3.In the Return Column, use the dropdown to select the data that will be backfilled in the field on the Invoice Entry screen.
The items in the dropdown are based on the selected list. This is the column value that is entered into the field being configured when the backfilling is run.
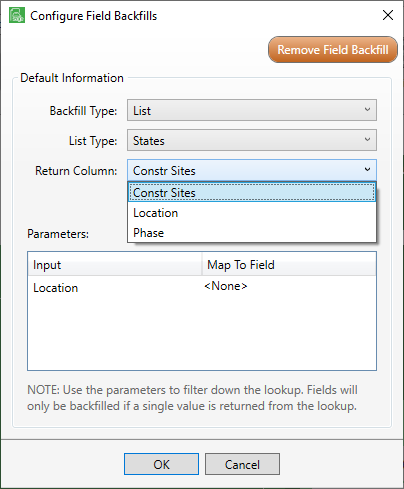
For example: Constr Sites was selected from the Return Column dropdown. This means that the mailing address for any selected vendor will systematically backfill in the field once the parameters are set.
Note: The Return Column field dropdown varies based on the List Type selected.
4.In the Parameters grid, an input parameter must be mapped so Sage Paperless Construction can return the correct information in the field.
Note: This may require the mapping of multiple parameters.
Each list (Bridge or Query), usually takes a set of parameters. Depending on the chosen list, these parameters may or may not be optional.
For instance, additional data needs to be pulled from the job list that Sage Paperless Construction does not typically pull.
This data may need to populate standard and custom fields set up by the user.
Because this is job data, it should pull from the job list. If pulling from the job list, the specific job must be identified; the Job Number parameter must be mapped to the Job Number field in Invoice Entry.
Important: When the backfilling code runs, it will only backfill values if it can filter the list into a single data row. The user must configure the parameters to ensure this outcome.
For instance, if the job list filters the parameters and ends up identifying two or more jobs, no values will backfill. This is because the system does not know which set of job data to use.
When Field Backfills are configured and active, the Field Backfills button includes an indicator: 
5.Click OK to close the Configure Field Backfills dialog box.
6.Click Field Lookup, if appropriate. Click here for details.
7.Click OK to close the Configure Invoice Entry Fields [Admin Mode] window.
8.Click OK to close the Manage AP Flow window.