The Sources tab contains the path of the email.
Important
•Email jobs are locked down so an individual cannot access another person's email account or make changes to the Email Import job.
•Jobs set up under one account and then logged into with a different account will generate a message indicating that the job cannot be viewed or edited. Only if no options were assigned to the job will editing be permitted.
•Only email accounts you have configured under your account are visible to you.
•Only options in the Sources, Error Options and Archiving Options tabs assigned to your email accounts are visible to you.
•Only email options are available under the Email Job Type. No other Job Types should be able to view any of the Email Options.
•Only one email account per user per Job. For example, Source, Error and Archiving all must point to the same email account.
1.Click the Sources tab.
A window similar to the following displays:
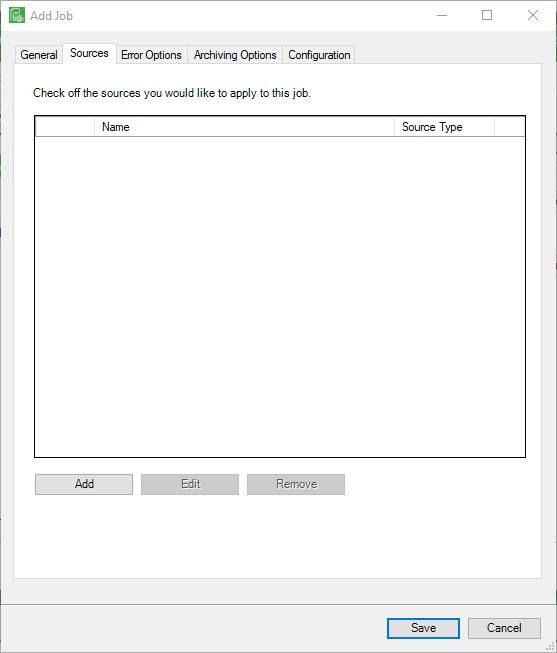
2.Click Add.
The Source Properties dialog box displays:
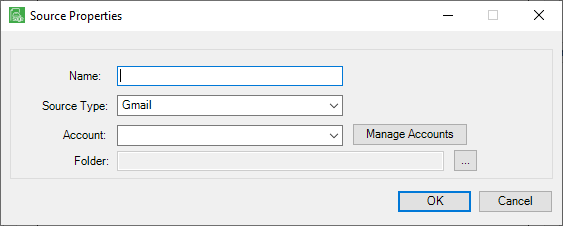
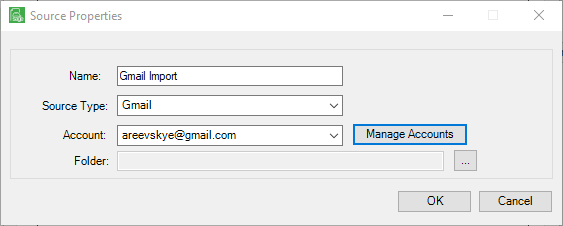
3.In the Name field, enter a meaningful name for the Gmail source. For example: Gmail Import
4.In the Source Type field, use the dropdown and click to select Gmail.

5.In the Account field, use the dropdown to select a listed entry or click Manage Accounts.
Note: This field may system populate.
6.If Manage Accounts is clicked, the Manage Accounts dialog box similar to the following displays:
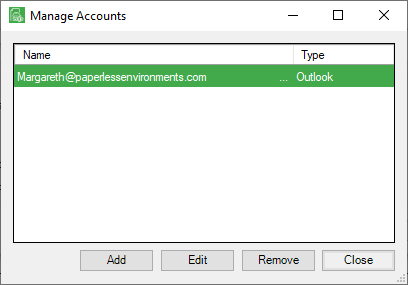
7.Click Add.
The Add Account dialog box similar to the following displays with the Name field unpopulated and Connection Not Established displaying:
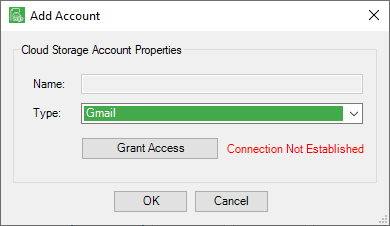
8.In the Type field, use the dropdown to select Gmail if it is not visible in the Type field.
9.Click Grant Access.
A series of Google windows may display starting with the following:
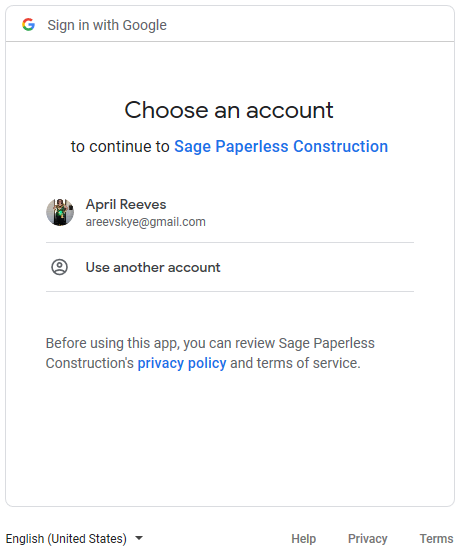
10.Click the Gmail account that displays or click Use another account and follow the prompts.
The following Google warning may display:
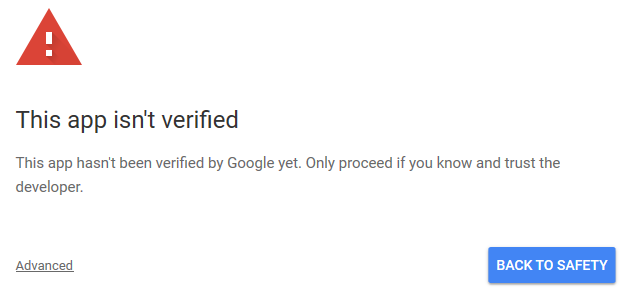
11.Click Advanced.
The Google warning redisplays with additional text and a link (Go to Sage Paperless Construction (unsafe)) similar to the following:
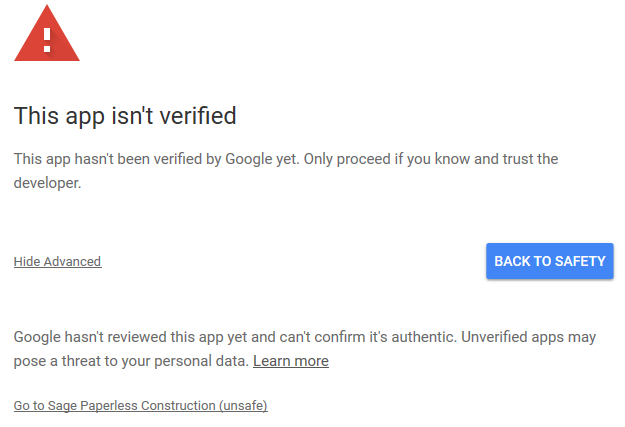
12.Click the Go to Sage Paperless Construction (unsafe) link.
The following message box displays:
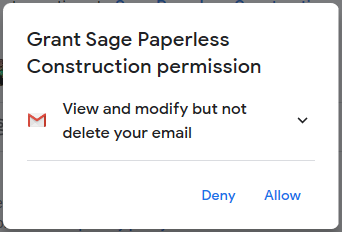
13.Click Allow.
The following confirmation window displays:
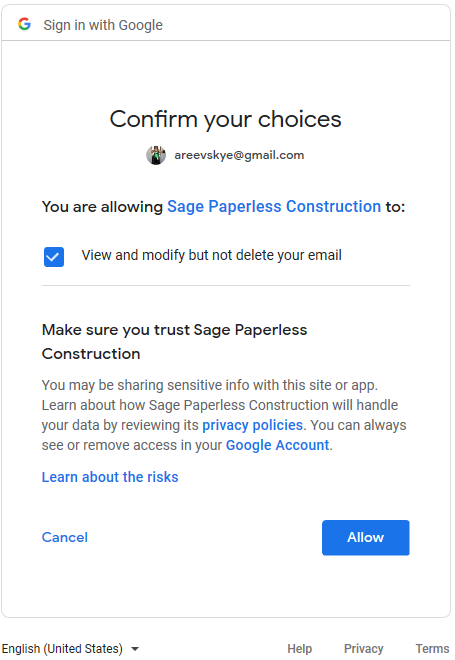
14.Click Allow.
The Add Account dialog box redisplays similar to the following with the Name field populated with the account name and Connection Successful displaying:
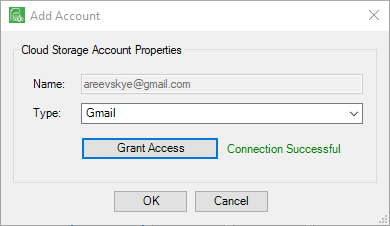
15.Click OK.
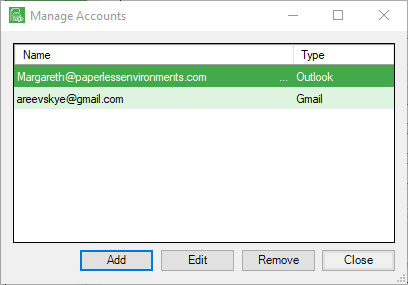
This closes the Add Account dialog box and the Manage Accounts dialog box redisplays with the newly created account displaying in the grid similar to the following:
The following prompt may display:
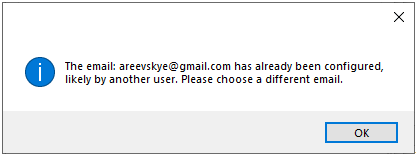
This prompt indicates that the Gmail account you are attempting to set up was previously set up by someone else. An account can only be accessed and edited by the user who sets it up.
16.Click OK to close the prompt, if applicable or click Close to close the Manage Account dialog box.
If you need to set up a different Gmail account, return to step 9.
If the prompt did not display, continue with step 17.
The Source Properties dialog box redisplays with the Account field system populated similar to the following:
17.Click the Folder field ellipsis,  .
.
A Folders dialog box similar to the following displays:
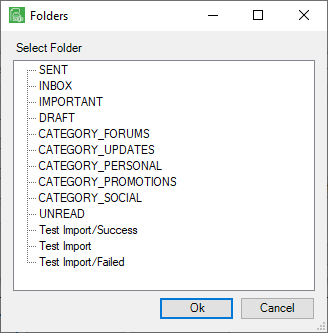
18.Click to highlight the folder.
19.Click OK.
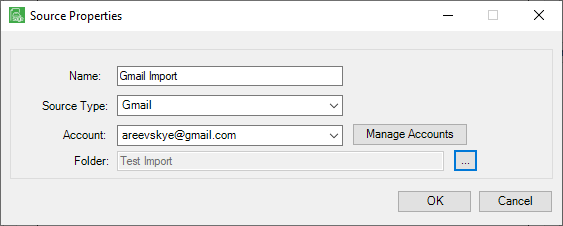
The Source Properties dialog box with the Folder field populated redisplays similar to the following:
20.Click OK.
The Sources tab redisplays with the new Job added to the grid similar to the following:
The following prompt may display:
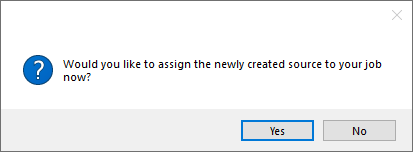
Click Yes to systematically add a check mark in the newly created Source tab of the Add Job dialog box.
Click No and no check mark will be systematically added.
21.Click the Error Options tab.