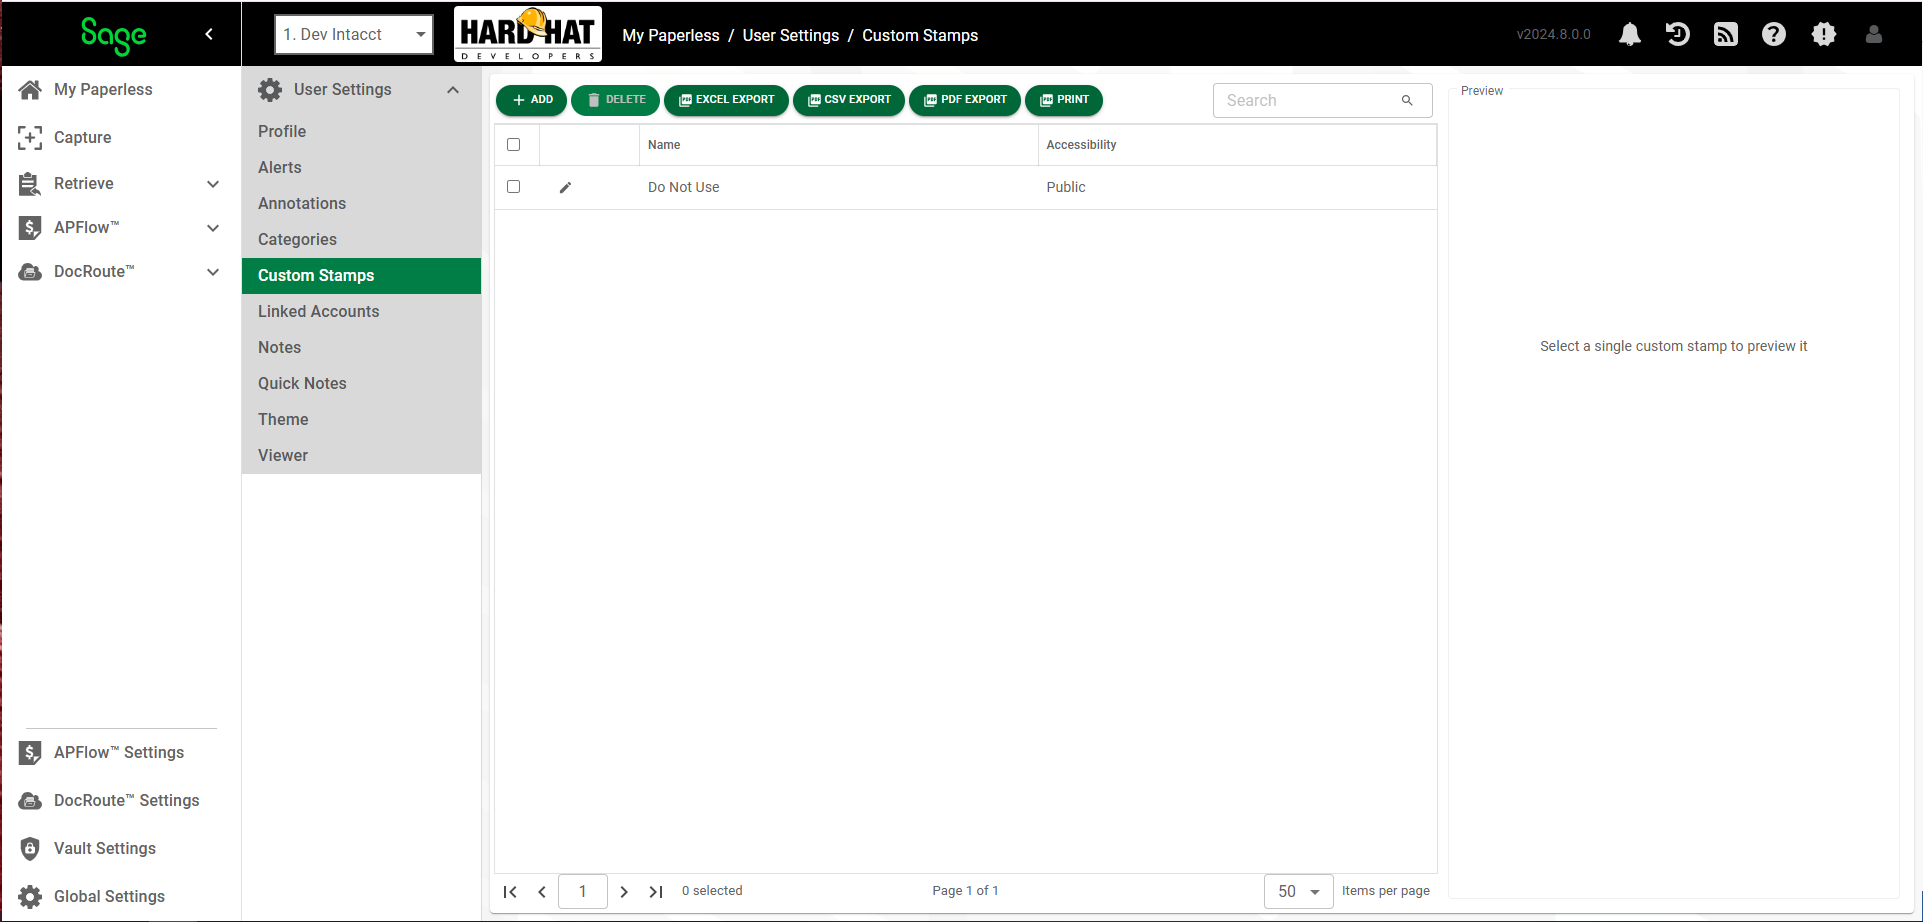
The Custom Stamps page is where Administrators can create system-wide "public" stamps and individual users can create their own "private" custom stamps.
1.Click the My Account ![]()
 icon in the header.
2.Select Profile. This brings up the User Settings page.

3.Click Custom Stamps.
Create a New Custom Stamp
Custom stamps can be created using an existing image files or by entering text to use as a stamp.
Note: By clicking Make Public, you can mark a custom stamp Public, making it available to all users.
Custom Stamps from Image Files
Custom stamps can be created from existing image files saved in the following supported formats:
• .bmp
• .gif
• .jpg
• .png
• .tiff
1.On the Custom Stamps page, click ADD.
The following Custom Stamp Properties page displays:
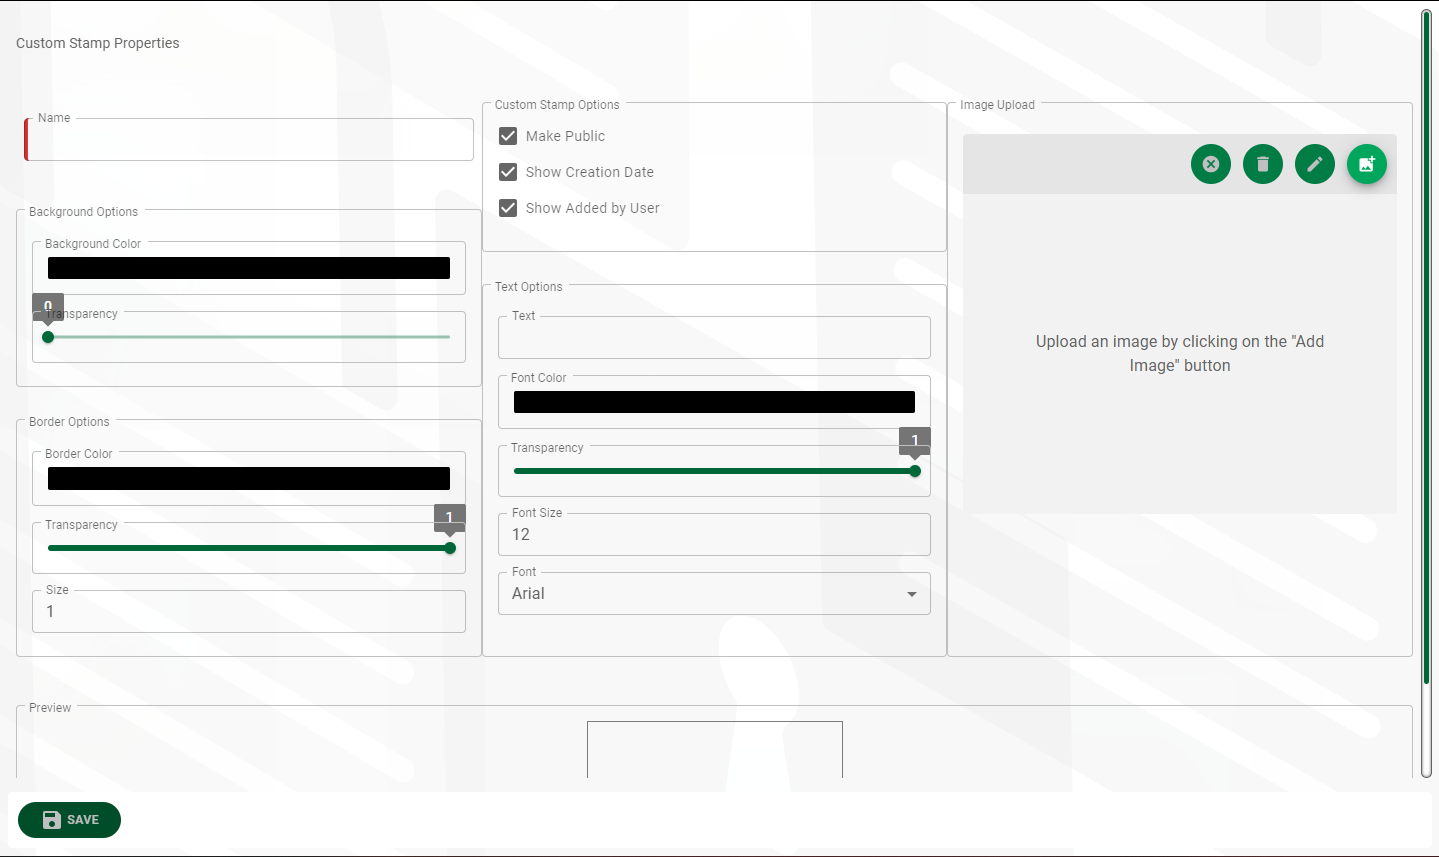
2.In the Name field, type the name of the custom stamp.
3.You can choose from any (or all) of the following Custom Stamp Options:
• Make Public: Check this box to make the stamp available to all users.
Non-Administrators do not have the option of making the stamp available to all users. Any stamp created by a non-Administrator can only viewed by the individual who created it.
• Show Creation Date: Check this box to display the creation date above or below the stamp.
• Show Added by User: Check this box to display the name of the user who created the stamp above or below the stamp.
4.For Background Options, accept the defaults or modify the Background Color field, and adjust the Transparency level of the stamp background if necessary.
5.For Border Options, accept the defaults or modify the Border Color fields, and adjust the Transparency level of the border surrounding the stamp as appropriate.
6.For Text Options:
a.In the Text field, enter any text that you want to display in addition to the image.
Note: Custom stamp text displays over the custom stamp image.
b.Adjust the Transparency level if necessary.
c.Use the Font Size dropdown to select the font size.
d.Use the Font dropdown to select the font style.
7.In the Image Upload section, click Add New Image  to browse and select the image file to import.
•You can click the Edit Image  icon to modify the image.
•To delete the image, click the Remove Image  icon.
icon.
8.Click SAVE.
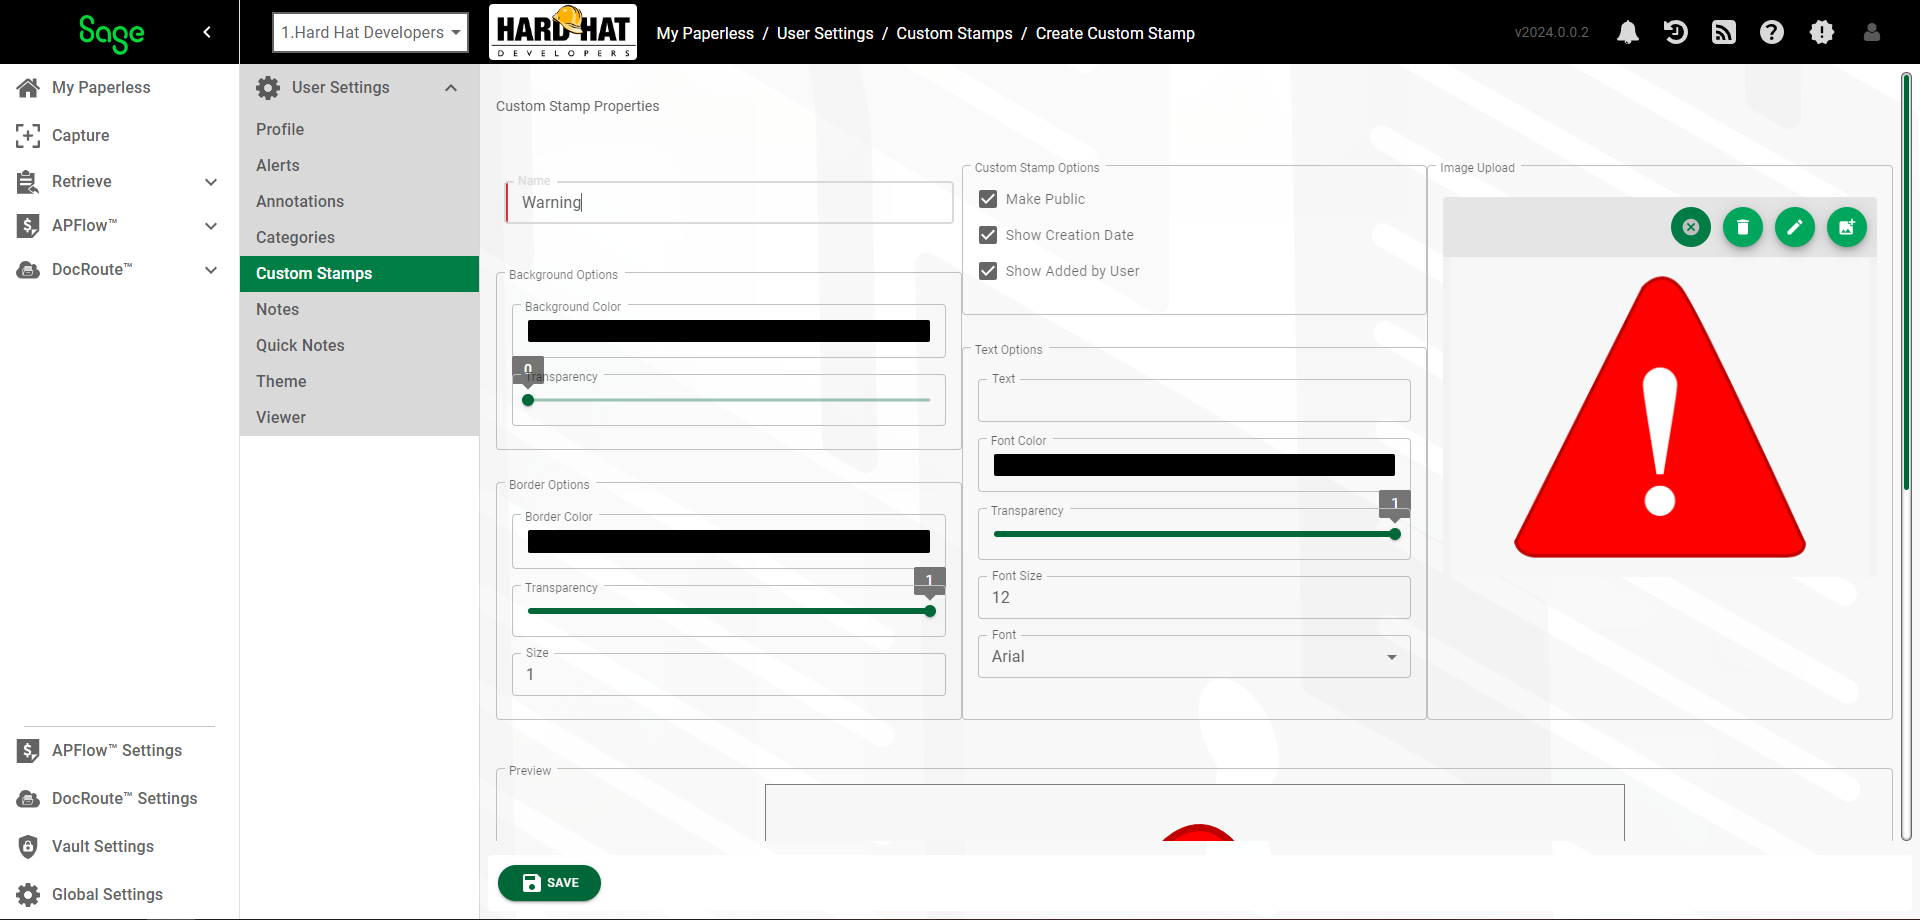
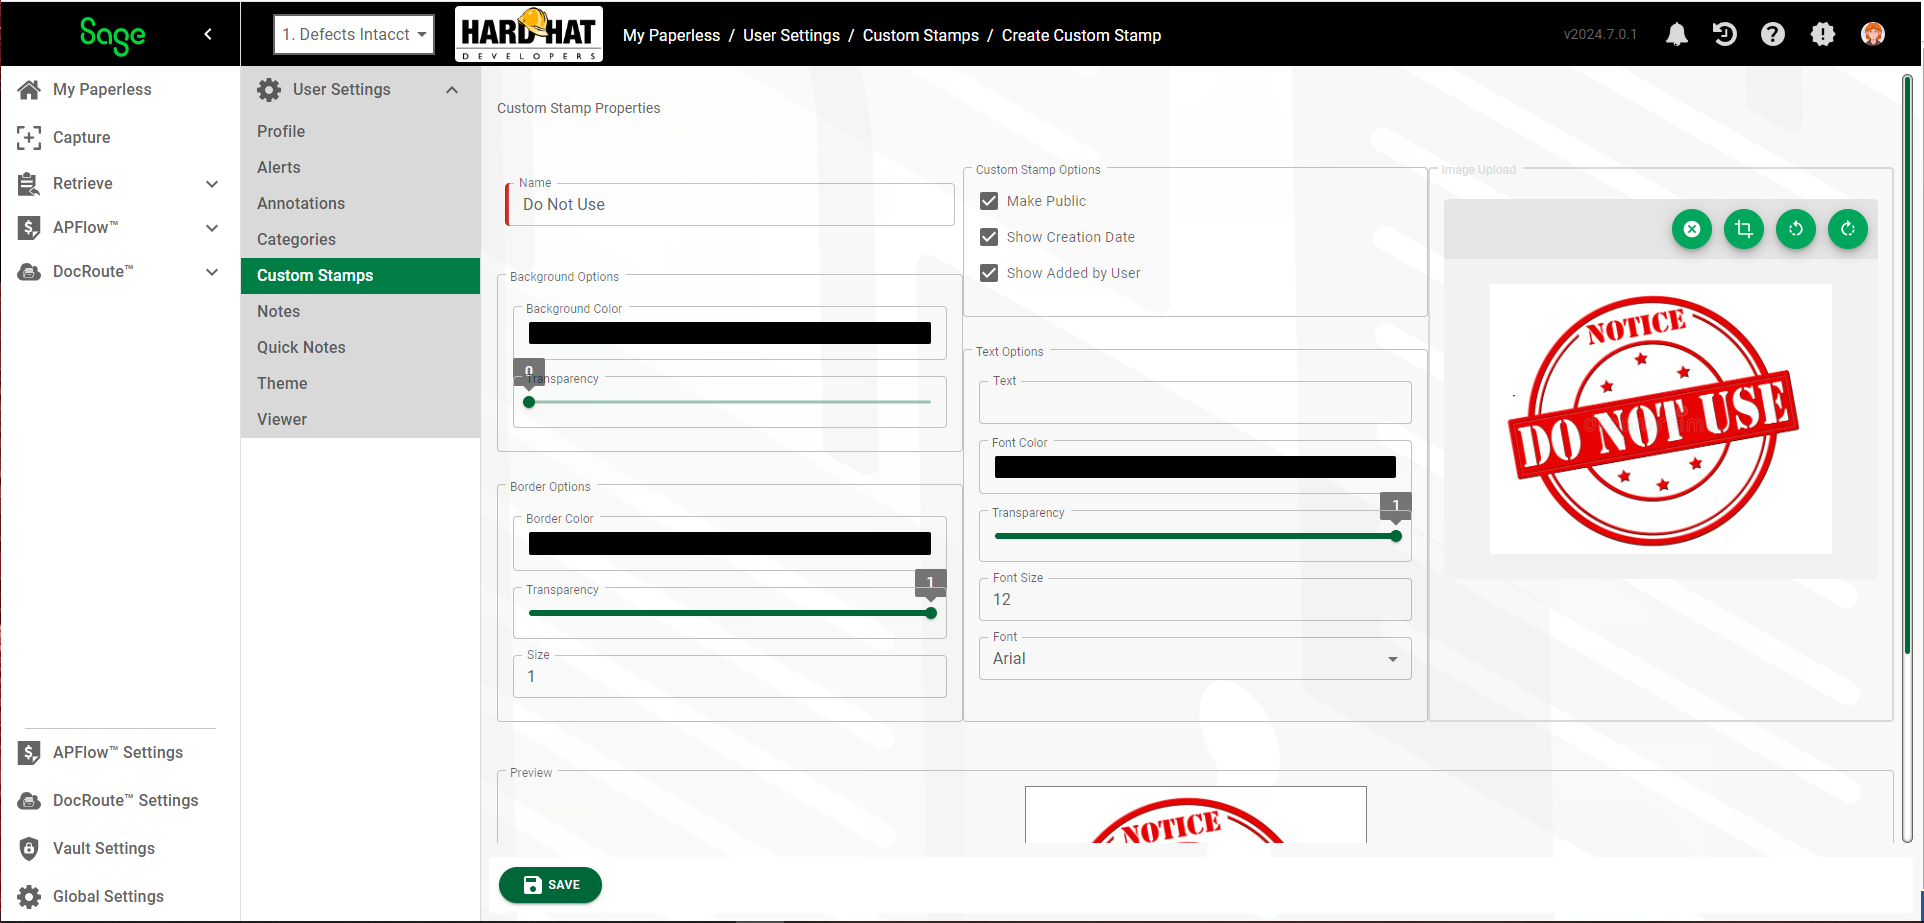
When you have created your custom stamp, the page resembles the following:
Custom Text Stamps
Custom text stamps can be created with any text.
1.On the Custom Stamps page, click New Custom Stamp.
The following Custom Stamp Properties page displays:
2.In the Name field, type the name of the custom stamp.
3.You can choose from any (or all) of the following Custom Stamp Options:
• Make Public. Check this box to make the stamp available to all users.
Non-Administrators do not have the option of making the stamp available to all users. Any stamp created by a non-Administrator can only viewed by the individual who created it.
• Show Creation Date. Check this box to display the creation date above or below the stamp.
• Show Added by User. Check this box to display the name of the user who created the stamp above or below the stamp.
4.For Background Options, accept the defaults or modify the Background Color field, and adjust the Transparency level of the stamp background if necessary.
5.For Border Options, accept the defaults or modify the Border Color fields, and adjust the Transparency level of the border surrounding the stamp as appropriate.
1.For Text Options:
a.In the Text field, enter the text for your custom stamp.
b.Adjust the Transparency level if necessary.
c.Use the Font Size dropdown to select the font size.
d.Use the Font dropdown to select the font style.
6.Click SAVE.