The final configuration step is to assign the workflow mappings to queues.
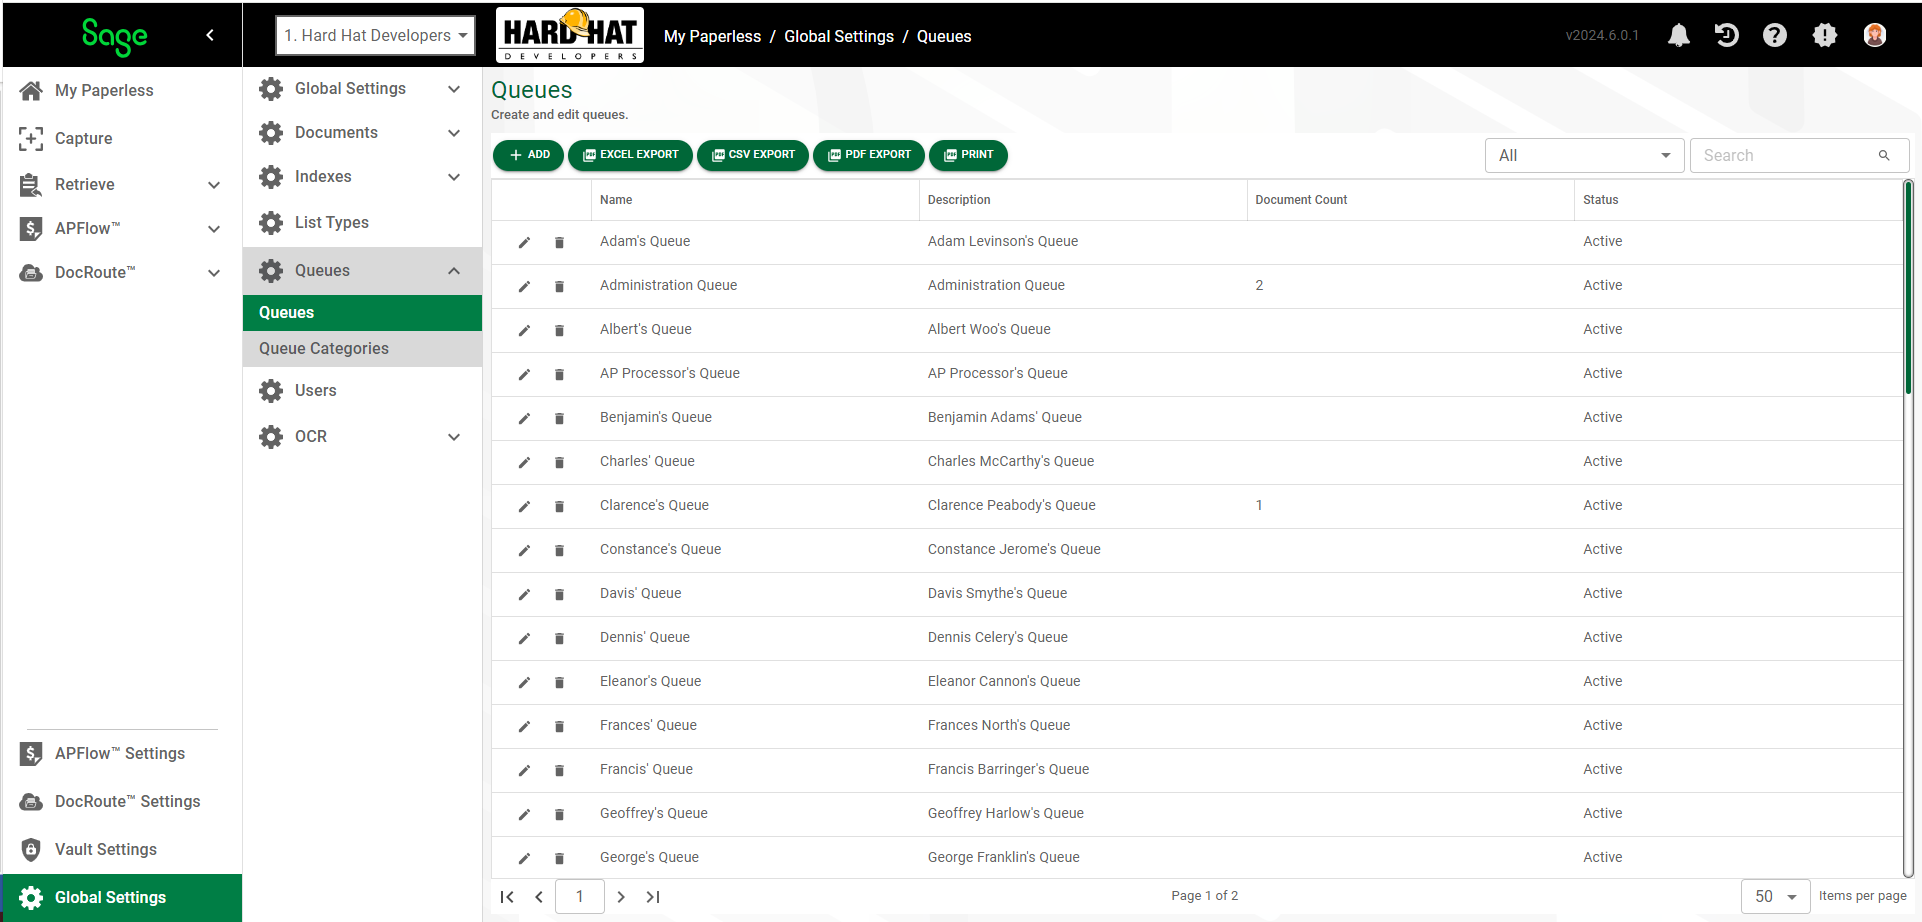
1.From My Paperless, click Global Settings.
2.In the Global Settings navigation bar, click Queues.
3.From the Queues dropdown, click Queues.
The Queues page similar to the following displays:
4.Click the edit icon,  , associated with a specific queue.
The GENERAL tab displaying the Queue Properties page displays:
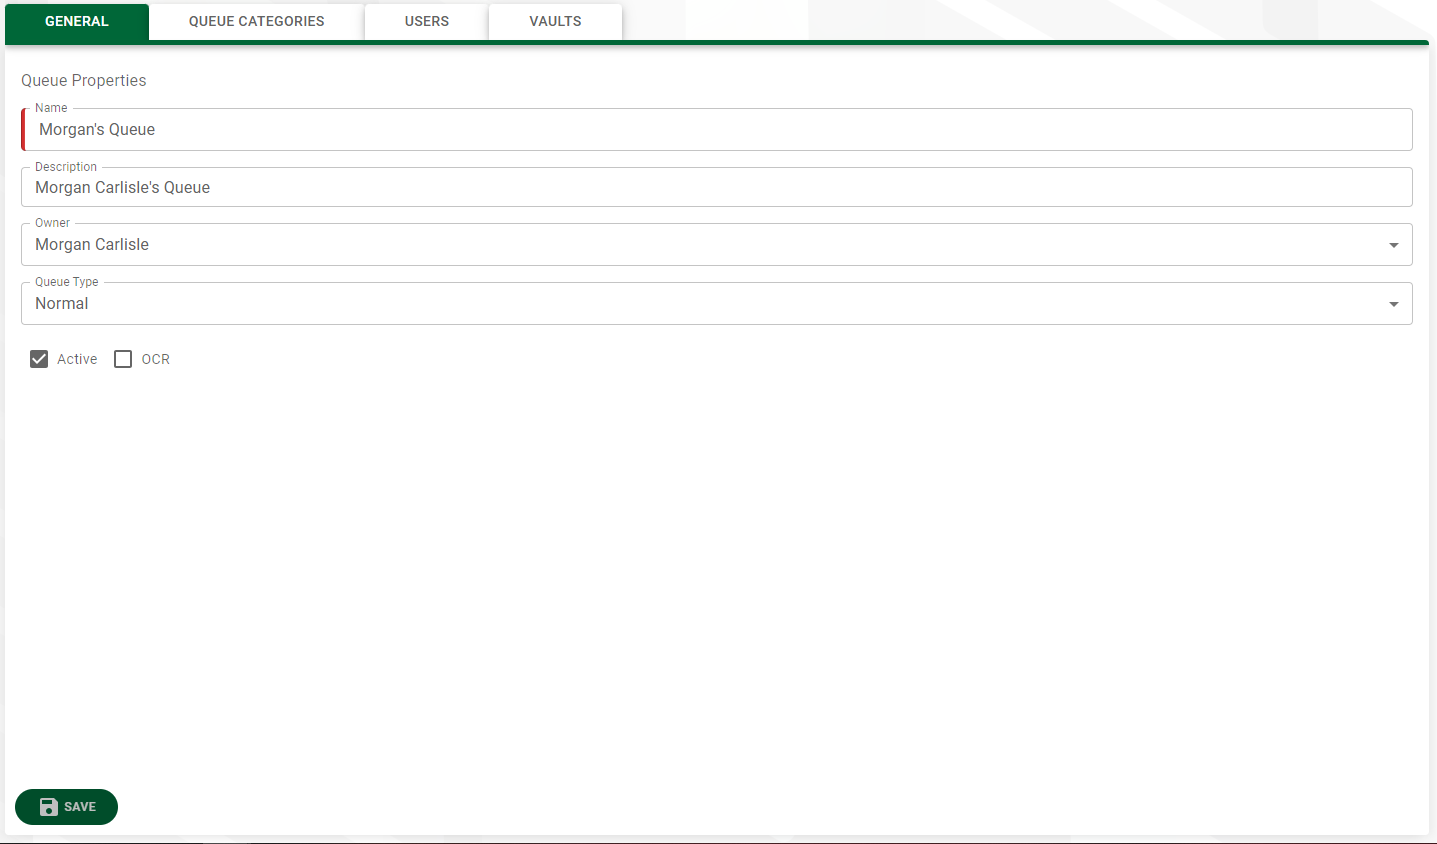
5.Click the OCR check box.
6.Click the VAULTS tab.
The following page displays:
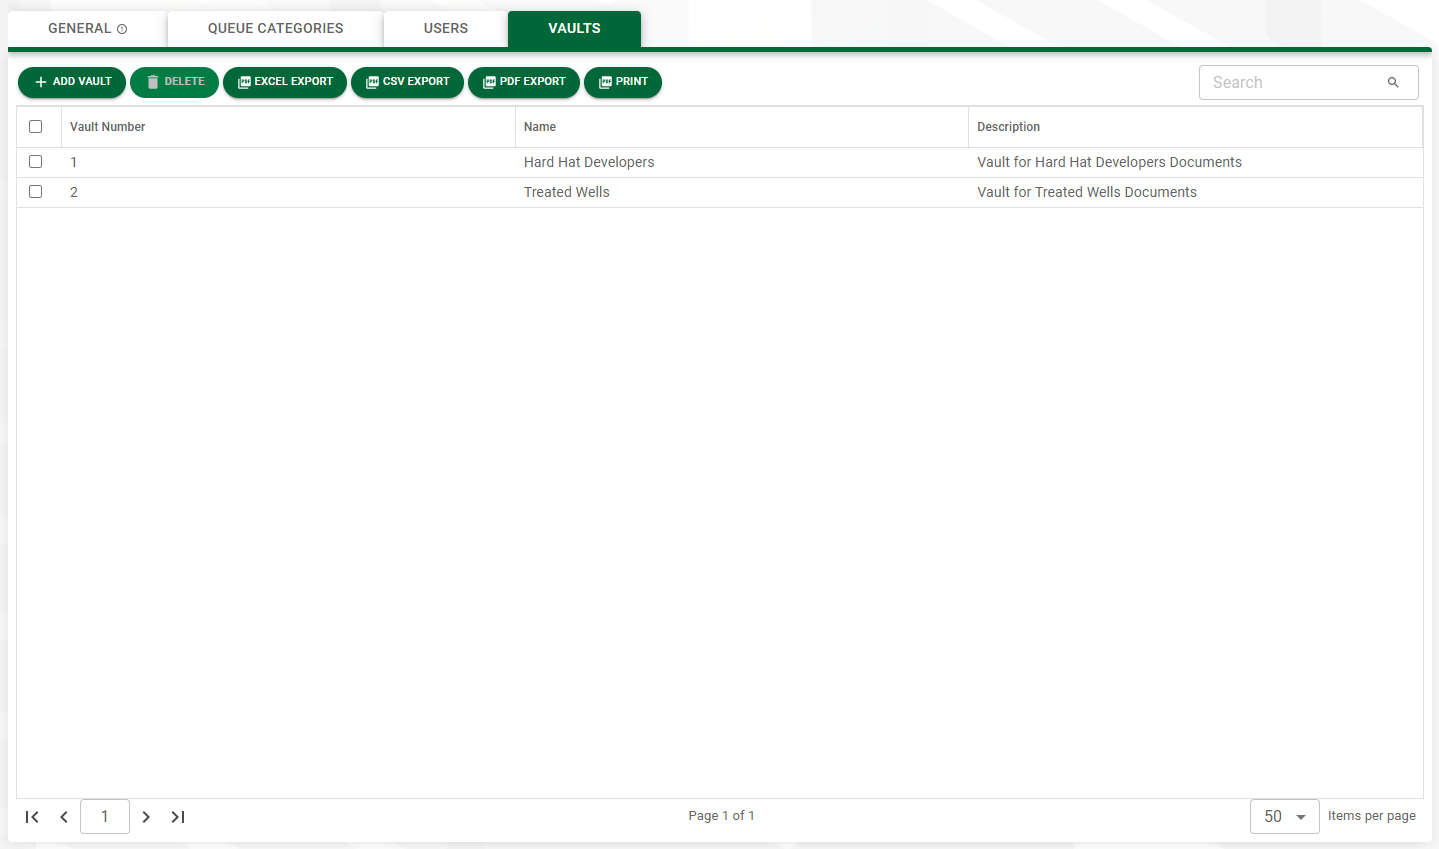
7.Click in the row to select the vault.
8.Click back to the GENERAL tab.
9.Click  to keep your changes.
Clearing an OCR Workflow Mapping
1.From Vault Settings in the left navigation bar, click Queues.
2.Click to select a queue that was assigned OCR access. For additional information, click here.
The following page displays:
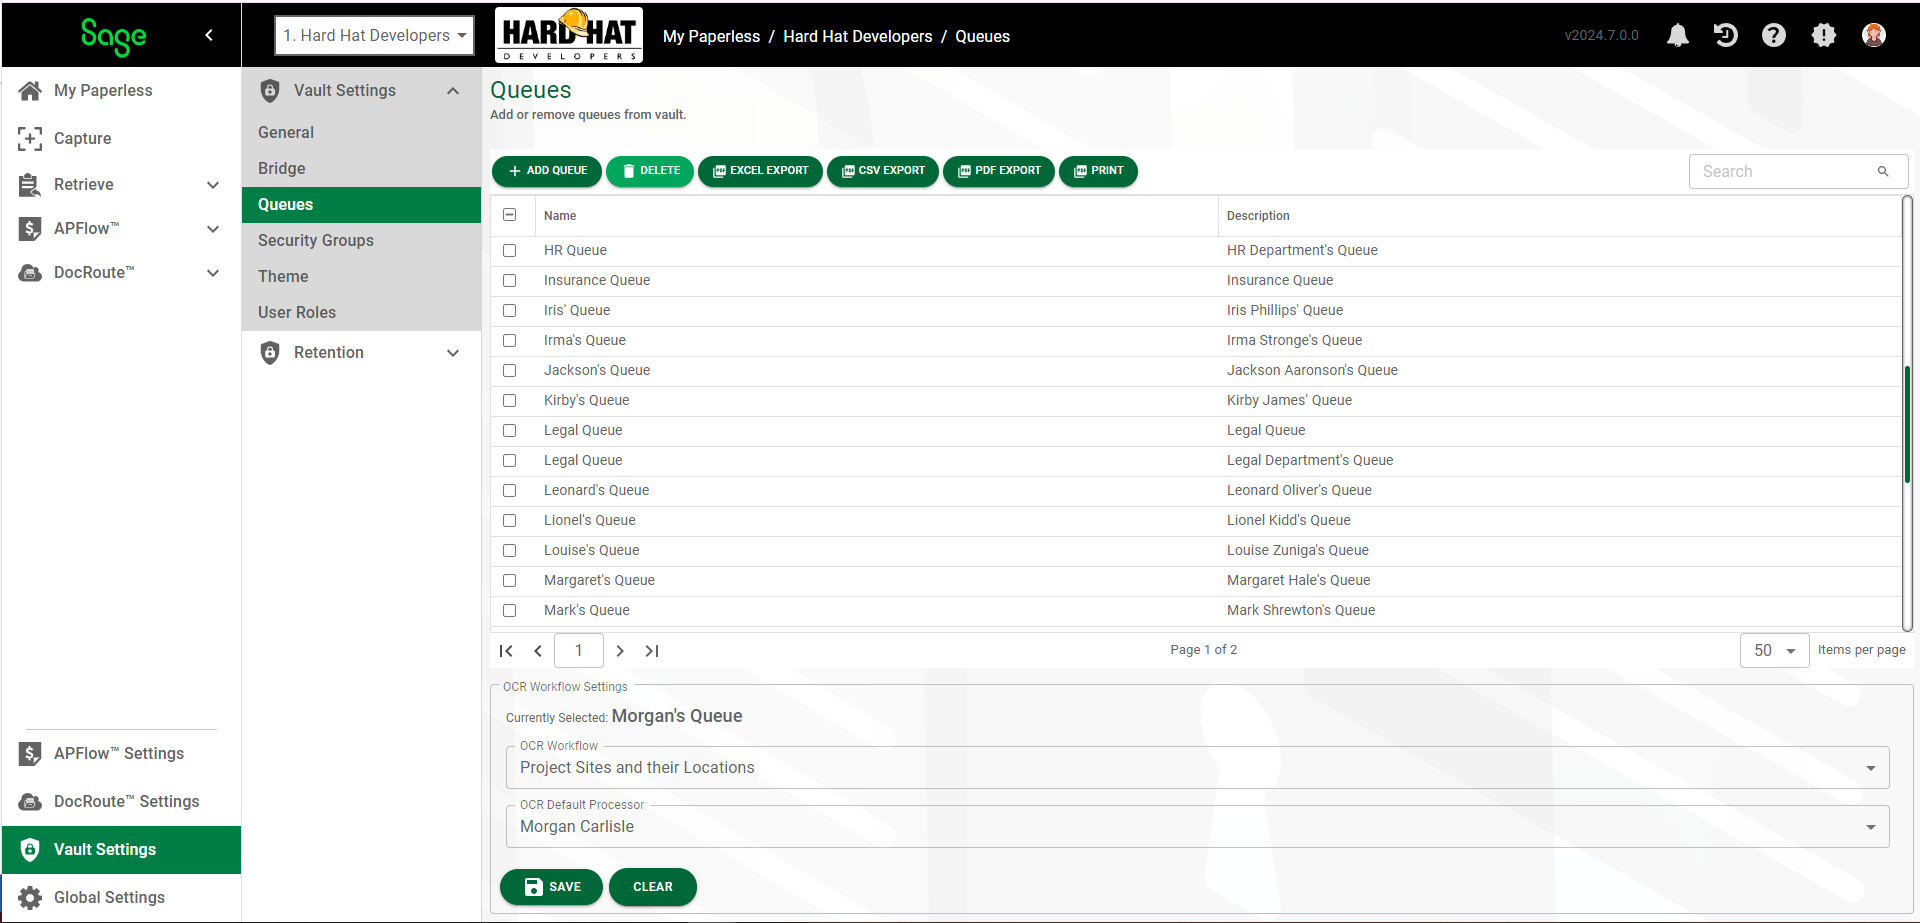
Because the selected queue was assigned to OCR, the OCR Workflow Settings pane displays.
3.Click  .
.
The OCR Workflow and the OCR Default Processor fields are repopulated with generic defaults:
