Vendors added to the Master Address Book can be imported to jobs using the import function or can be added by matching subcontracts.
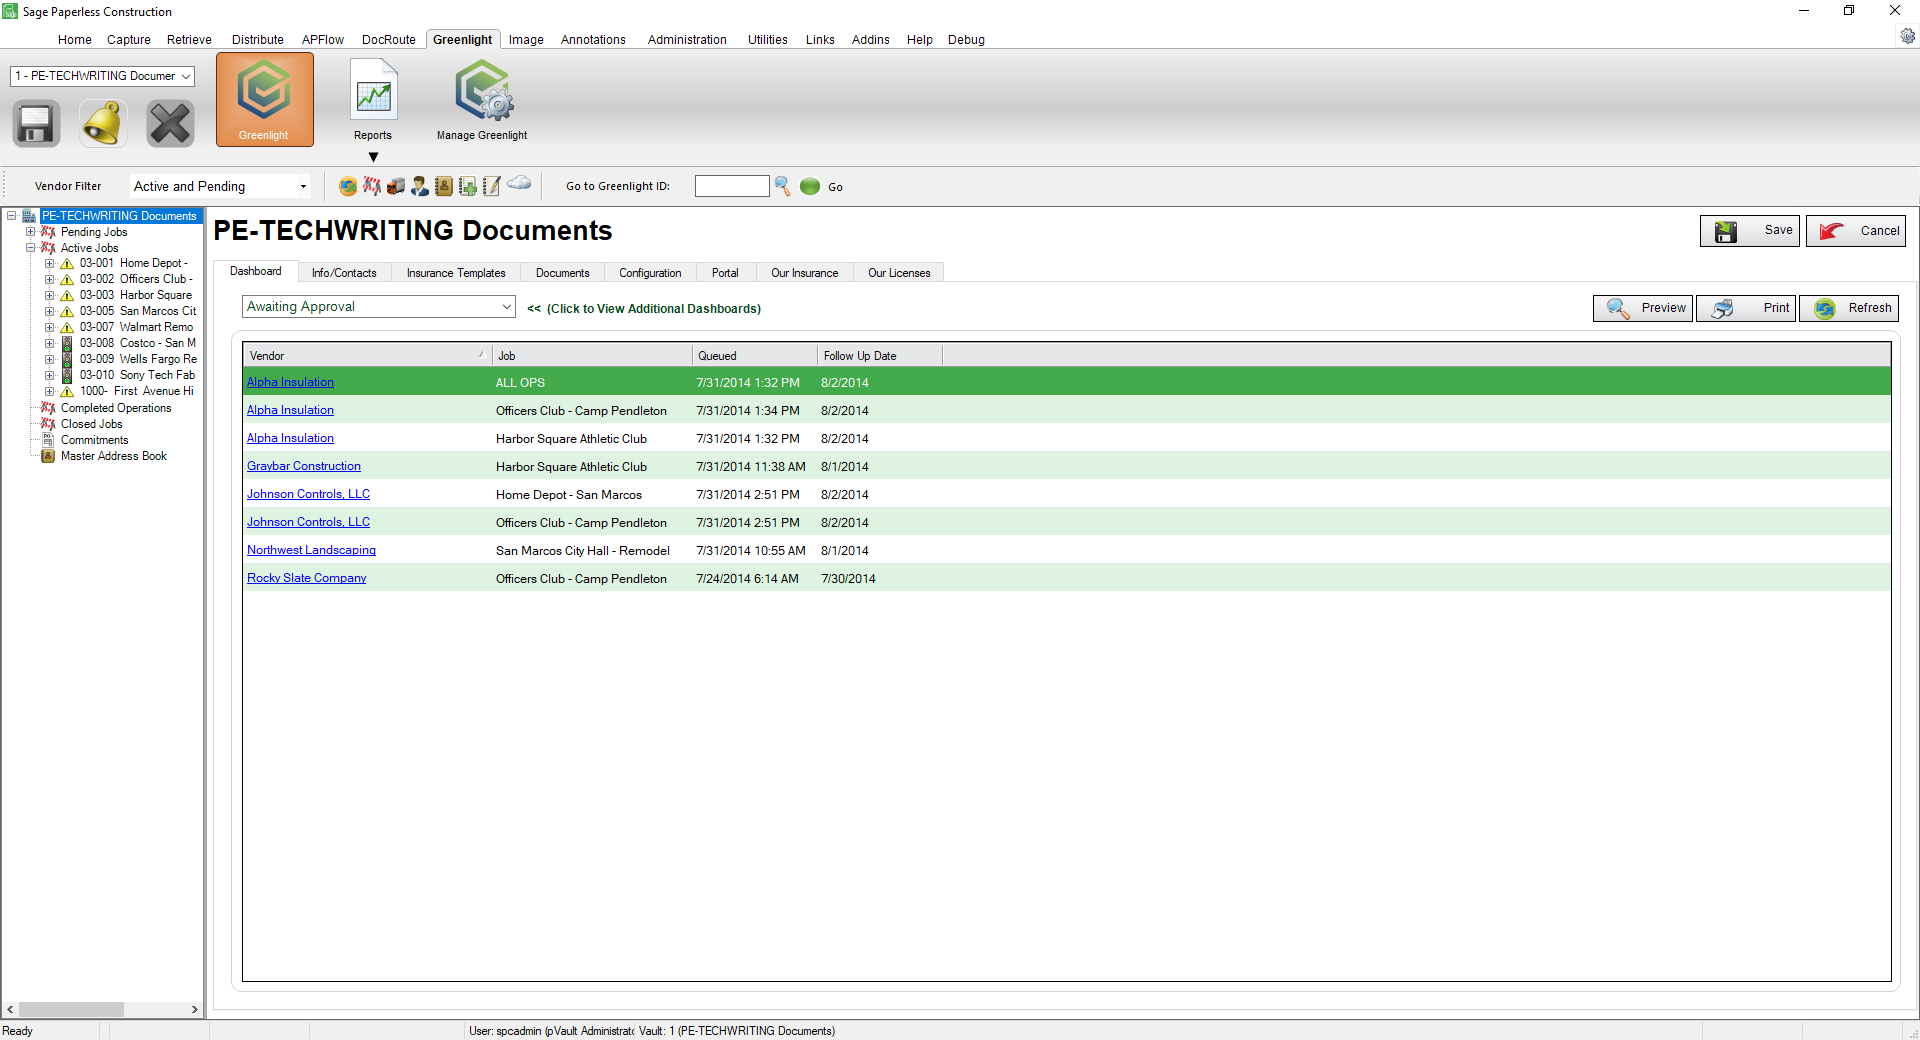
1.From the ribbon toolbar, click Greenlight.
2.Click Greenlight,  .
.
The main screen displays with the Dashboard tab active:
3.In the left navigation bar, click Master Address Book.
The following screen displays:
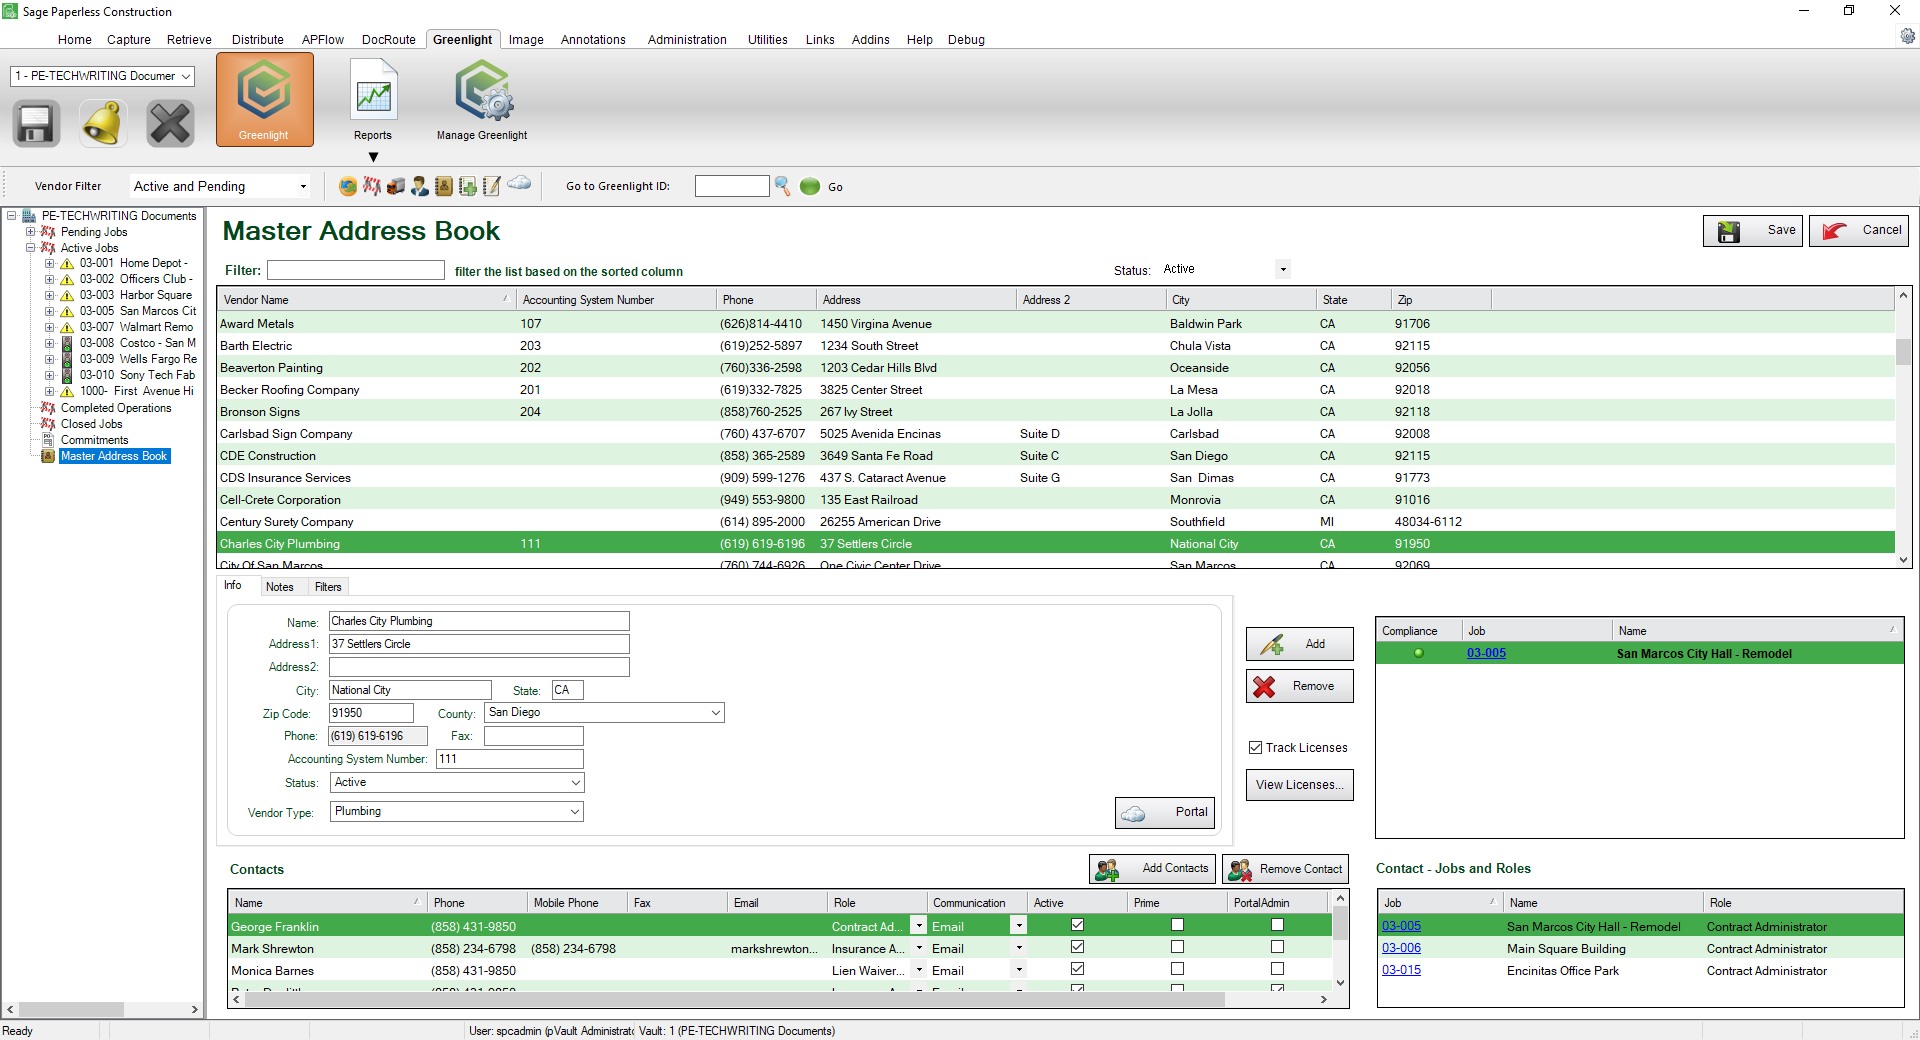
4.In the Info tab grid, click Add,  .
.
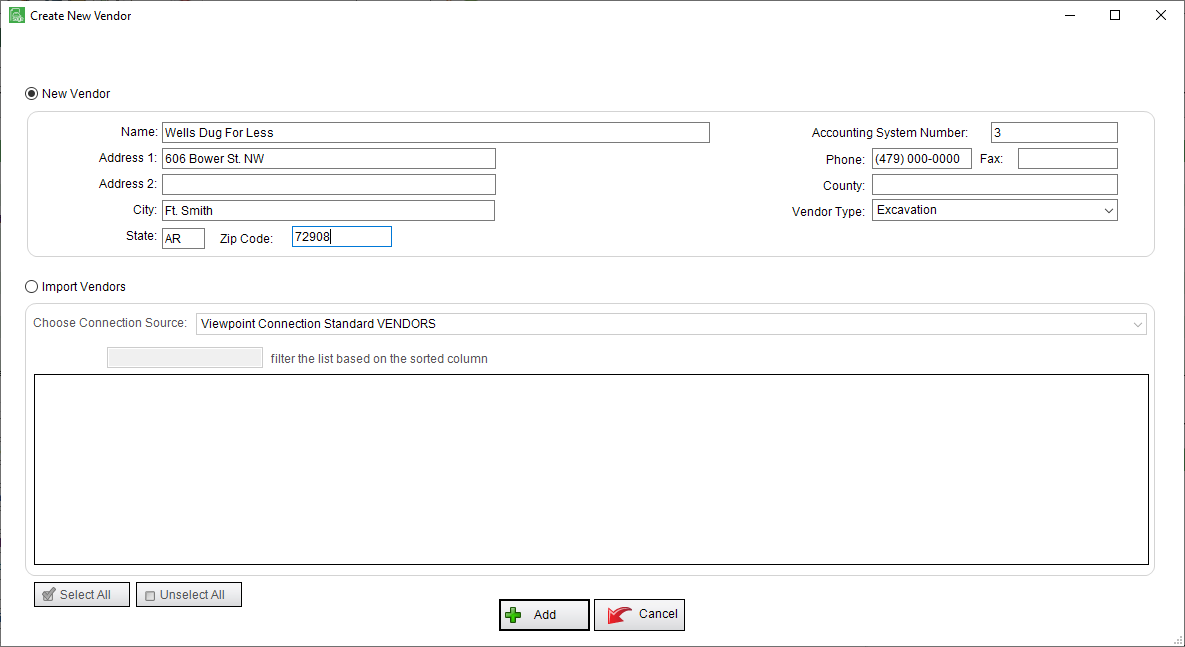
A Create New Vendor window displays:
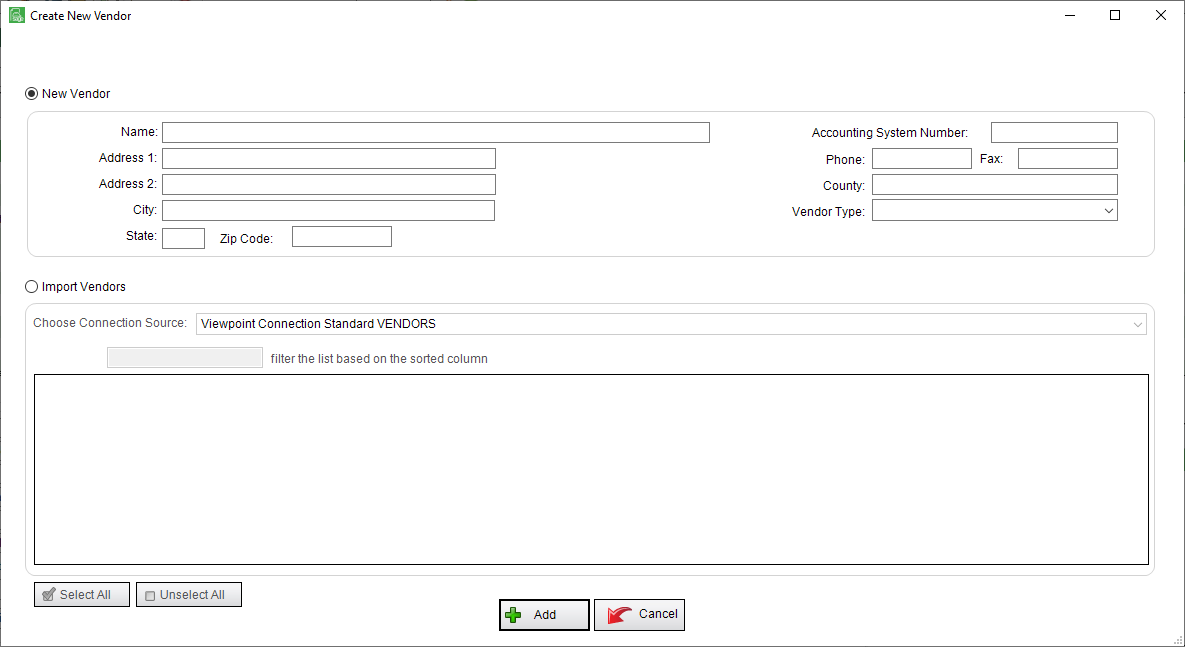
Note: From this window, you can only enter a New Vendor. That means the Import Vendors radio button is not active.
5.In the Name field, enter the name of the vendor.
6.In the Address 1 field, and Address 2 field if applicable,enter the vendor's address.
7.In the City field, enter the city.
8.In the State field, enter the 2-character state abbreviation.
9.In the Zip Code field, enter the 5-digit zip code. You may also enter the zip extension in this field.
10.In the Accounting System Number field, enter the vendor number. This is the number that identifies the vendor in your accounting system.
11.In the Phone field, enter the vendor's phone number. You do not need to include parentheses or dashes. The system will add it.
The number format will resemble (###) ###-#### when you tab to the next field.
12.In the Fax field, enter the vendor's fax number. This is not a required field.
13.In the County field, enter the county where the vendor's business is located.
You may leave this field blank. After clicking Add,  , the new vendor record in the Master Address Book listing, the Info tab, will display all the information entered in this window. The County field that displays there includes a dropdown that lists every county for the state identified in the State field.
14.Use the dropdown in the Vendor Type field to select the type of construction work that the newly added vendor performs.
The Create New Vendor window should resemble the following:
15.Click Add, , to save and close the window.
The Master Address Book redisplays and the new vendor you added will be in the list.
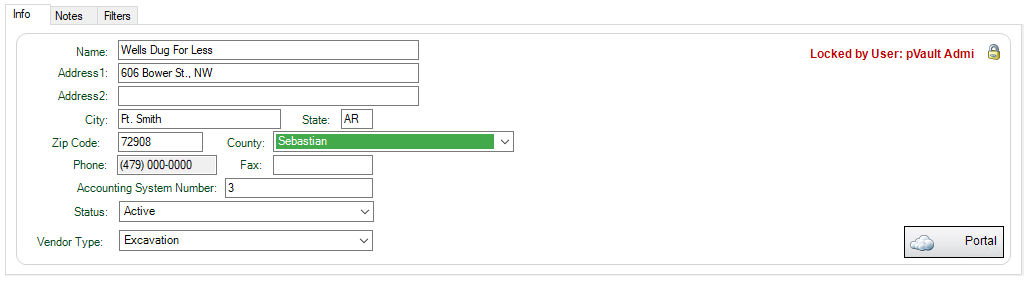
16.Click the entry to display the populated fields in the Info tab similar to the following:
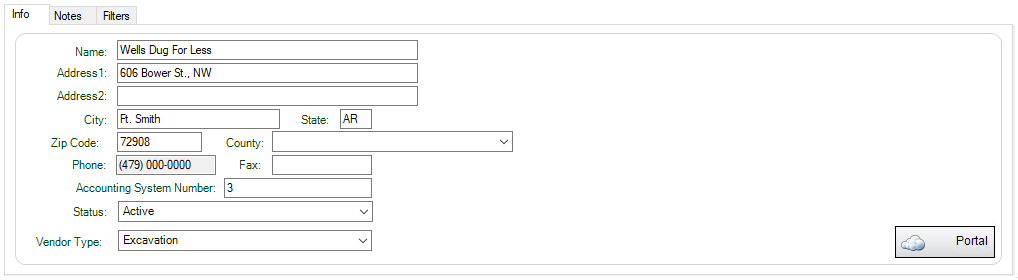
17.In the County field, use the dropdown to locate the appropriate county where this vendor does business.
18.Click to select the appropriate county.
Once you populate the County field, this entry is locked. Note the visual cue in the right corner of the tab: