
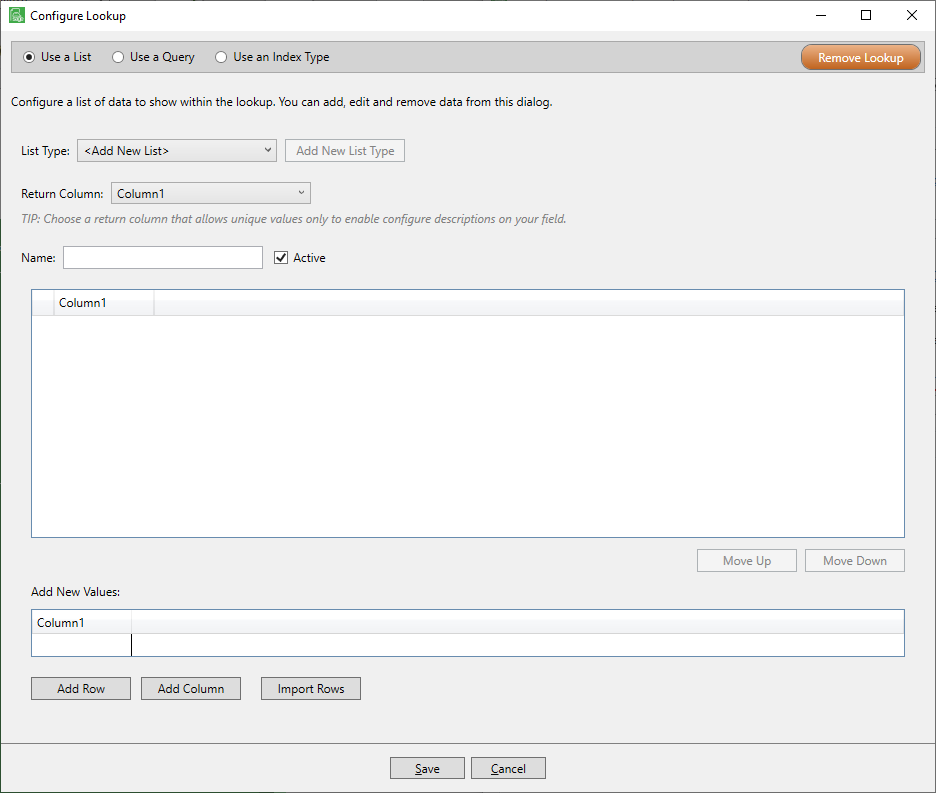
1.Select from the List Type field dropdown list or click Add New List Type.
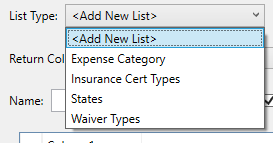
Based on the List Type you select, the Configure Lookup window fields will systematically backfill with data originally entered in the Administration ribbon toolbar, Types icon dropdown.
2.In the Name field, enter a name for your new list type.
3.Enter the values for the rows and columns in the Add New Values in grid.
When you have a row selected, you can change the position of List Type value rows that display in the grid by clicking the Move Up,  , and Move Down,
  , buttons as appropriate.
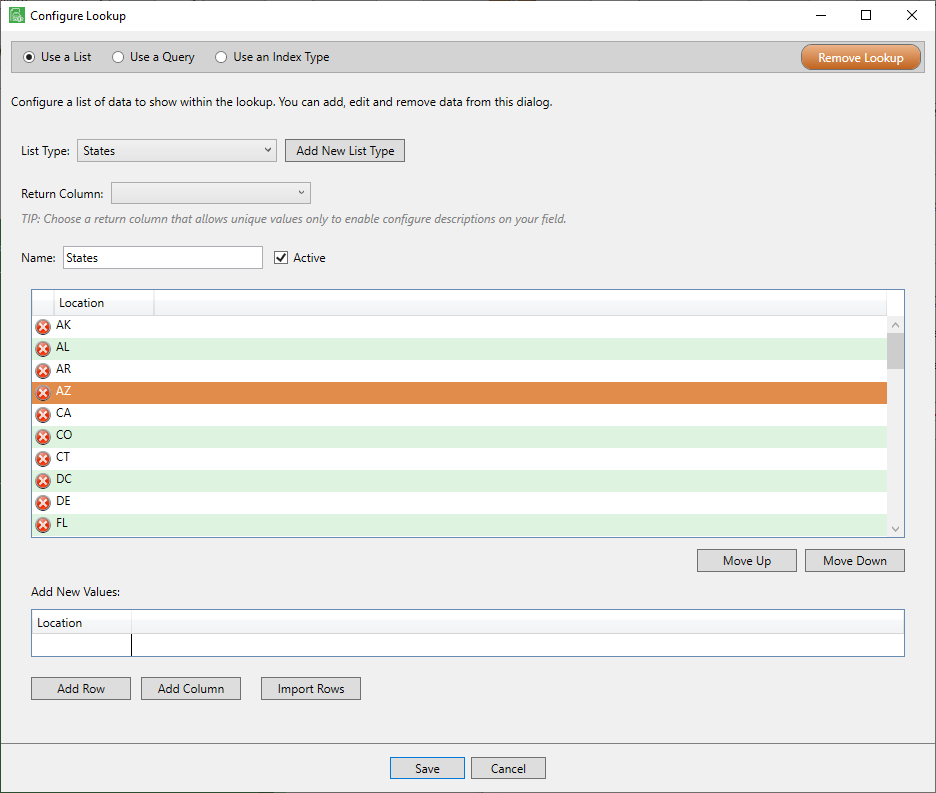
4.Because unique column values must be in place before descriptions can be set, click in the column heading so these icons are visible:
5.Click the edit icon,  .
.
The Edit Column dialog box similar to the following displays:
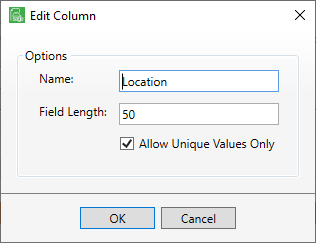
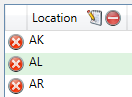
In this example, the column heading is Location.
6.Click the Allow Unique Values Only check box.
By clicking this check box, you cannot have two identical values in this column.
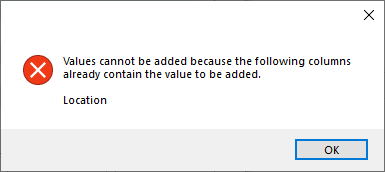
If you add a value that already exists in this column while the Allow Unique Values Only check box is selected, the following warning prompt displays:
Note: To have descriptions visible for custom fields, the Allow Unique Values Only check box must be selected. Without a unique list or column of values, if multiple values exist, the system cannot determine which of the duplicate values you want.
7.Click OK to save and close the Edit Column dialog box.
8.Click Save to save and close the Configure Lookup window.
The Configure Invoice Entry Fields [Admin Mode] screen redisplays with the Lookup Info grid populated similar to the following along with a visible Preview Lookup Data button:
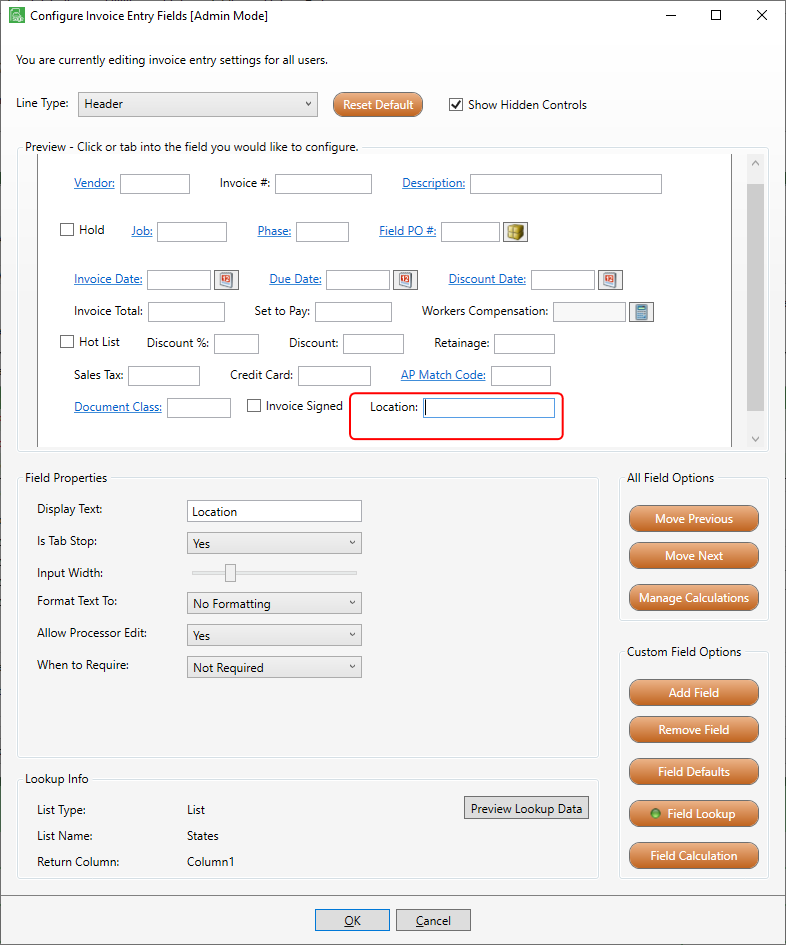
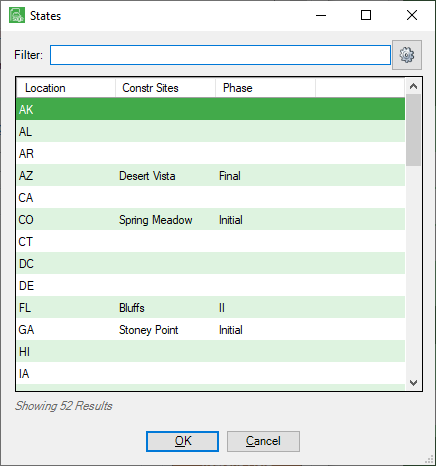
9.Click the Preview Lookup Data button to review the information you entered.
10. Click OK.
When the Field Lookup is configured and active, the Field Lookup button includes an indicator: 
Click here to see how your custom field looks on the Invoice Entry screen with a visible description.