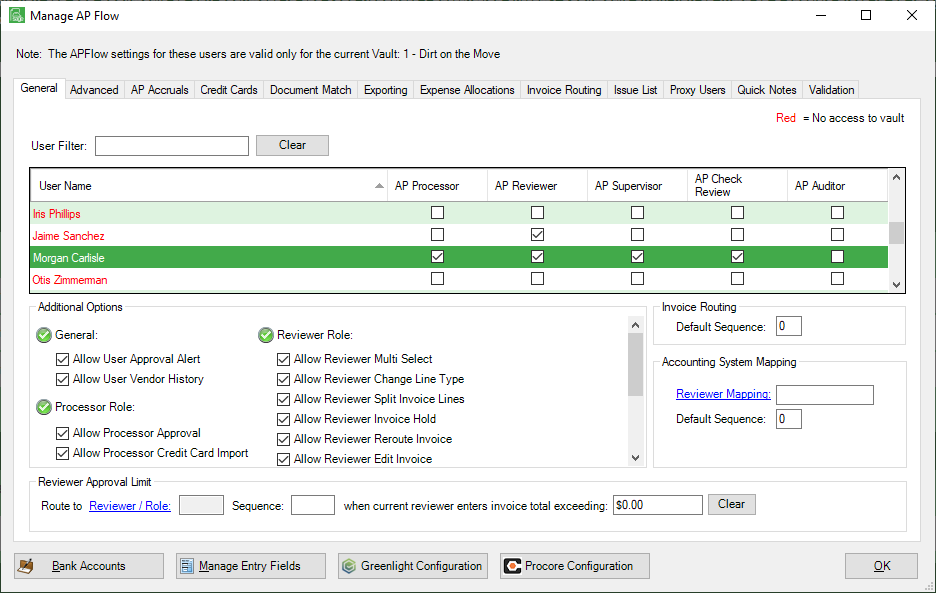
User and security settings for the APFlow™ module are maintained on the Manage APFlow™ screen.
The Manage APFlow™ screen is accessible from the following areas within Sage Paperless Construction:
➢On the ribbon toolbar, click the APFlow™ tab and then click the Manage APFlow™ icon, ![]() .
.
➢From the Invoice Manager screen, click Manage APFlow™. Read more about the Invoice Manager by clicking here.
The Manage AP Flow screen similar to the following displays with the General tab active:

•For more information on the AP Processor, AP Reviewer, AP Supervisor, AP Check Reviewer and AP Auditor roles and permissions, refer to General Tab.
•For more information on the Advanced tab and advanced bridge settings refer to Advanced Tab.
•For more information on the AP Accruals tab, expense lines and job-related lines, refer to AP Accruals Tab.
•For more information on the Credit Cards tab and how to create credit card templates, refer to Credit Cards Tab.
•For more information on the Document Match tab, document types and one time attachments, refer to Document Match Tab.
•For more information on the Exporting tab, refer to Exporting Tab.
•For more information on the Expense Allocations tab, refer to Expense Allocations Tab.
•For more information on the Invoice Routing tab, routing groups, rules and descriptions, refer to Invoice Routing Tab.
•For more information on the Issue List tab, issue names and resolution, refer to Issue List Tab.
•For more information on the Proxy Users tab, refer to Proxy Users Tab.
•For more information on the Quick Notes tab, refer to Quick Notes Tab.
•For more information on Bank Accounts, refer to Bank Accounts.
•For more information on the Manage Entry Fields, refer to Configure Invoice Entry Fields.
•For more information on the Greenlight CM™ Configuration, refer to Greenlight Configuration.
•For more information on Procore, refer to Procore.