No matter how a document can be brought in to Sage Paperless Construction, it can be associated with a Document Class.
Capture
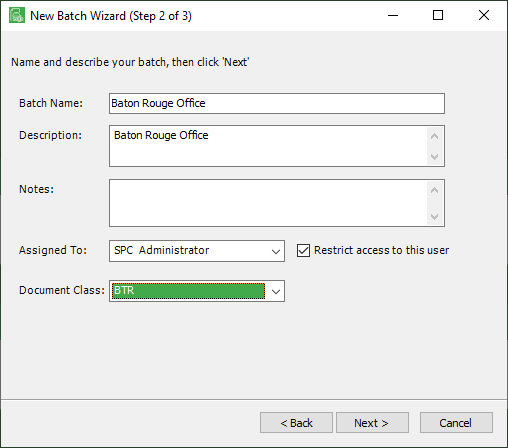
In the Document Class field, use the dropdown to select the newly created document class. In this example, select BTR.
Note: For details on creating new batches, click here.
CSV Import
There are two instances where Document Class can be selected.
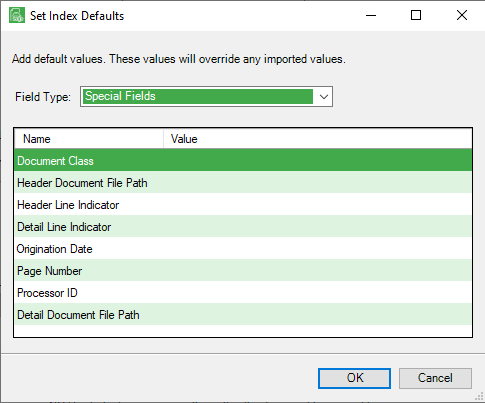
1.Click Set Defaults on the Configuration tab and then use the Field Type dropdown to select Special Fields.
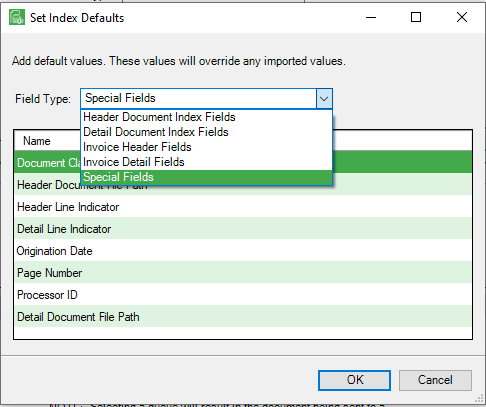
2.In the Field Type field, select Special Fields to select Document Class.
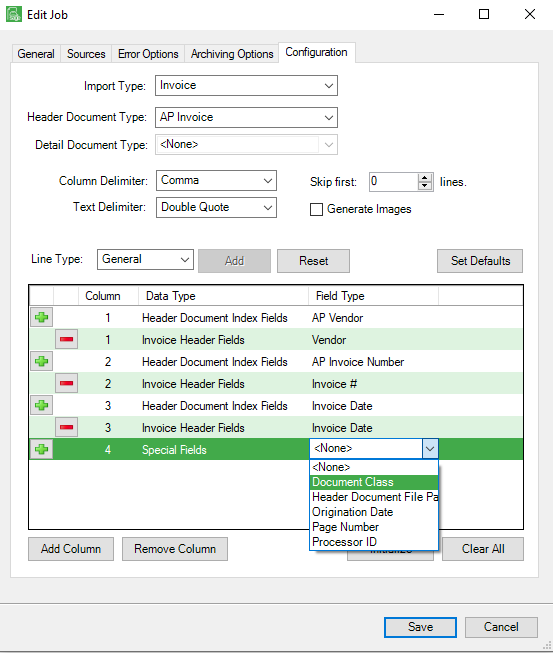
Or, on the Configuration tab, in the Field Type column, click the dropdown menu to select Document Class.
Note: For details on CSV Import functionality, click here.
Splitter Utility
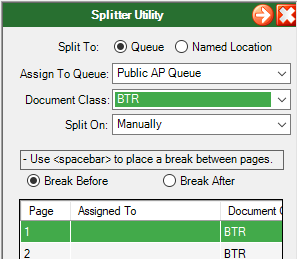
In the Document Class field, use the dropdown to select the newly created document class. In this example, select BTR.
The Document Class will also display for every associated page in the Document Class column.
Note: For details on the Splitter Utility functionality, click here.
Invoice Entry
Click New Invoice to access a blank Invoice Entry screen similar to the following:
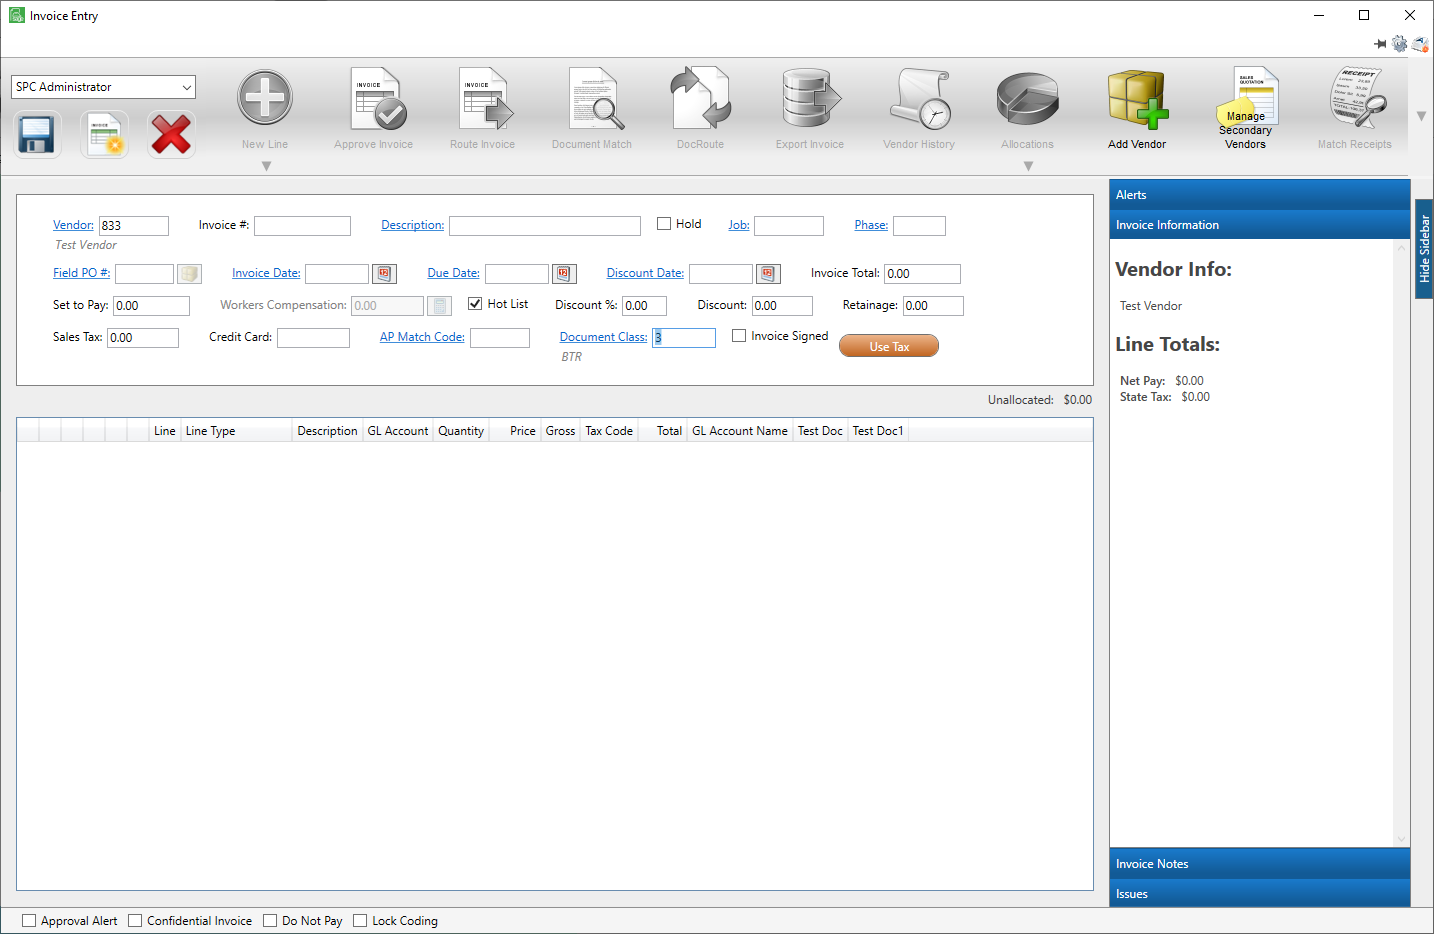
Note that the Document Class field is in the header. There is a lookup associated with this field. Click the field label or click F4 to access the following lookup dialog similar to the following:

Note: For details on Invoice Entry features and functionality, click here.
Route Invoice, ![]()
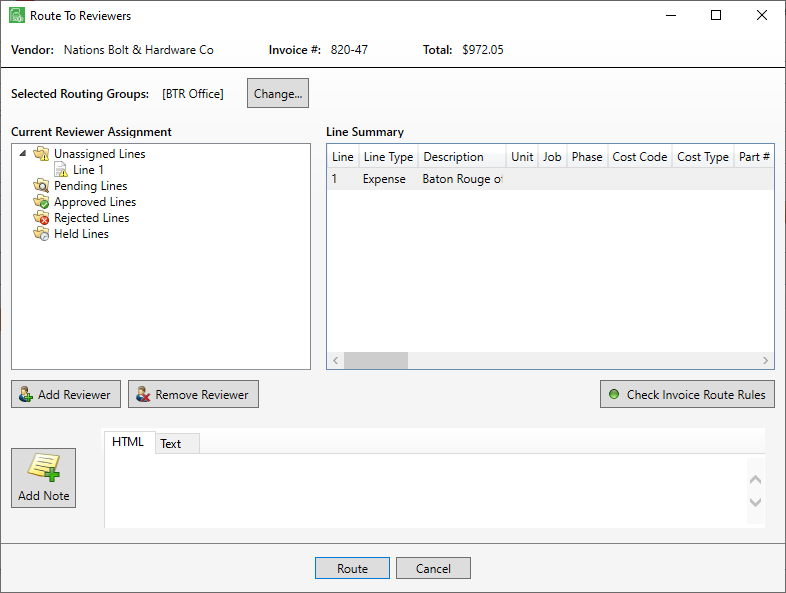
The Selected Routing Groups displays the document class. In this example, BTR Office.
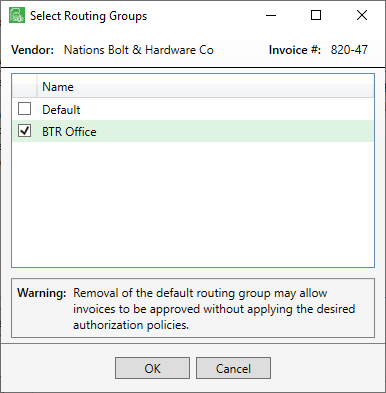
Click Change to view the Select Routing Groups dialog box resembling the following:
Note: For details on routing invoices, click here.