Tiered filtering narrows the filtering for a series of fields to display a limited set of values based on previous selected field criteria.
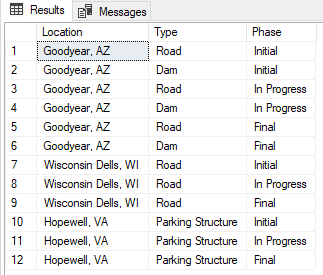
Prerequisite: You must create the table you will use in your query in SQL. This is table from which your query will reference. In my screen examples, this is the SQL table that I created:
|
Configure Invoice Entry Fields screen
1.From the ribbon toolbar click APFlow™.
2.In the Manage AP Flow screen, click Manage Entry Fields.
The Configure Invoice Entry Fields screen displays:
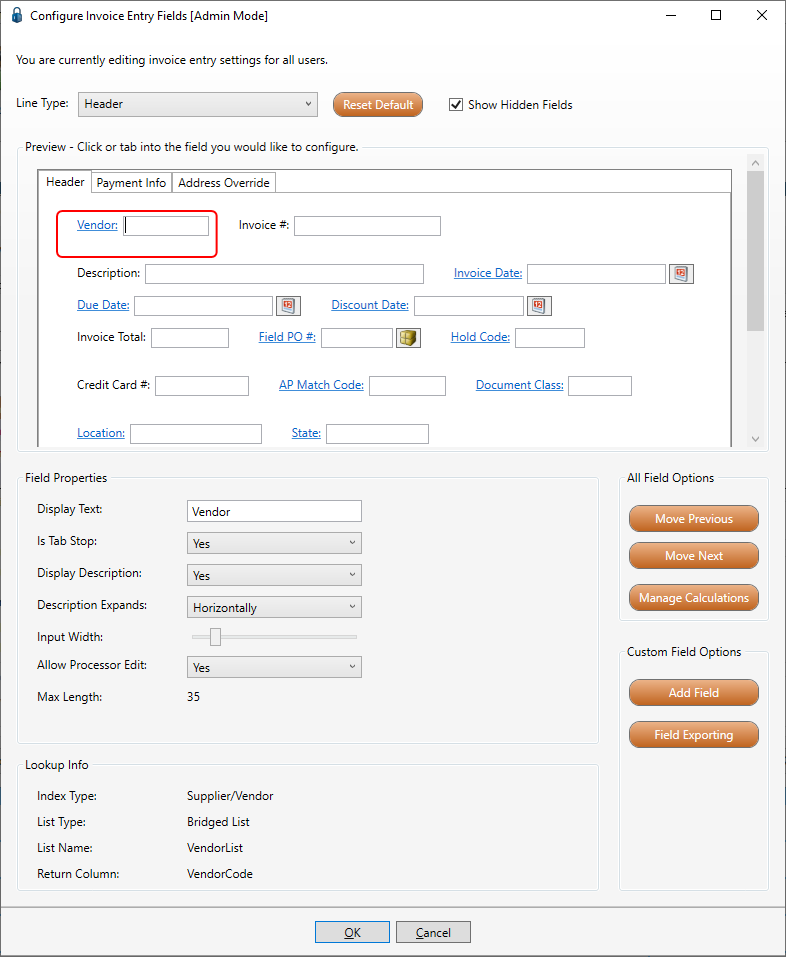
3.Click Add Field to add your top tier field. Each field you add in this sequence will build on the previous field, based on how you configure your query lookup.
4.Click Field Lookup.
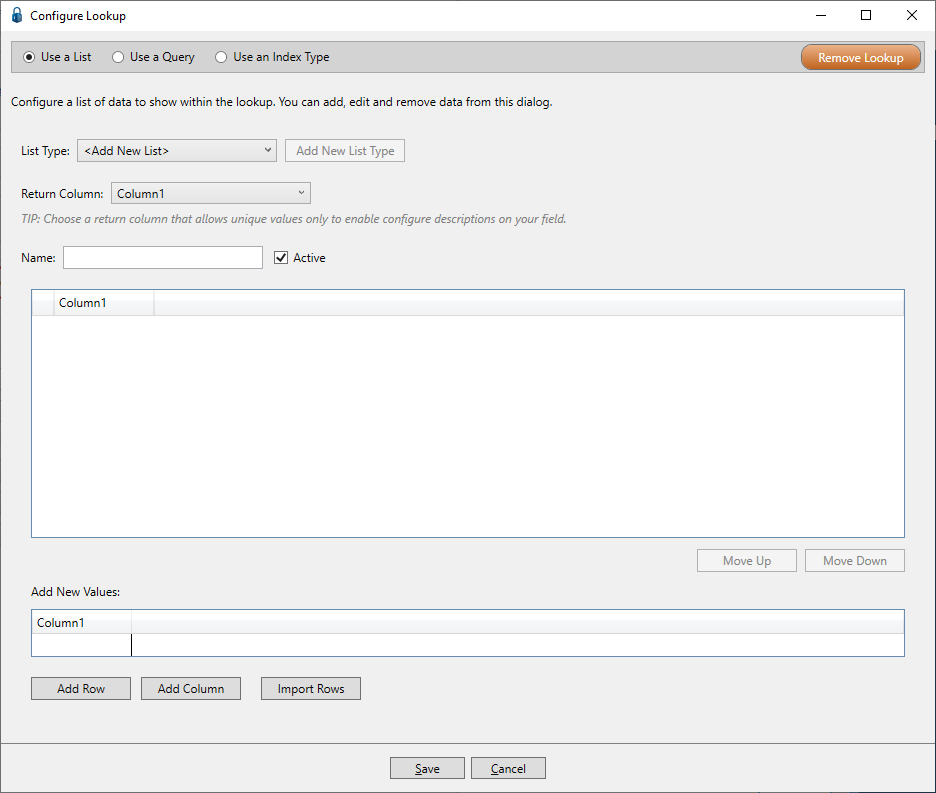
An empty Configure Lookup screen displays with the Use a List radio button selected.
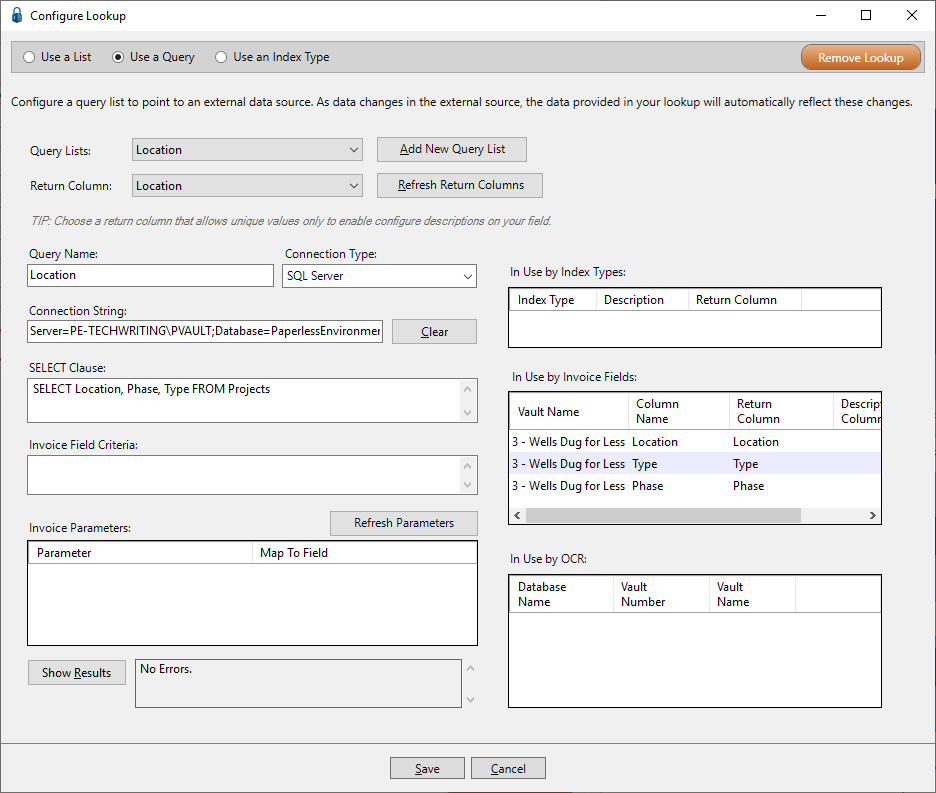
5.Click Use a Query.
6.Use the Query Lists field dropdown to select the appropriate query list. In this example, Location is the query list.

7.In the Return Column field, the query list title redisplays as the default. Keep the default.
8.In the Query Name field, type the query name from your SQL table title. In this example, Location is the query name.
9.In the Connection Type field, use the dropdown and select SQL Server.
10.In the Connection String field, enter the appropriate information.
11.In the SELECT Clause field, enter the SELECT statement. In this example, SELECT Location, Phase, Type FROM Projects
12.Click Show Results.
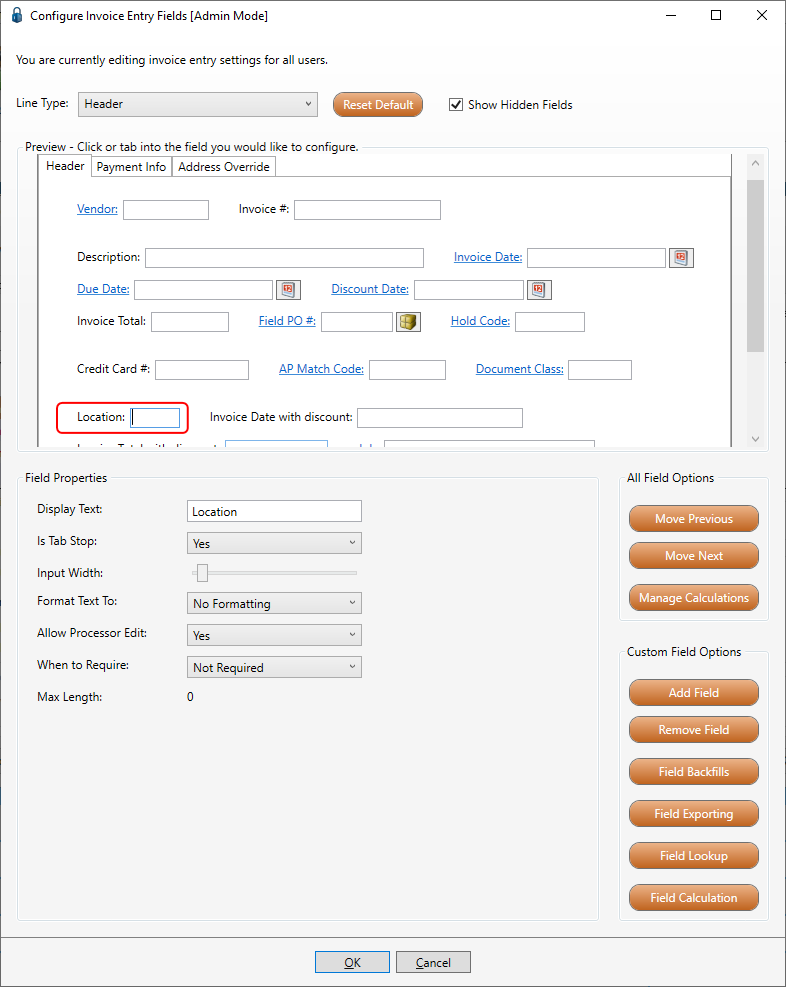
13.Continue with adding the fields in the Configure Invoice Entry Fields screen.
14.Click Field Lookup after adding each field to add that field to your query.
When you are finished, your completed Query should resemble this:
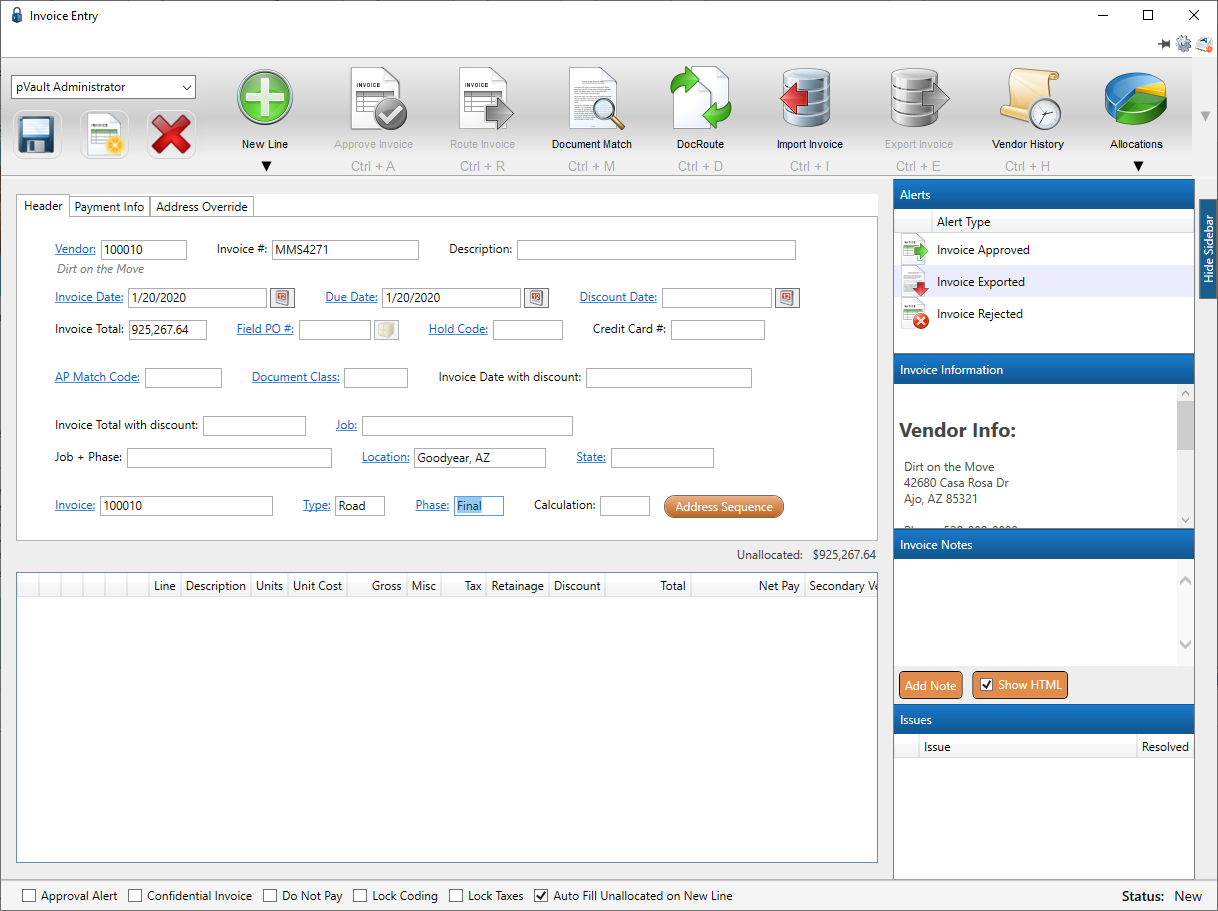
Invoice Entry
1.Access Invoice Entry.
2.Click New Invoice.
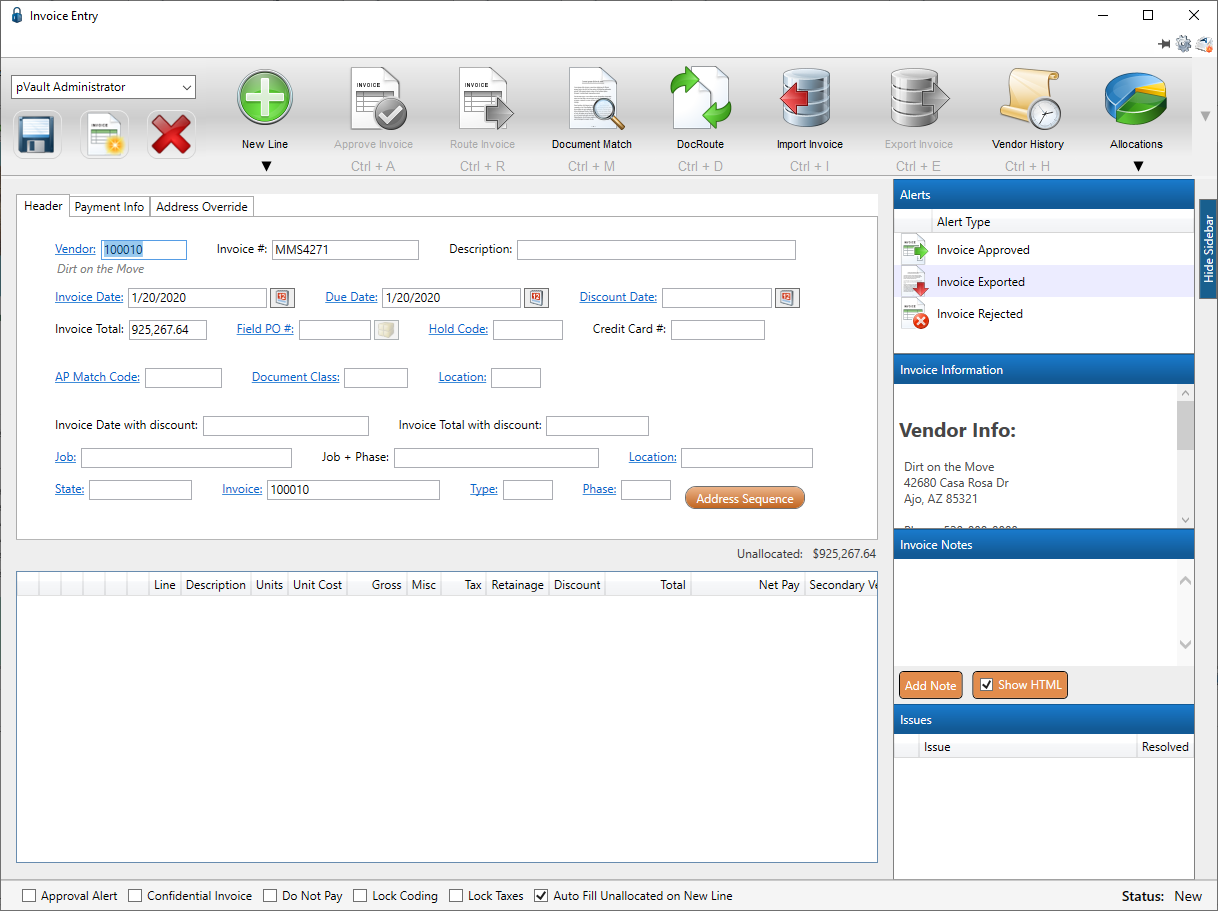
The following invoice with the new fields you added will display. In this example, Location, Type and Phase are the newly added fields. Note that all three fields indicate they have associated lookups (blue font/underlined).
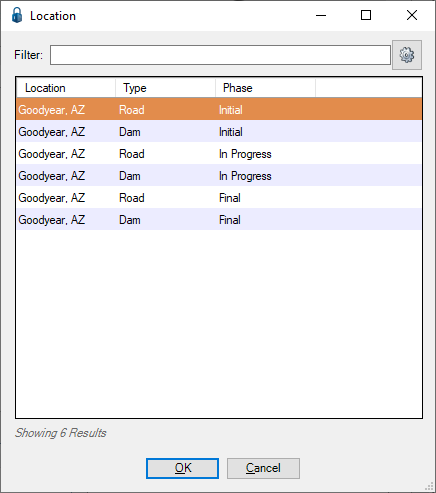
3.Click the first newly added field to access the lookup.
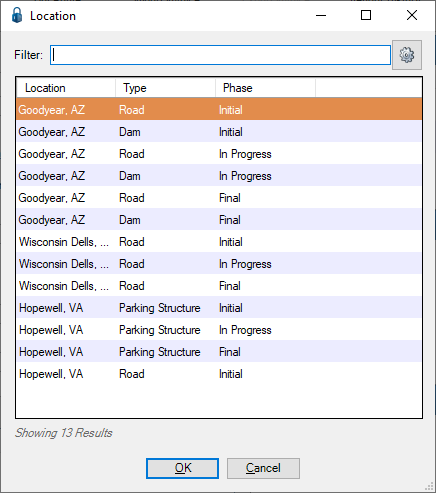
A lookup similar to the following displays. Note that this lookup is identical to the SQL table.
4.Click to highlight the appropriate row and click OK.
5.Click the second newly added field to access the lookup.
A lookup similar to the following displays. Note that this lookup dialog box only includes the entries based on the Location selected. In this example: Goodyear, AZ
6.Click to highlight the appropriate row and click OK.
7.Click the third newly added field to access the lookup.
The final field lookup only includes the entries based on the Type selected. In this example: Road
The Invoice Entry screen will resemble the following: