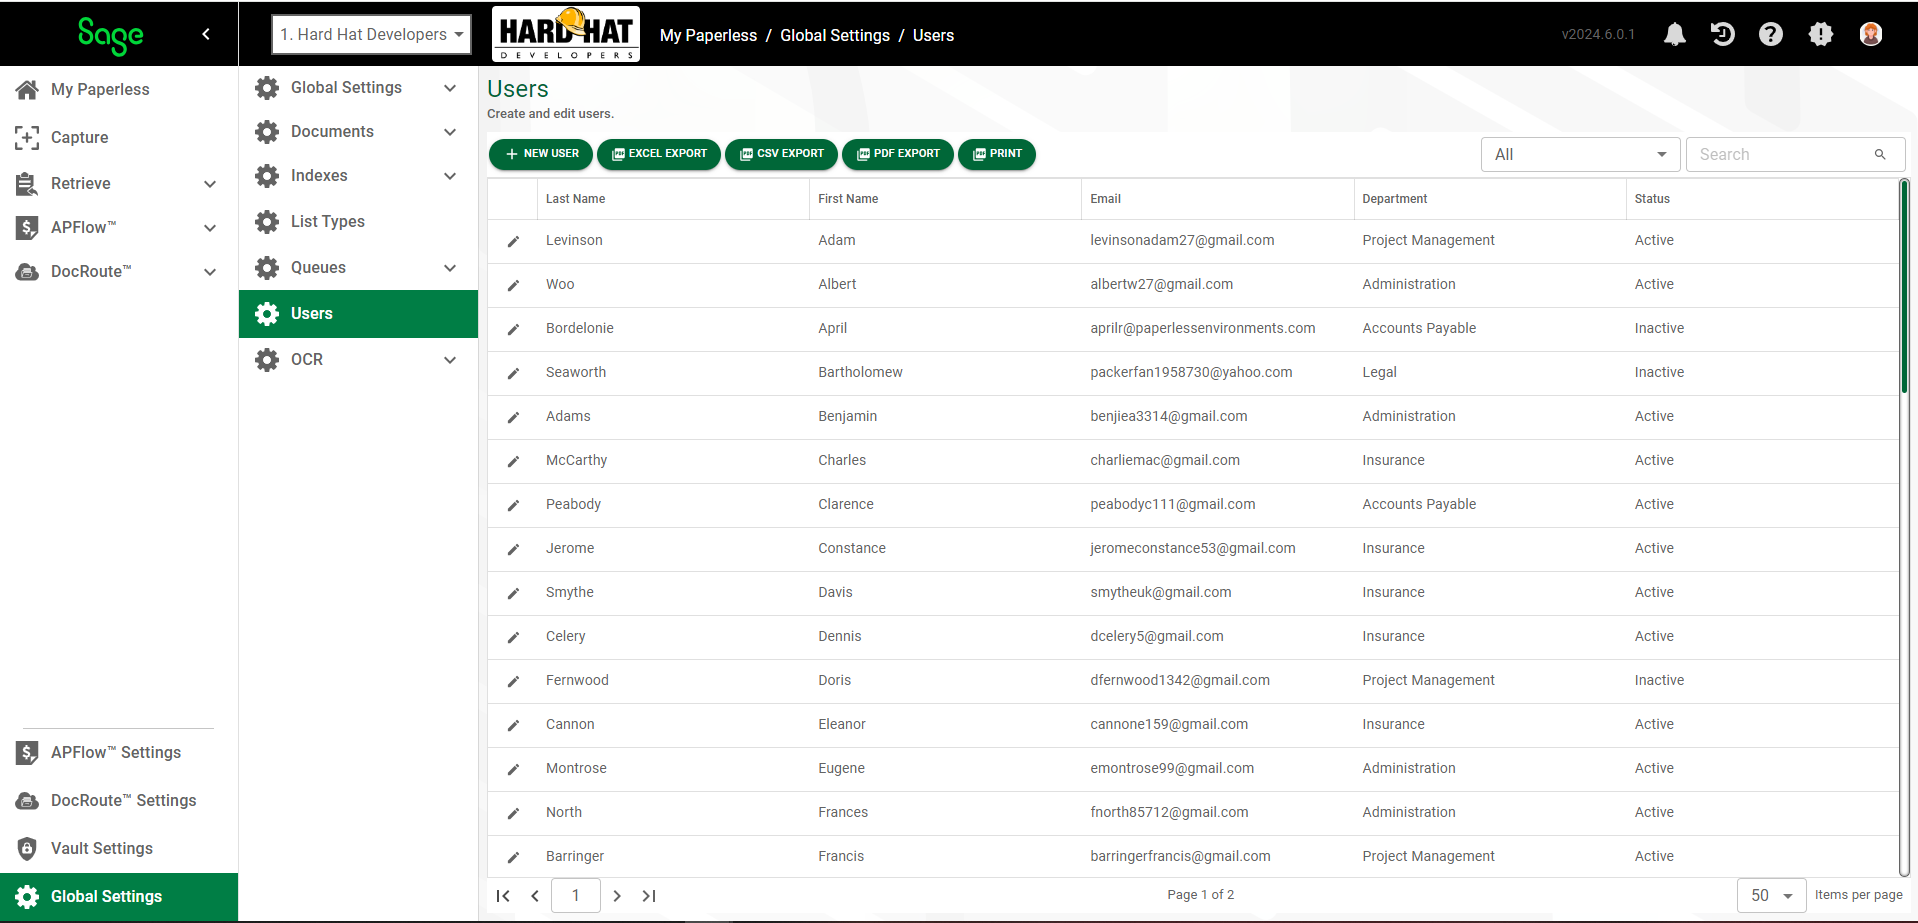
1.From My Paperless, click Global Settings.
2.In the Global Settings navigation bar, click Users.
The following page displays:
3.Click NEW USER or click the edit icon on an existing user.
The following page displays with the GENERAL tab active:
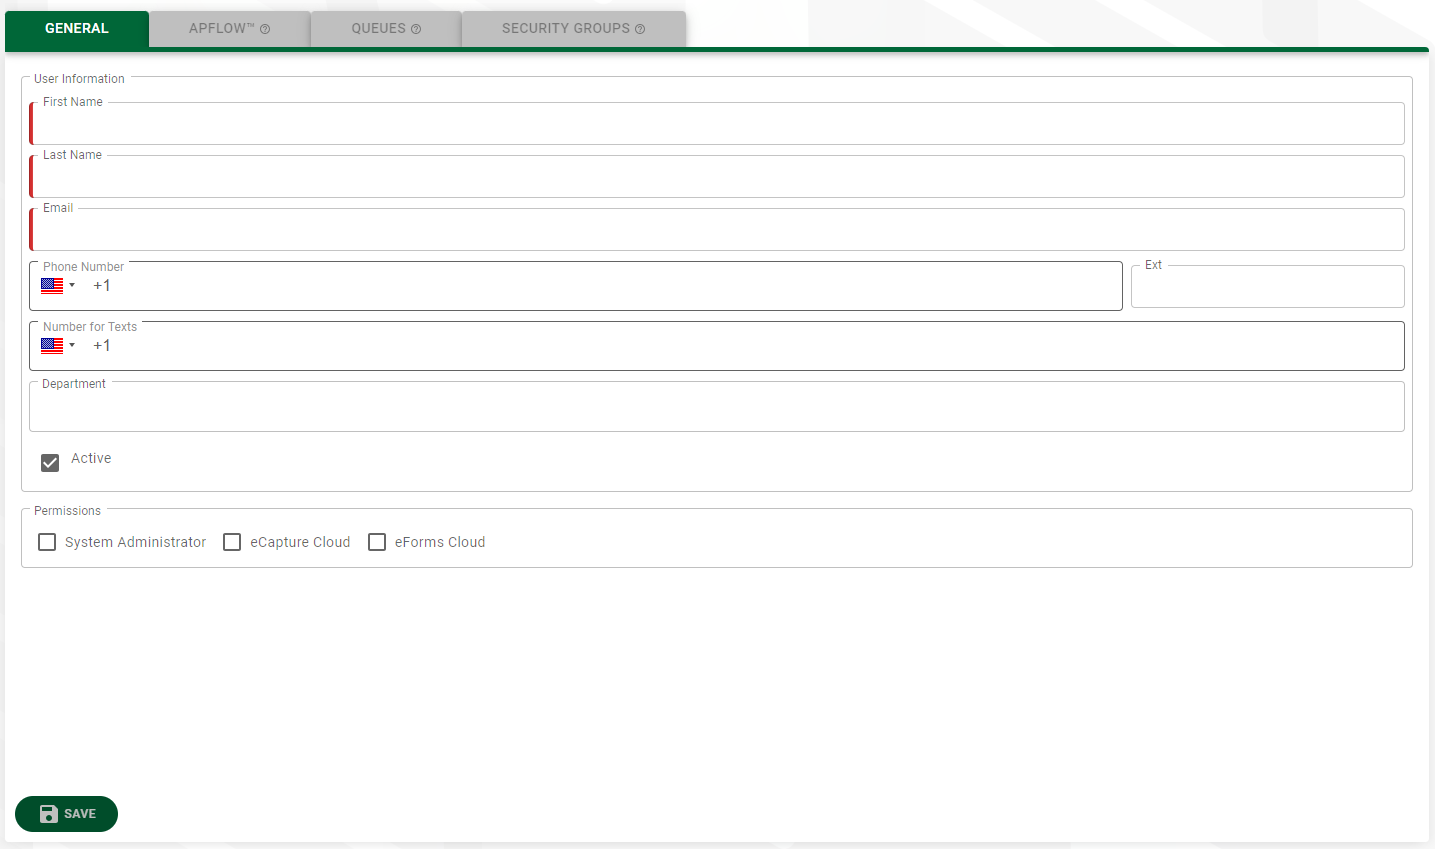
Note: Information entered on this page will systematically populate the individual's Basic Information grid, Profile page. (Click here for details.)
4.In the User Information section, the following fields are systematically populated based on information entered by the Administrator when the user was initially set up:
• First Name
• Last Name
• Email
This is the user's login id.
If the email you are trying to enter already exists, a warning message displays.
If the email you are trying to enter is invalid for any reason, an error message displays.
Note: This is the email that is used for system alerts, document alerts, and/or invoice alerts.
Update any of the information in these fields as appropriate.
5.The Phone Number field may be systematically populated based on information entered by the Administrator. If this field is blank, enter your phone number and extension, if applicable.
The field format is 2252184768. It is not necessary to include any punctuation.
The country code is identified by the flag and the +# that displays in the Phone Number field. To change the country code, click on the dropdown arrow next to the flag. Begin typing the country name to narrow your search.
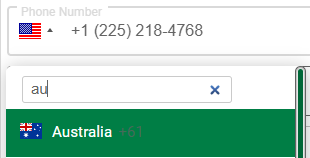
When you click Enter, the updates display.
In this example, the revised country code is Australia, +61. Note that the phone number format is revised to meet the identified country's requirements.
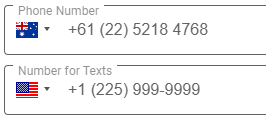
6.In the Number for Texts field, enter the cell phone number where texts should be sent. This is the text number that is used for system alerts, document alerts and/or invoice alerts.
The number in this field must include the entire cell phone number. It is not necessary to include any punctuation.
If the country code is not correct, click the dropdown arrow to locate the appropriate country.
Note: The country code for the United States and Canada is 1.
7.In the Department field, enter the department name to which the new user is assigned.
Note: This is not a required field.
8.In the Time Zone field, click the field dropdown to select the time zone for which output, such as reports, uses and displays where appropriate.
9.In the Date Format field, click the field dropdown to select the date format that displays throughout Sage Intacct Paperless.
10.If the new user is active, click the Active check box.
If the new user is not yet active, leave the Active check box blank.
11.In the Permissions section:
Sage Intacct Paperless |
If the user has access to the main Sage Intacct Paperless application, click the Sage Intacct Paperless check box. |
System Administrator |
If the user is a System Administrator, click the System Administrator check box. Important: For most users, this check box remains blank. This individual has permission to manage Sage Intacct Paperless across all vaults. |
eCapture Cloud |
If the user should have access to eCapture Cloud, click the eCapture Cloud check box. |
eForms Cloud |
If the user should have access to eForms Cloud, click the eForms Cloud check box. |
eForms Admin |
If the user should have access to the eForms Administration Portal, click the eForms Admin check box. |
12. If you have System Admin permissions, RESEND INVITE displays. If an invitation email was sent but not acted upon, the email expires. Should a follow up invitation email need to be sent, click this button.
User Mappings
This grid is for mapping users to Vendor, Employee and Customer IDs that are stored in the bridged accounting system. Use these mappings for setting index level security on document types.
For example, enter 8003 in the Vendor ID field and enter 300 in the Employee ID field. The Sage Intacct Paperless user is Employee 300 in their bridged accounting system, is set up in the Accounts Payable module as a vendor (to pay for expense reports) and is mapped to a specific vendor (in this example 8003).
1.Continue by clicking SAVE to activate the remaining tabs.
2.Click the APFLOW™ tab. Click here for more information.