Index level filters for document types assigned to vault security groups can be selected in Sage Paperless Construction.
This, in effect, filters the search results of users assigned to the security group.
For instance, to limit who can see documents with “Job Number = 200” as an index value on the documents, set up a filter with that limit in place.
Caution
If done incorrectly, setting up security group filters can cause serious difficulties with document searching.
Consult with Sage customer support if uncertain how Index Level Security works.
Remember that once a Sage Paperless Construction user is placed into a security group with an index level security filter setup, only those documents meeting that document type/index filter combination will be visible.
To view additional combinations, those security groups up must be set up with the user assigned to the appropriate groups.
For an administrator-type user who should have access to all documents of a particular type--no matter what the index values are on the document--do not put them into a security group with filters.
1.From the ribbon toolbar, click Administration.
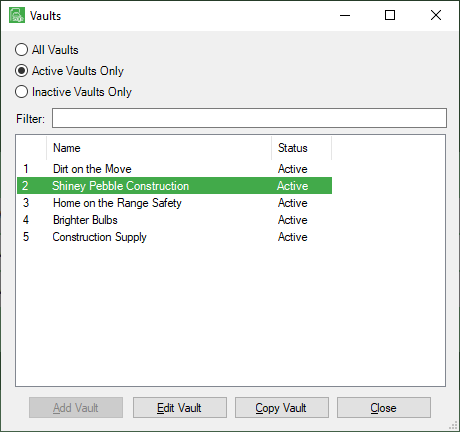
2.Click Vaults,  .
.
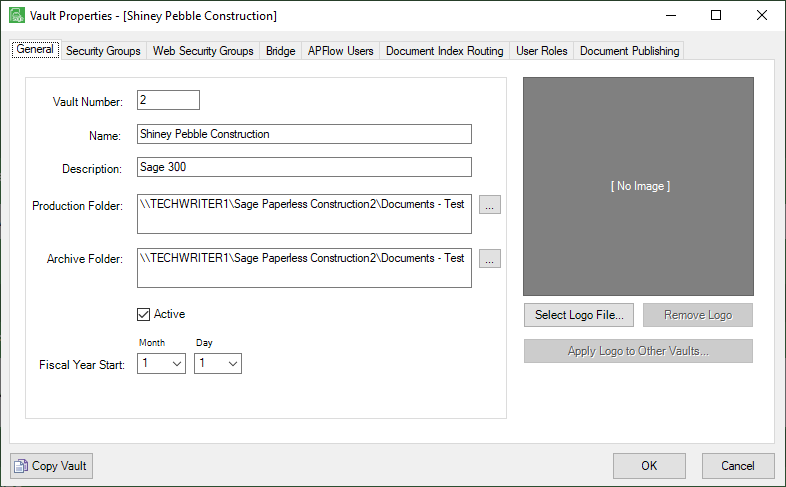
3.Click Edit Vault.
The Vault Properties window with the General tab active similar to the following displays:
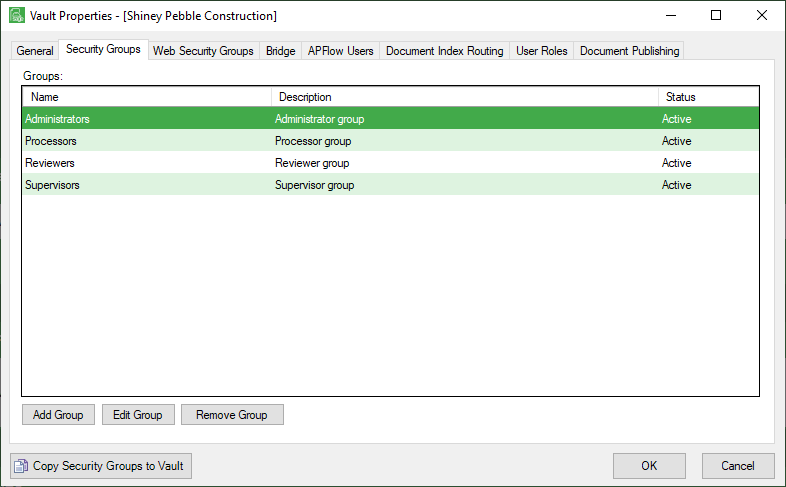
4.Click Security Groups.
The Security Group Properties window with the Security Groups tab active similar to the following displays:
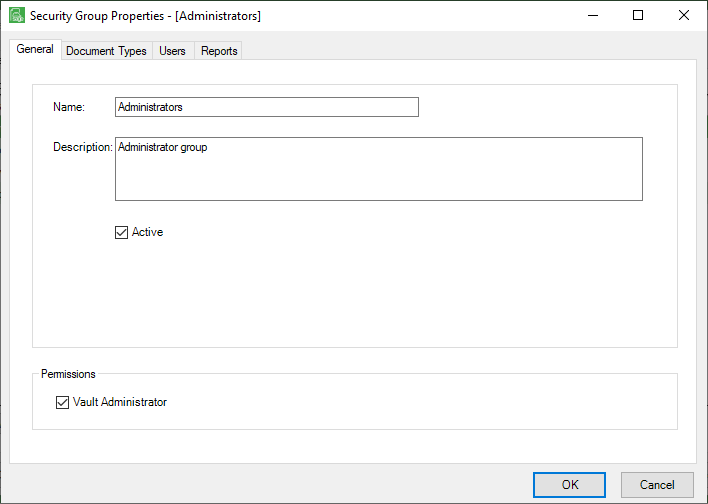
5.Click Edit Group.
The Security Group Properties window with the General tab active similar to the following displays:
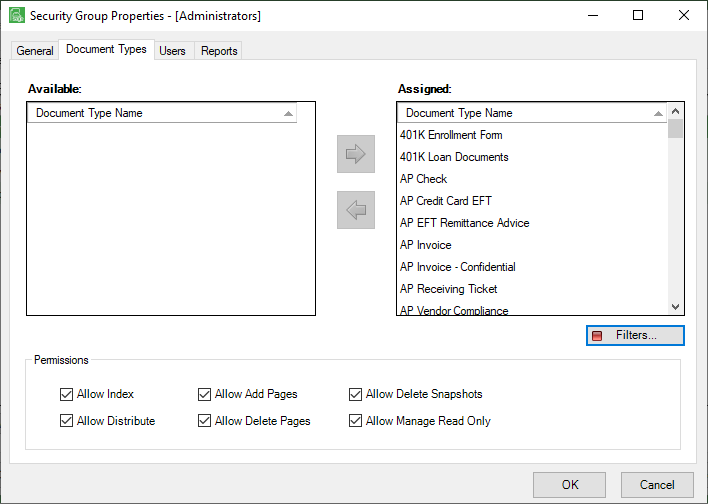
6.Click the Document Types tab.
The Document Types window similar to the following displays:
7.Click Filters,  .
.
The Index Filters window similar to the following displays:
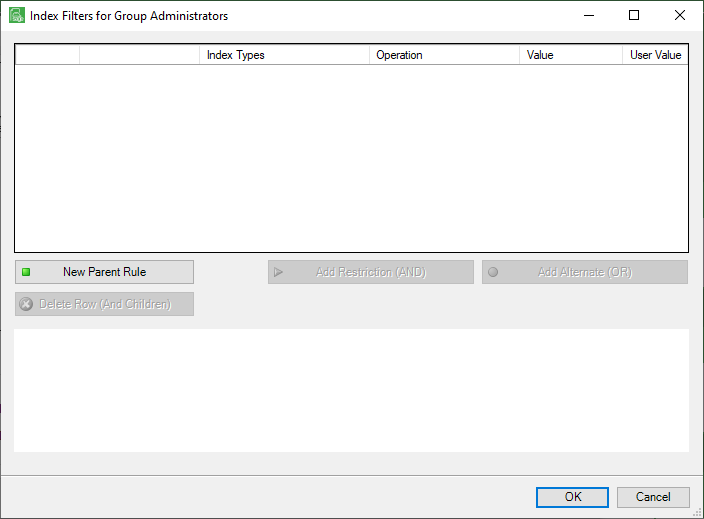
8.Click New Parent Rule.
A line will display in the Index Filters window similar to the following:
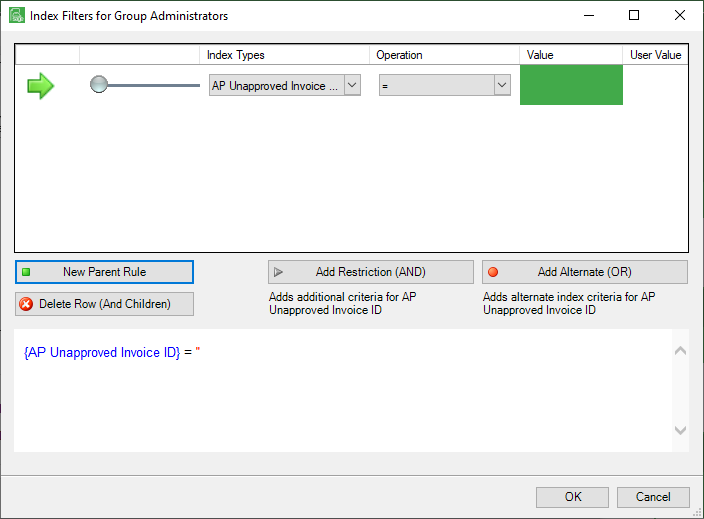
In the top pane is where the filtering criteria is set up.
In the bottom pane is where the rule logic displays.
9.In the Index Type field, use the dropdown to select the index type on which to filter (i.e. Job Number).
10. In the Operation field, use the dropdown to select the type of operation to use.
= |
Exact match. For example, if 100 is entered, only 100 will be returned. There cannot be a space before the 100 or a minus sign behind (100-). Also, the asterisk (*) is not considered a wild card in this field. |
< > |
Not equal. This could be anything but the value entered in the Value field. |
> |
Greater than. |
< |
Less than. |
>= |
Greater than or equal to. |
<= |
Less than or equal to. |
LIKE |
Include a wild card (*). For example, if 10* is entered, 10, 100, 101293 and any variation beginning with 10 will be returned. |
NOT LIKE |
Include a wild card (*). This is the exact opposite of LIKE. For example, if 10* is entered, any variation except anything beginning with 10 will be returned. |
11. Type in or click the look-up key to insert the value of the index (i.e. “200”).
Note: As filter rules are selected, the filter "equation" is systematically written out in text format at the bottom of the screen. In the example, the filter is “ {Job Number} = ‘1000-’ “.
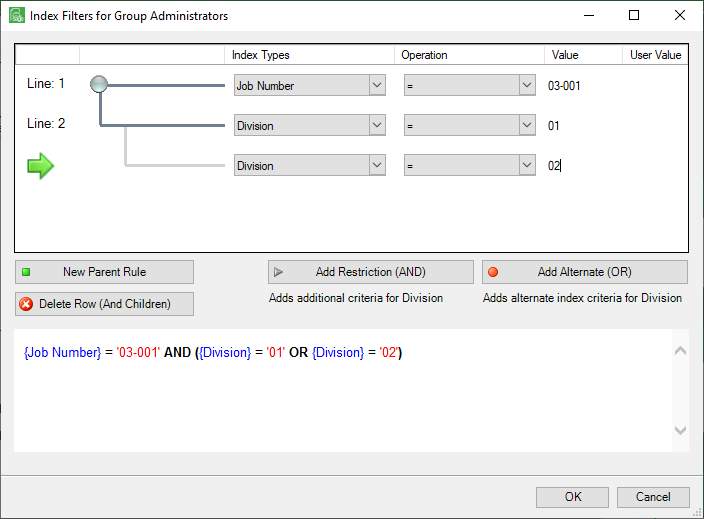
The filter can be further defined by adding “AND” or “OR” statements to the rule.
Examples
Example 1
The following example illustrates a rule setup where the Job Number = “200” AND Division = “01” OR Division = "02".
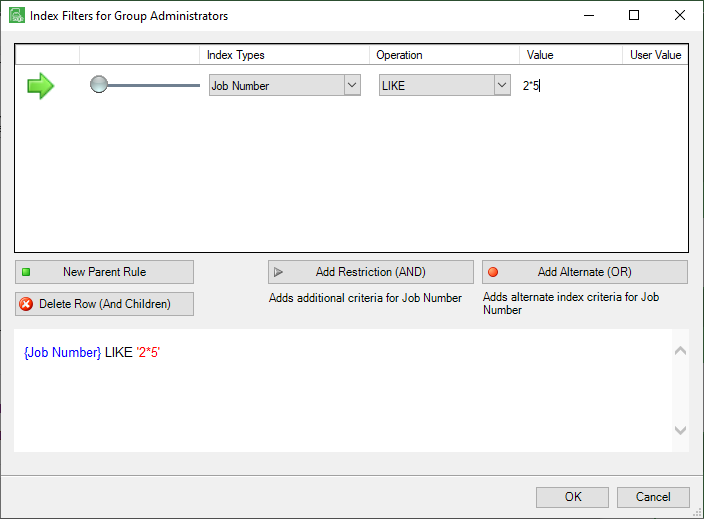
The system also allows the use of the wild card character “ * “ when setting up security rules. Wild card characters can be used anywhere in the security rules.
For instance, if the job number should equal every job number starting with "2", choose the operator “LIKE” and set the value by typing in the desired beginning or ending text ( i.e. 2* ).
Example 2
In the following example, the filter is set to Job Numbers beginning with “2”. (i.e. Job Numbers 2, 20, 21)

Example 3
In the following example, the filter is set to Job Numbers beginning with “2” and ending with “5” (i.e. Job Numbers 20105, 20115, 20125).
Special Index Filters
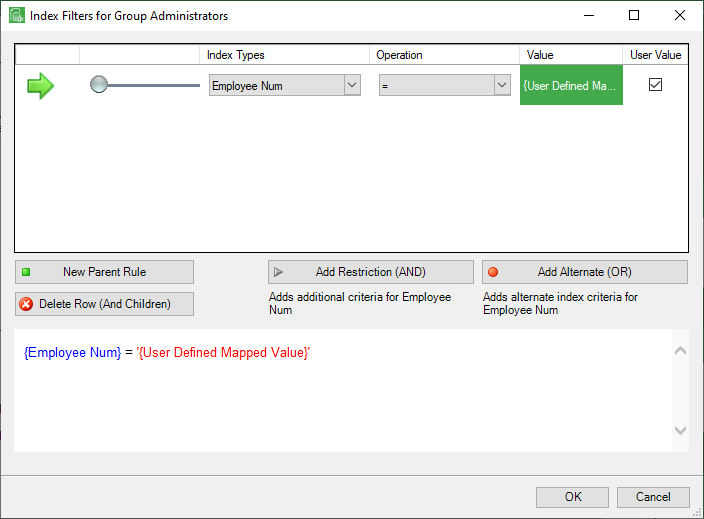
Use Index level filtering to filter documents with special index values mapped to AP Vendor, Customer ID or Employee ID of the user executing the search.
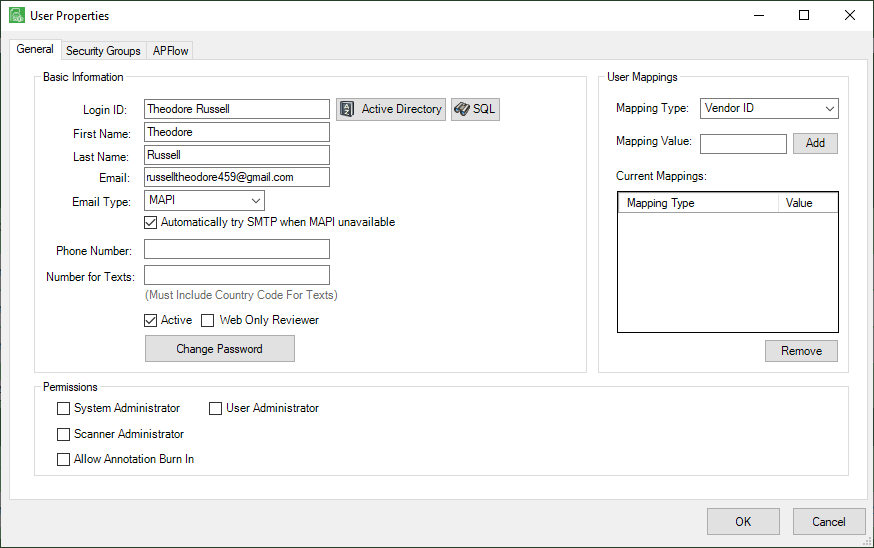
On the User Properties screen (Refer to Editing User Properties), there is a User Mappings section. This section is for mapping users to Customer, Vendor or Employee IDs stored in the accounting system. Use these mappings for setting index level security on document types.
Example
An employee's Employee ID is mapped to "300", is set up in the Accounts Payable module as a vendor (to pay for expense reports) and is mapped to Vendor ID "8003".
1.From the ribbon toolbar, click Administration.
2.Click the Users dropdown,  .
.
3.Click Users.
The User Accounts window similar to the following displays:
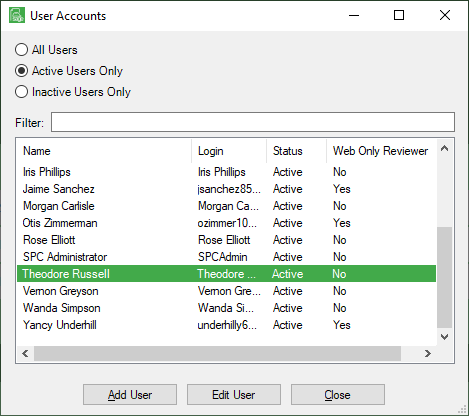
4.Click Edit User.
The User Properties window similar to the following displays with the General tab active:
Example
To give the employee the security to search and view his paycheck stubs or expense reports, set up index level security for a special group. If the selected index type equals AP Vendor, Customer Number or Employee Num, a check box will display in the User Value column. Click the User Value check box. "(User Defined Mapped Value)" will populate in the Value column. With this setting, the system will only display the documents that contain the corresponding index type and value that is mapped to the user executing the search.