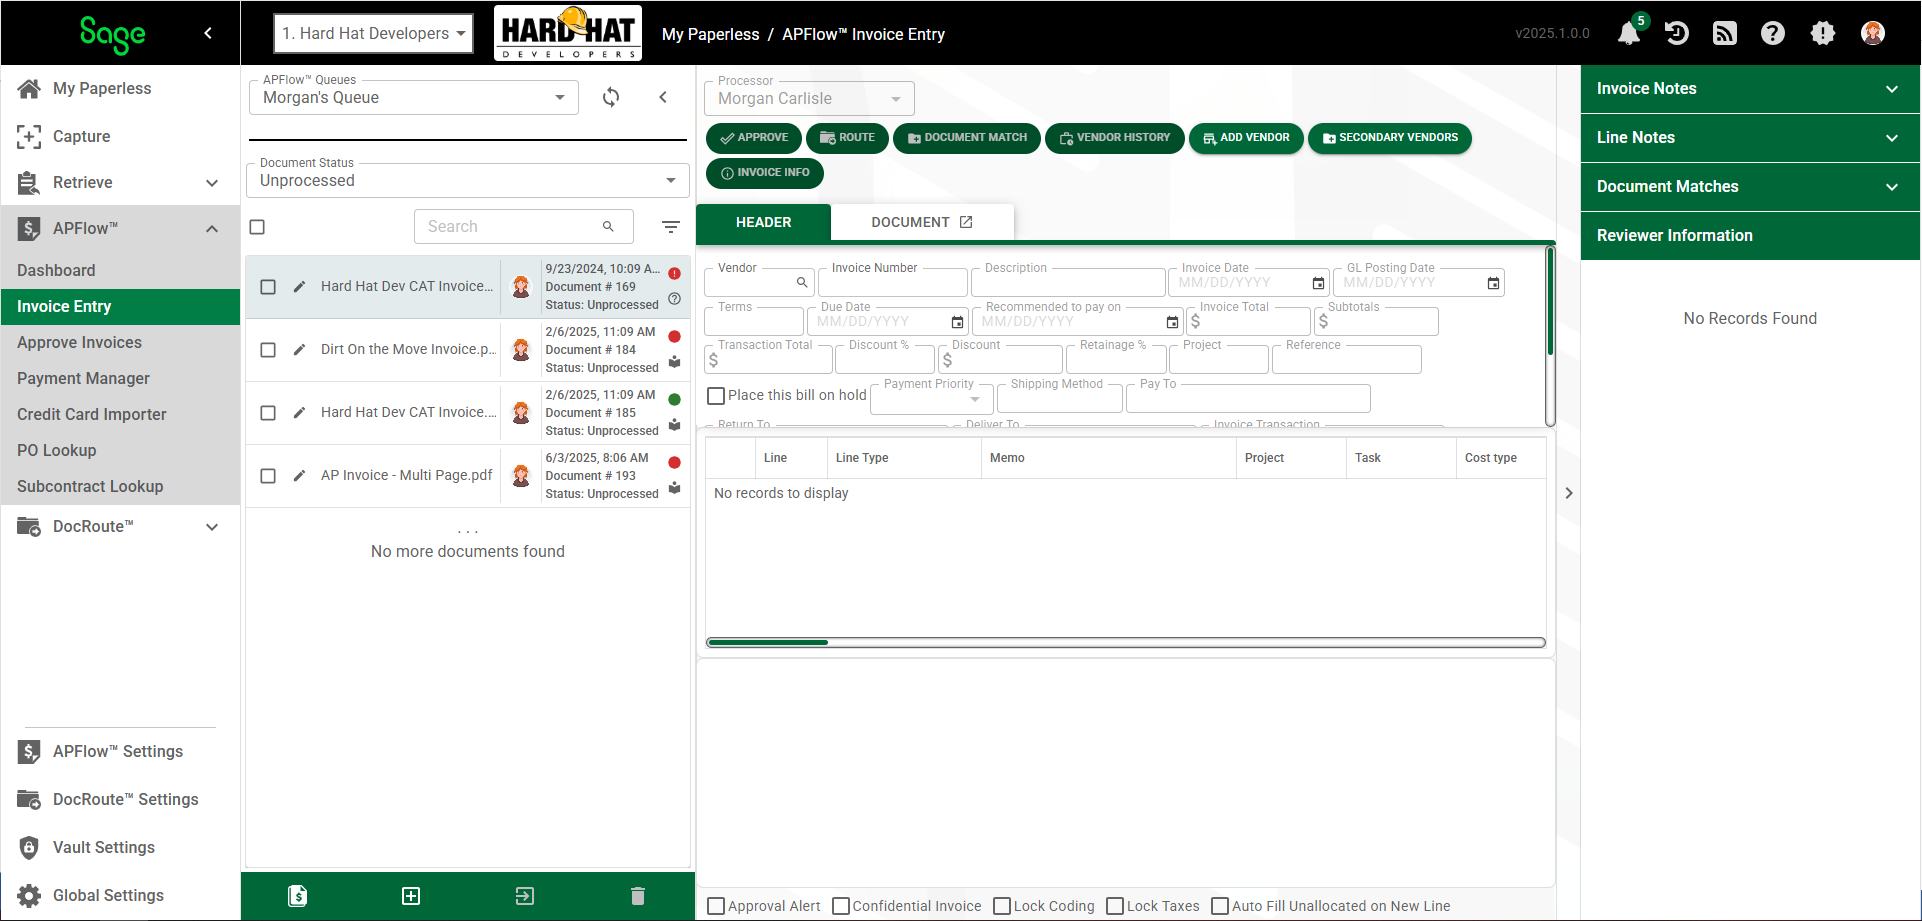
The Invoice Entry page is the main page for processing invoices.
Important |
|
Fields on this page vary depending on the accounting system to which Sage Intacct Paperless is bridged. |
|
If you are not properly bridged to your accounting system, even though an invoice displays in your APFlow™ Queue, the Create New Invoice icon ( |
|
•For information on accessing Invoice Entry and page layout details, click here.
•For information on the Invoice Entry sidebar, click here.
1.From My Paperless, click APFlow™.
2.From the APFlow™ navigation bar dropdown, click Invoice Entry.
3.In the APFlow™ Queues field, use the field dropdown to select the queue from which the Processor is entering invoices.
The field dropdown will list any user queue to which the Processor has security rights.
Note: My Queue should display as the default.
4.In the Document Status field use the field dropdown to select Unprocessed.
5.Click on a row in the grid.
This document will display to the right of the APFlow™ Queues pane.
6.Click the Create New Invoice icon ( ) at the bottom of the APFlow™ Queues pane.
This will generate a blank invoice template.
As fields are populated, italicized text descriptions may display below fields.
•For OCR icons and validation details, click here.
Top (Header) Pane
Important: Until you populate the Vendor and Invoice Number fields, all other fields on the Invoice Entry page are disabled. Once you enter information in these two fields, all other fields, based on your accounting system, become active. This prevents validation contradictions.
1.In the Vendor field, click the lookup icon to access the vendor lookup dialog box similar to the following:
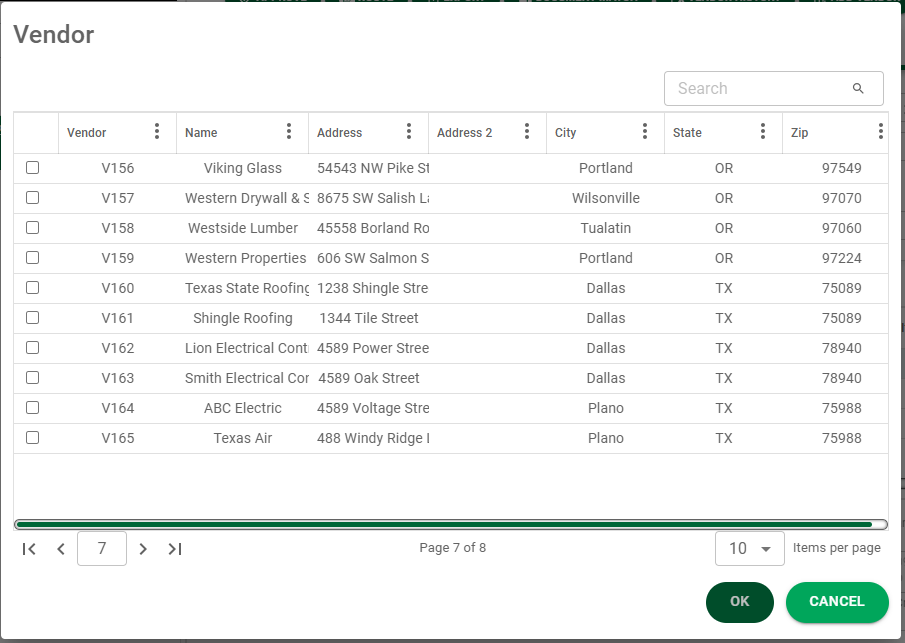
Note: To view the entire dialog, click the Expand icon located in the upper right corner of the dialog. If you expand this Vendor Lookup list, Sage Intacct Paperless remembers. Every time you access this particular Lookup dialog, it opens either as expanded or as collapsed--depending on how you viewed it the last time.
2.Either double click a vendor in the list to populate the field or click to select a vendor and then click OK. The associated vendor number displays in the Vendor field.
Note: Any field that displays the lookup icon has an associated lookup utility. For more information on field lookups, click here.
3.In the Invoice Number field, enter the number from the invoice.
Remember, you can click the DOCUMENT tab to view a copy of the invoice for reference.
4.In the Description field, enter a description, as appropriate.
This is not a required field.
5.For the Invoice Date field, either enter a date (MMDDYYYY) or use the calendar icon to access a calendar.
Note: You can also enter the current day or the month and day to systematically populate the field. For example, if you type 14 in the Invoice Date field and then tab through the field to the next field, the system will populate the Invoice Date field with 02/14/2024. If it is a date in the next month, you can enter the month and day and the system populates the year. This functionality works for every date field in the Header portion of the new invoice (Invoice Date, GL Posting Date, Due Date and Recommended to pay on).
6.In the GL Posting Date field, enter a date if appropriate.
7. In the Terms field, use the lookup if there are terms (Net 30, 2%Net10) associated with the invoice.
8. In the Due Date field, enter the date that the invoice payment is due.
9. In the Recommended to pay on field, enter a date in conjunction with the Terms field date, if appropriate.
10. In the Invoice Total field, enter the total amount due as listed on the invoice.
11. If there is a retainage percentage associated with the invoice, enter the percentage in the Retainage % field.
12. Use the Job field lookup to identify the job that is associated with the invoice, if applicable.
13. If you have a reference number, perhaps an internal vendor number for instance, enter it in the Reference field.
14. If this invoice should be placed on hold for any reason, click the check box associated with Place this bill on hold.
15. Some fields are accounting system-specific, for example Payment Priority, Ship Via, Pay To, Return To, Deliver To. Populate any accounting system-specific fields based on your company's requirements.
16. Use the Field PO # field for additional document matching.
For example, use this field if your vendor assigns a number to their purchase order.
For more information, click here.
Note: This number is in addition to a number that your company assigns for that same purchase order.
17. In the Credit Card field, enter a credit card number if appropriate.
18. In the AP Match Code field, use the field lookup to select the indexed value associated with a document that needs to be automatically attached to an invoice.
For more information, click here.
19. If your company uses document classes, custom classifications used to further classify invoices, or other documents belonging to specific locations or groups, enter that information in the Document Class field.
Now you can proceed to the middle pane where you enter the lines that will, for the most part, mirror the lines detailed on the invoice.
Middle (Lines) Pane
Unallocated - This is the amount left after you take the invoice total and then subtract out the total of each line. The amount can be negative or positive. As one of the main validations of the Sage Intacct Paperless system, the unallocated functionality provides an immediate visual. With the Unallocated amount of 0.00, you know that the invoice total matches the sum of your invoice lines before routing/approving/exporting.
Click here for details on adding lines.
Bottom (Detail) Pane
The detail pane for each line added in the middle pane contains the fields in which to code the invoice detail.
Based on the selected line type, different fields display to input the coding details.
The fields that display are also based on your bridged accounting system.
There are a series of check boxes that display across the bottom of the Invoice Entry page.
Click here for details.